Hampta Pass – My First Ever Himalayan Trek

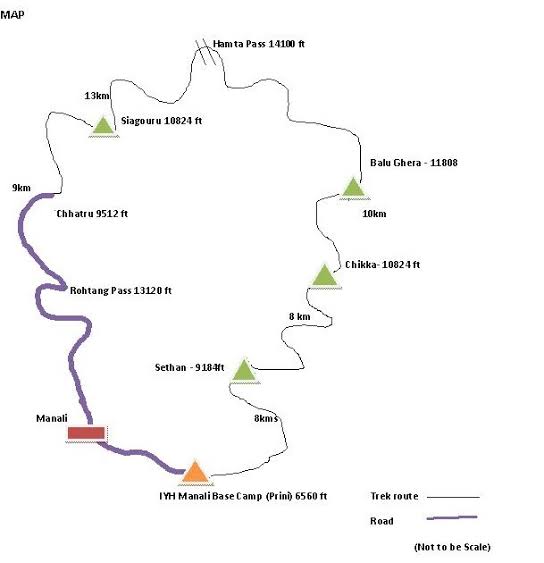
Hampta pass is considered the easiest and convenient of all treks in Himachal Pradesh. It offers you a soulful experience from the lush green beauty of Kullu to the deserts of Lahaul. A complete contrast of mother nature’s beauty and an incredible twist in the landscape will leave you awestruck. But this mesmerizing experience comes with a price, it will make you little tired and exhausted during the pass crossing day (so.. make sure you have glucose to pump your energy levels up 😜) If the weather permits then you can visit Chandra Tal lake (looks like Pangong lake in Ladhak) also at the end of your trek. As a first-timer, you can go for this trek but you should have some level of fitness (Fitness criteria).

It’s an interesting story that how my life into trekking, choosing my first trek as Hampta pass and going for a first solo trip collectively commenced. After my final year’s college results in July’2016 me and my friends thought of celebrating our graduation by going on a trip in a pocket-friendly manner. So we searched and while doing a little research about it, I got to know about the trekking organization Youth hostel association of India (YHAI). First thing when I heard about them was to check out their prices (well… we were a bunch of college graduates and prices mattered a lot…things had to be light on our pockets for us to be free of any regrets 😜) the prices were pretty much pocket friendly and within our budget. While going through their website (YHAI WEBSITE) I found out about this dramatic crossover trek ‘The Hampta pass’ trek.

Trek map

It clicked in my sanity. With my least knowledge about trekking back then all I knew was I was supposed to climb mountains that’s all. So after reading about the Hampta pass trek, I realised I should read more and collect some useful information before stepping into it, thanks to my reading and researching habit before stepping into things. I even watched some videos and articles about the trek and with all the knowledge I gathered I packed up the stuff that I believed will help me out during my trek. When all my background research was going on…one by one my whole bunch of friends cancelled on me and my trek and left me all alone excited to go on..though I already made up my mind and was already halfway in the trek in my dreams every day I wanted to make it real and go for it even though it meant to go for it all alone. At that time I had a craze in my mind to go on a solo trip. So right there the crazy part of me seduced to book the tickets and I did it for the batch on 5th September 2016.

DAY – 1 Reaching base camp

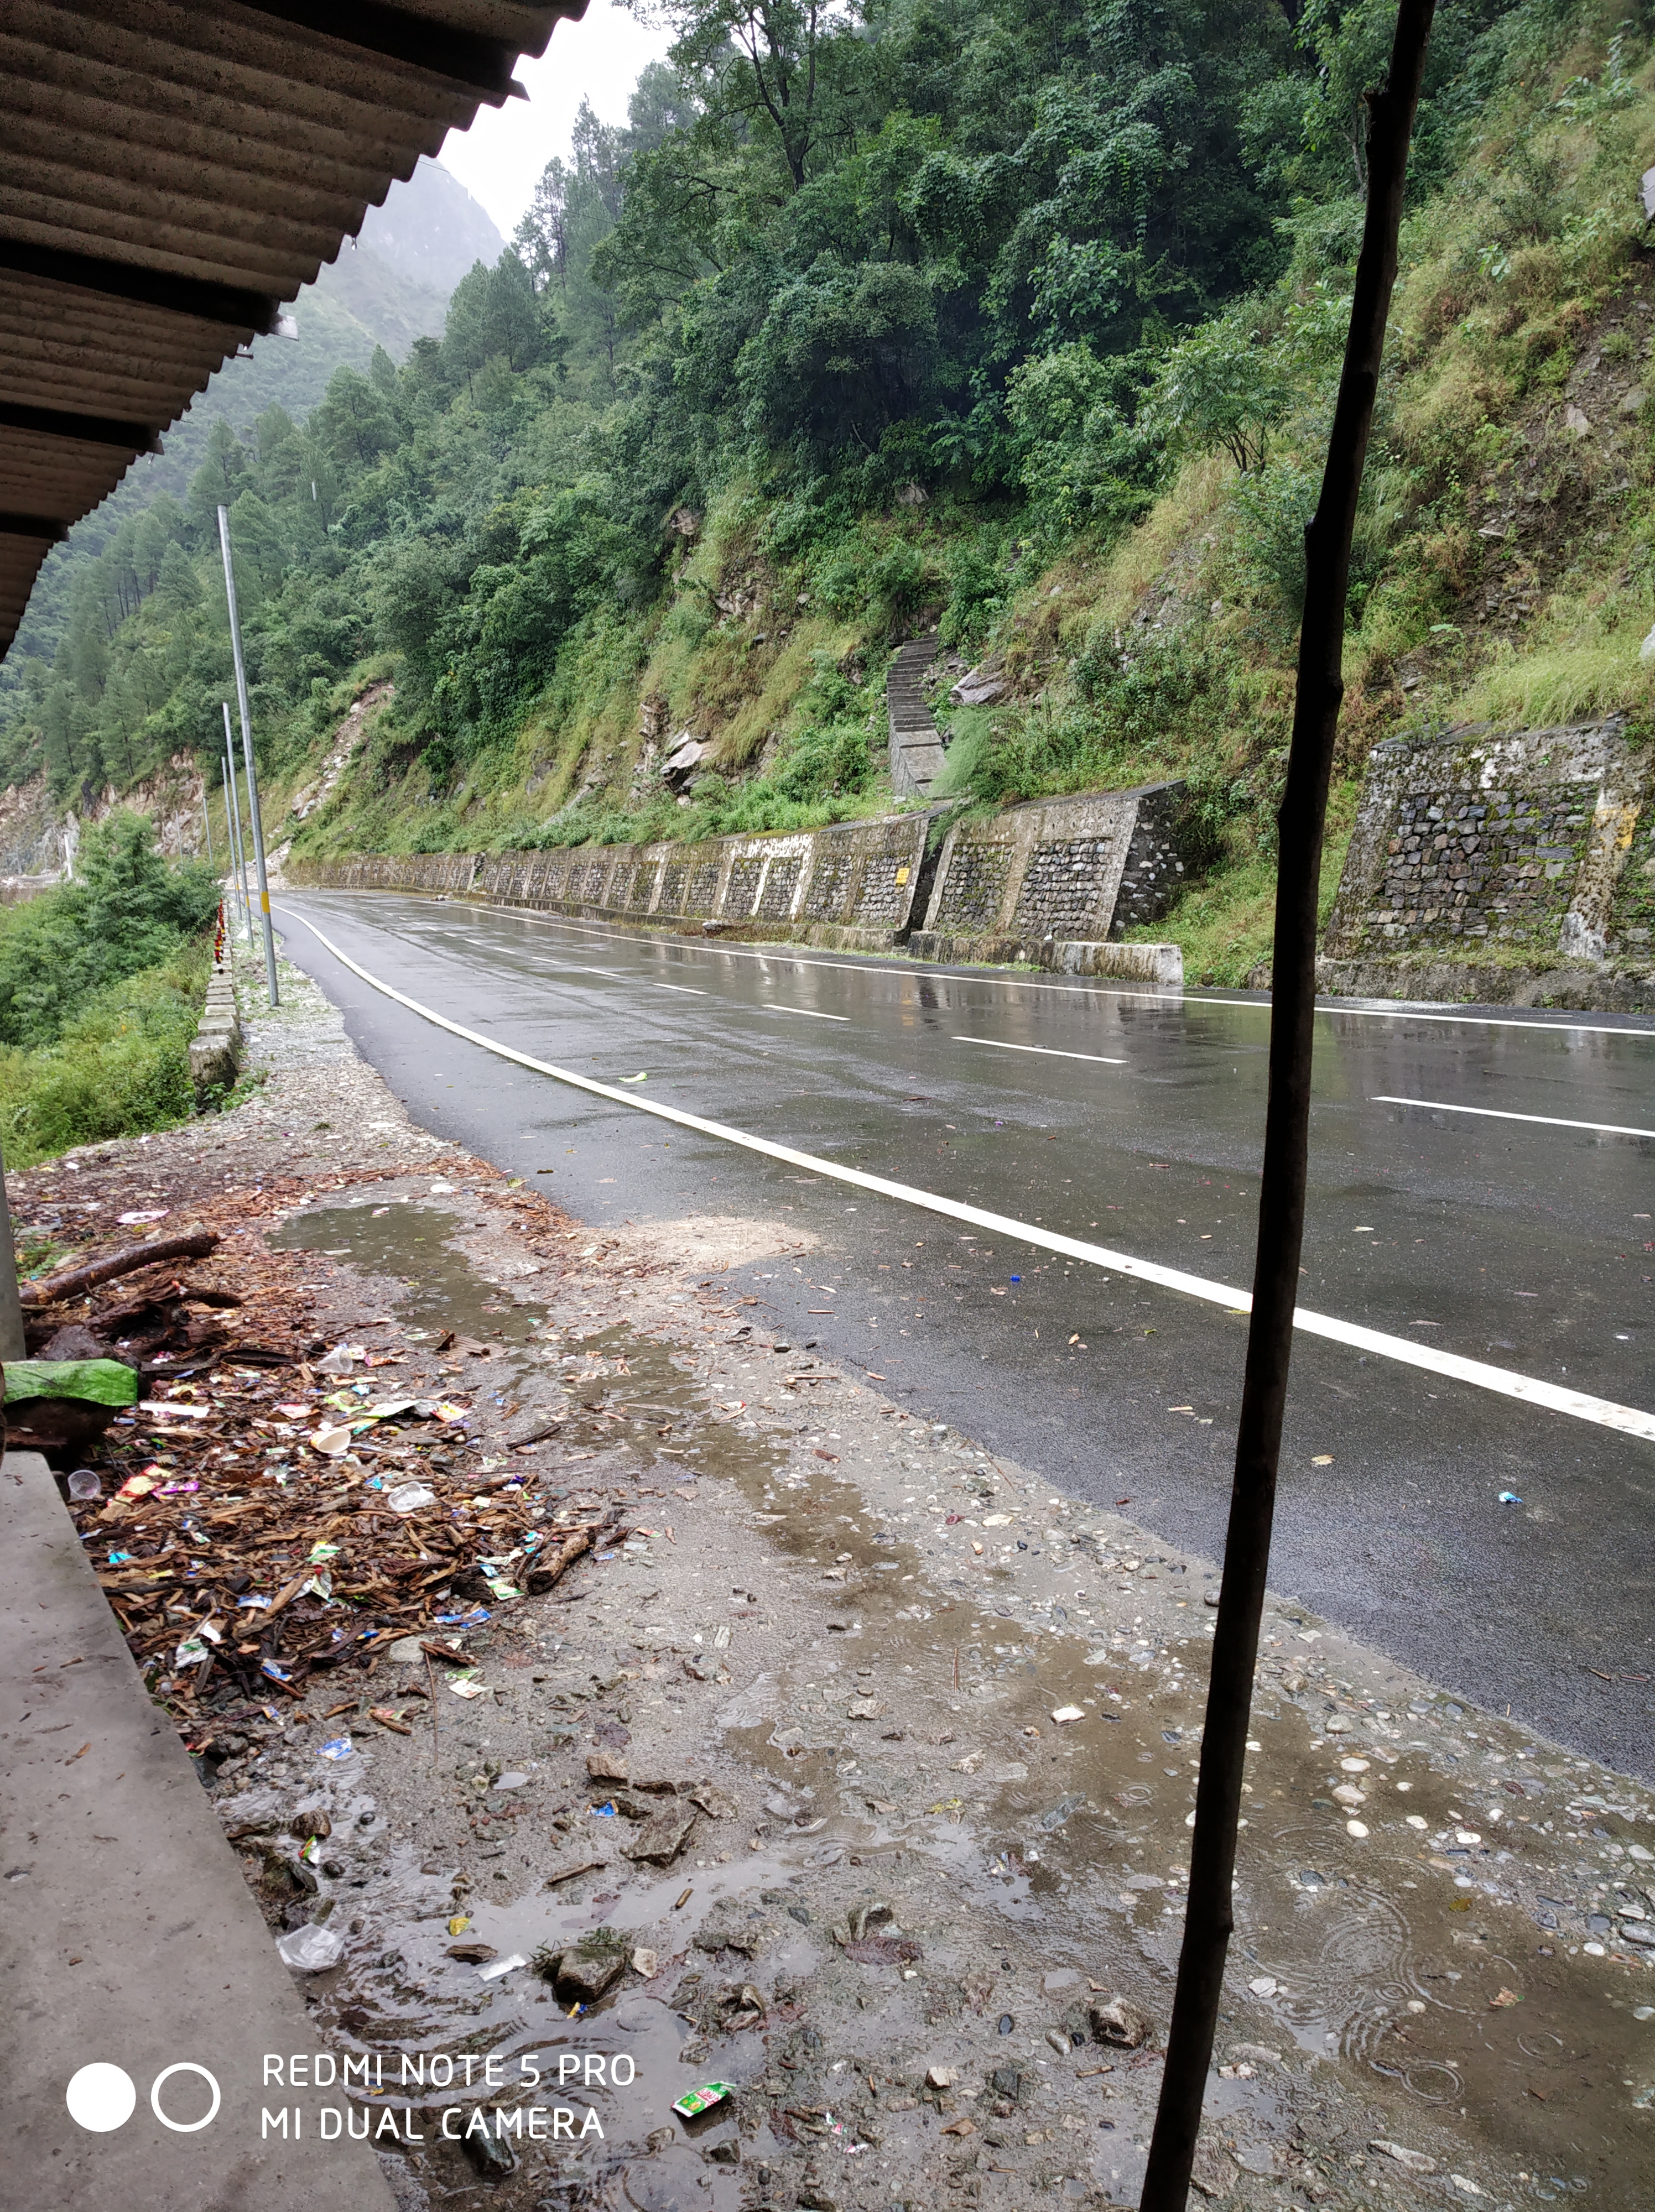
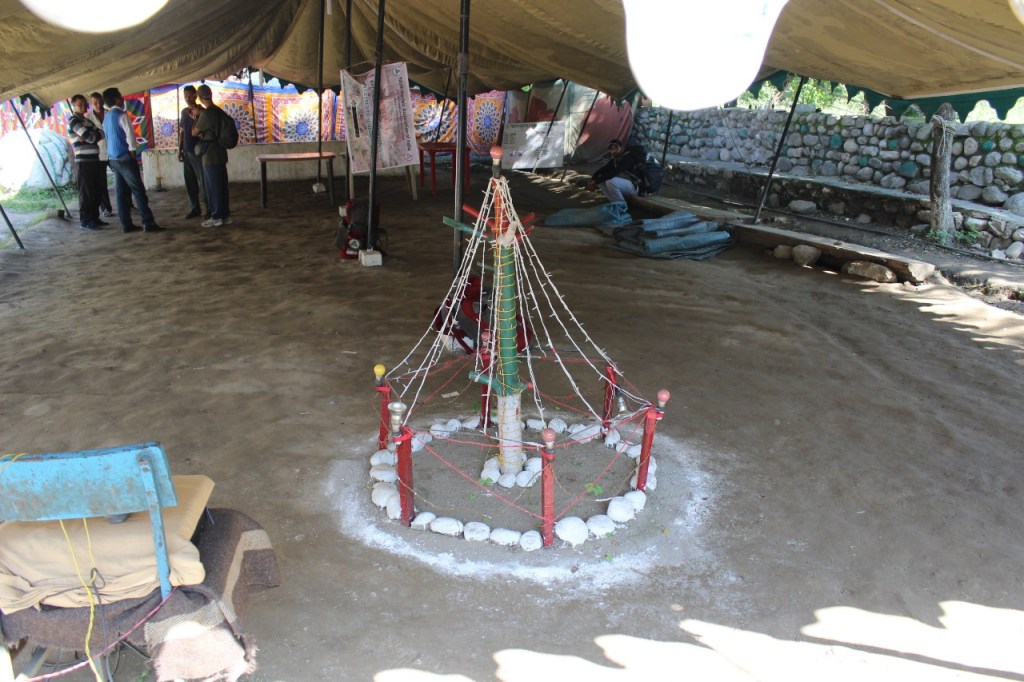
YHAI base camp was located at 15 mile, around 24 km ahead of Kullu and around 14 km before Manali. Any bus going towards Manali will pass through 15 mile and the bus drops you just in front of YHAI base camp. I took a bus from Delhi towards Manali (on 4th of September at night around 10 p.m.)and I reached there around at 1 pm in the afternoon.

YHAI BASE CAMP (15 MILE MANALI)

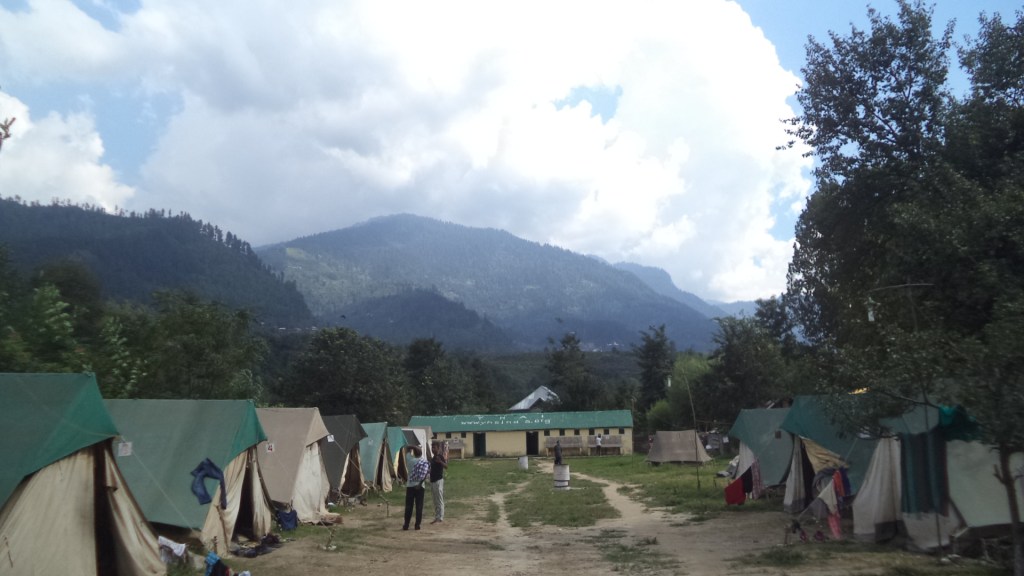
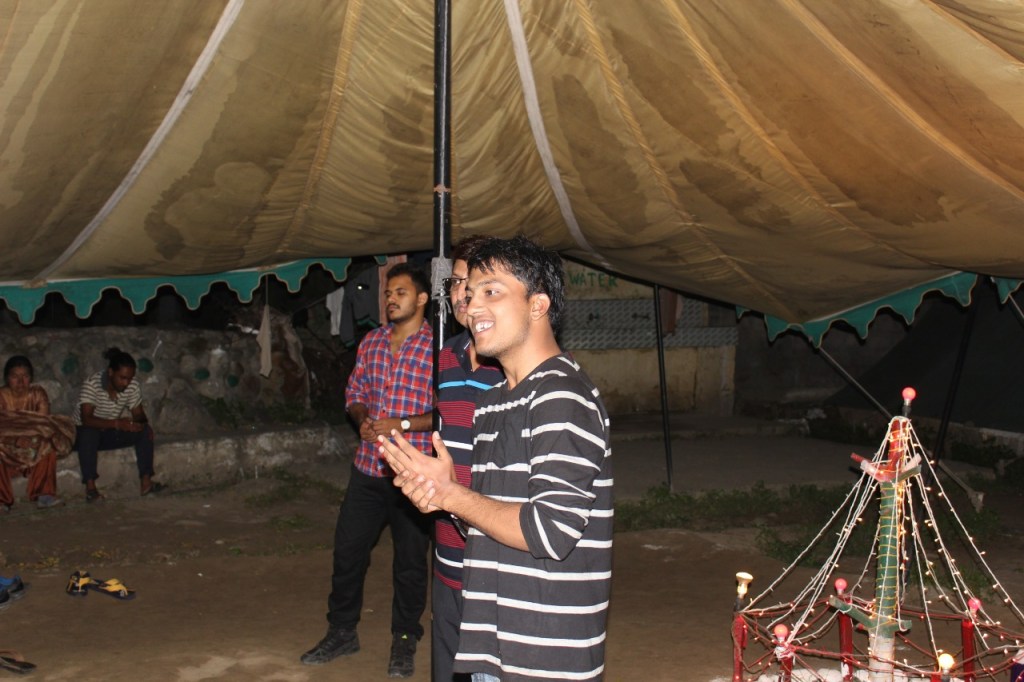
After verifying my admit card, medical certificate and my YHAI membership card, I got my tent number from my camp leader. I met my tentmates there who were also my fellow trekkers. After all these activities my body needed fuel so I had lunch and took some rest to charge myself up for the upcoming adventure. In the evening we all went for exploring the nearby places.

Beas river

After roaming we came back to the camps where we had our orientation about the trek and got further details about the trek and about other challenges like altitude sickness. After orientation, we had our dinner, collected our sleeping bags from the respective camp leaders and zipped up ourselves in those cosy bags in our respective tents and dozed off to our dreamlands.

Where we had our orientation and bornfire with lights (PC: VIJAY)

Day – 2 Training & acclimatization walk

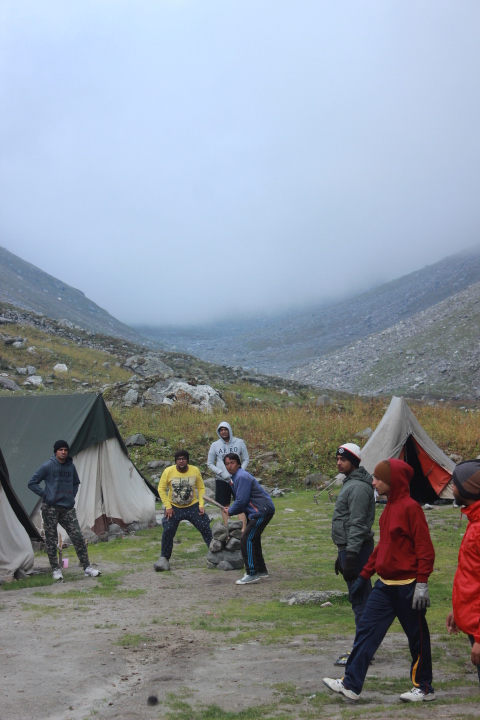
At around 5 am, we woke up to the camp leader’s wake-up whistle, so after finishing our morning duties we went for training, near the base camp at around 6 am. We had a training session for an hour, where we got to know about some exercises which we should do before and after our trek to relax our muscles. Training made us hungry, so as soon as the training came to an end we rushed to our base camp to fill our empty hungry stomach with delicious food made by YHAI’s cooking team and just before munching on that tasty breakfast we sent off a batch trekkers in a typical YHAI style who were moving towards the next camp. After fuelling ourselves with food and energy, we met our guide and trek leader who were about to accompany us on our whole trek.

On the way

We all sat under a big tree, where our trek leader enlightened us about the difficulty level of the trek and how to pack our backpack, how to climb, how to descend, every single thing we needed to know. As a first-timer, it was very useful. Then we all went for an acclimatization walk with a backpack weighing 2-3kgs, which went for around 2hours.

Tips given by the trek leader (PC: SUMIT)

After having lunch we went back to the base camp.

On the way back.

In the evening we had a campfire with the amazing performance of our teams doing some skits, singing and dancing. We also got feedback of the trek from the trekkers who came back after successfully completing their trek and got some precautions too. Then we went to sleep followed by the dinner. I was excited about the upcoming days as we will be approaching the higher camps.

While singing during campfire (PC: VIJAY)

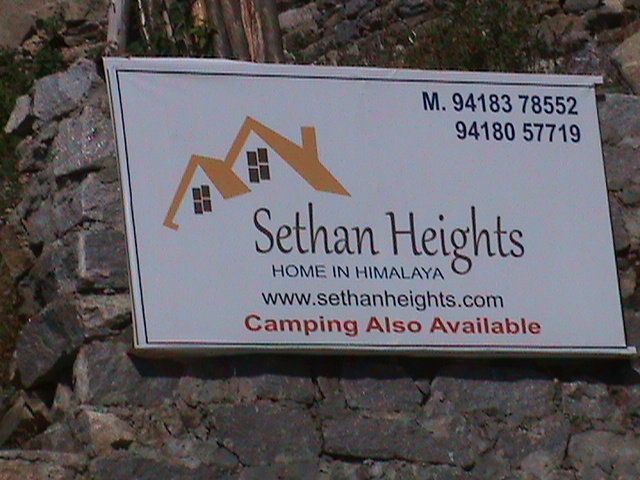
Day -3 Trek to Sethan (9184 ft.) 8 kms

Just before leaving the base camp

So after having breakfast we were all ready to move with our backpacks and packed lunch. We boarded the bus to prini village from where we were supposed to start our trek.

Towards Sethan (PC: NAVEEN BHARADWAJ)

It was steep trail till sethan. We were climbing all the way eating chocolates, biscuits to maintain our energy levels.

On the way

We started around 8 in the morning and reached sethan at around 2:30 pm.

At lunch point (just before Sethan)

Upon our arrival, we were welcomed by the welcome drink at the guest house. I wore a sports shoe and I still remember that my shoe’s sole was detaching, thankfully I had fevikwik which helped my shoe and sole remain intact. (Precaution: buy trekking shoes for your trek, don’t trek in sport’s shoes as it’s sole may tear off and you may have to walk barefoot if you don’t have fevikwik)

Beautiful way to Sethan (PC: NAVEEN BHARADWAJ)

We halted there to catch up some rest and then we went for a small walk around Sethan.

At sethan, where we stayed

After returning we had a fun-filled bonfire and then with eagerness to welcome the next day we packed ourselves in our sleeping bags followed by dinner.

Near Sethan

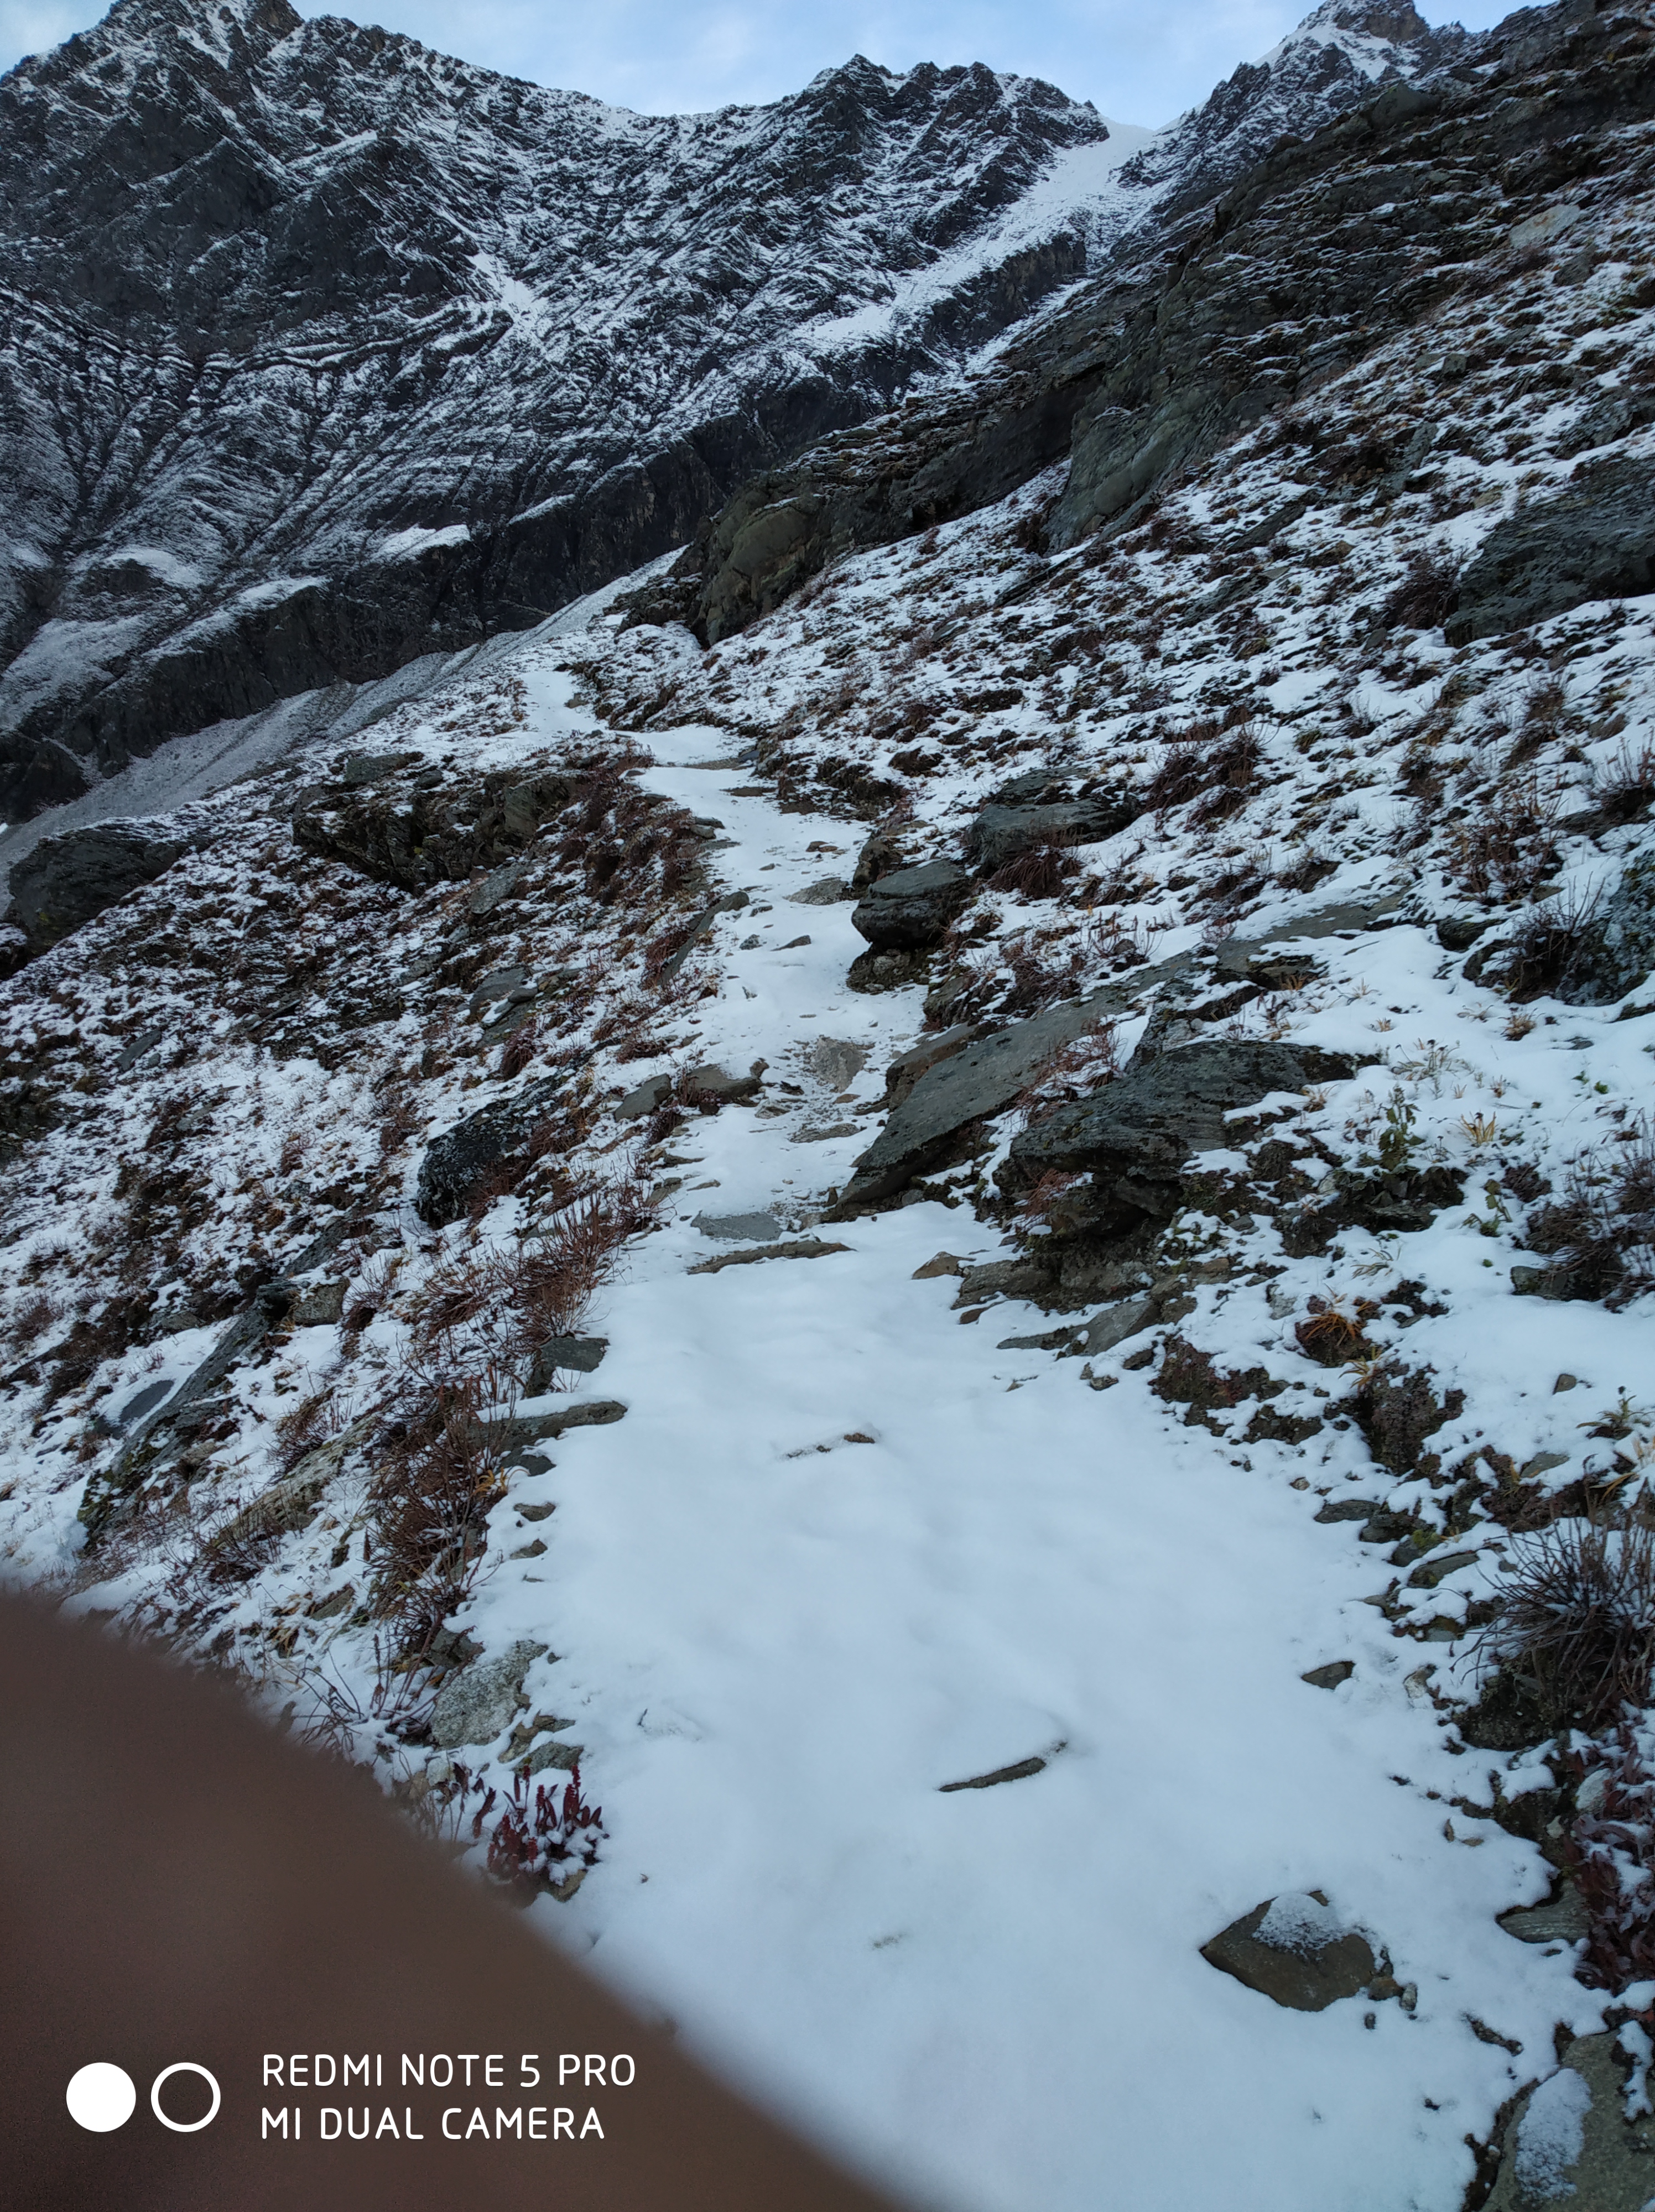
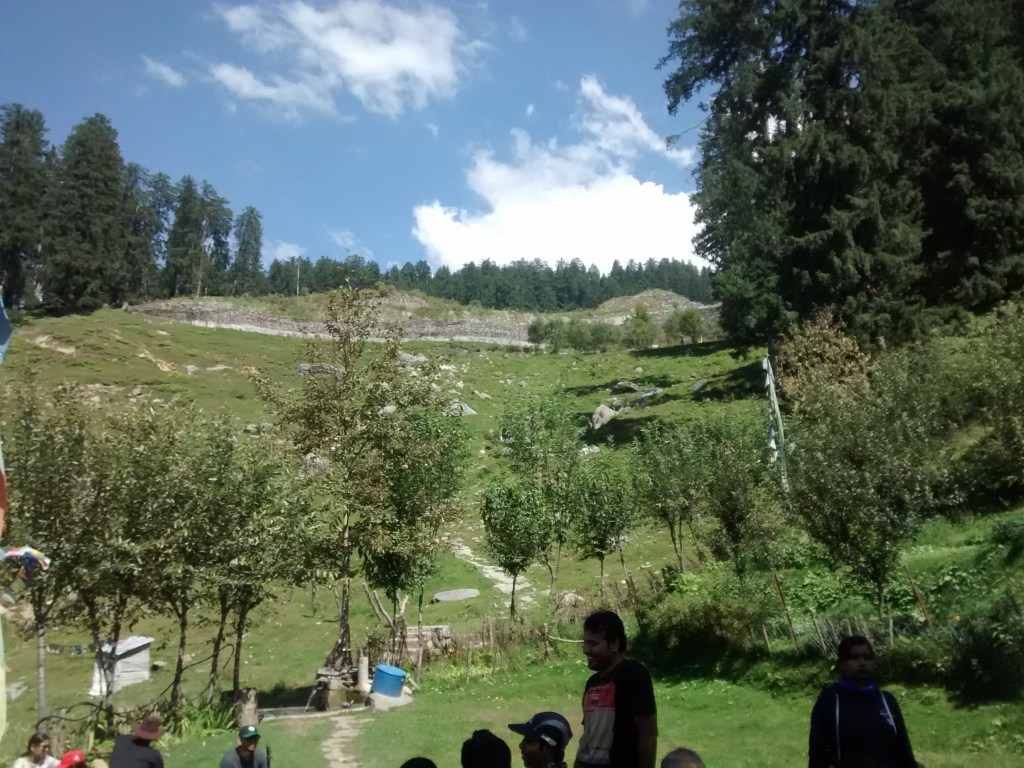
Day – 4 Trek to Chikka (10,824 ft.) 8 kms

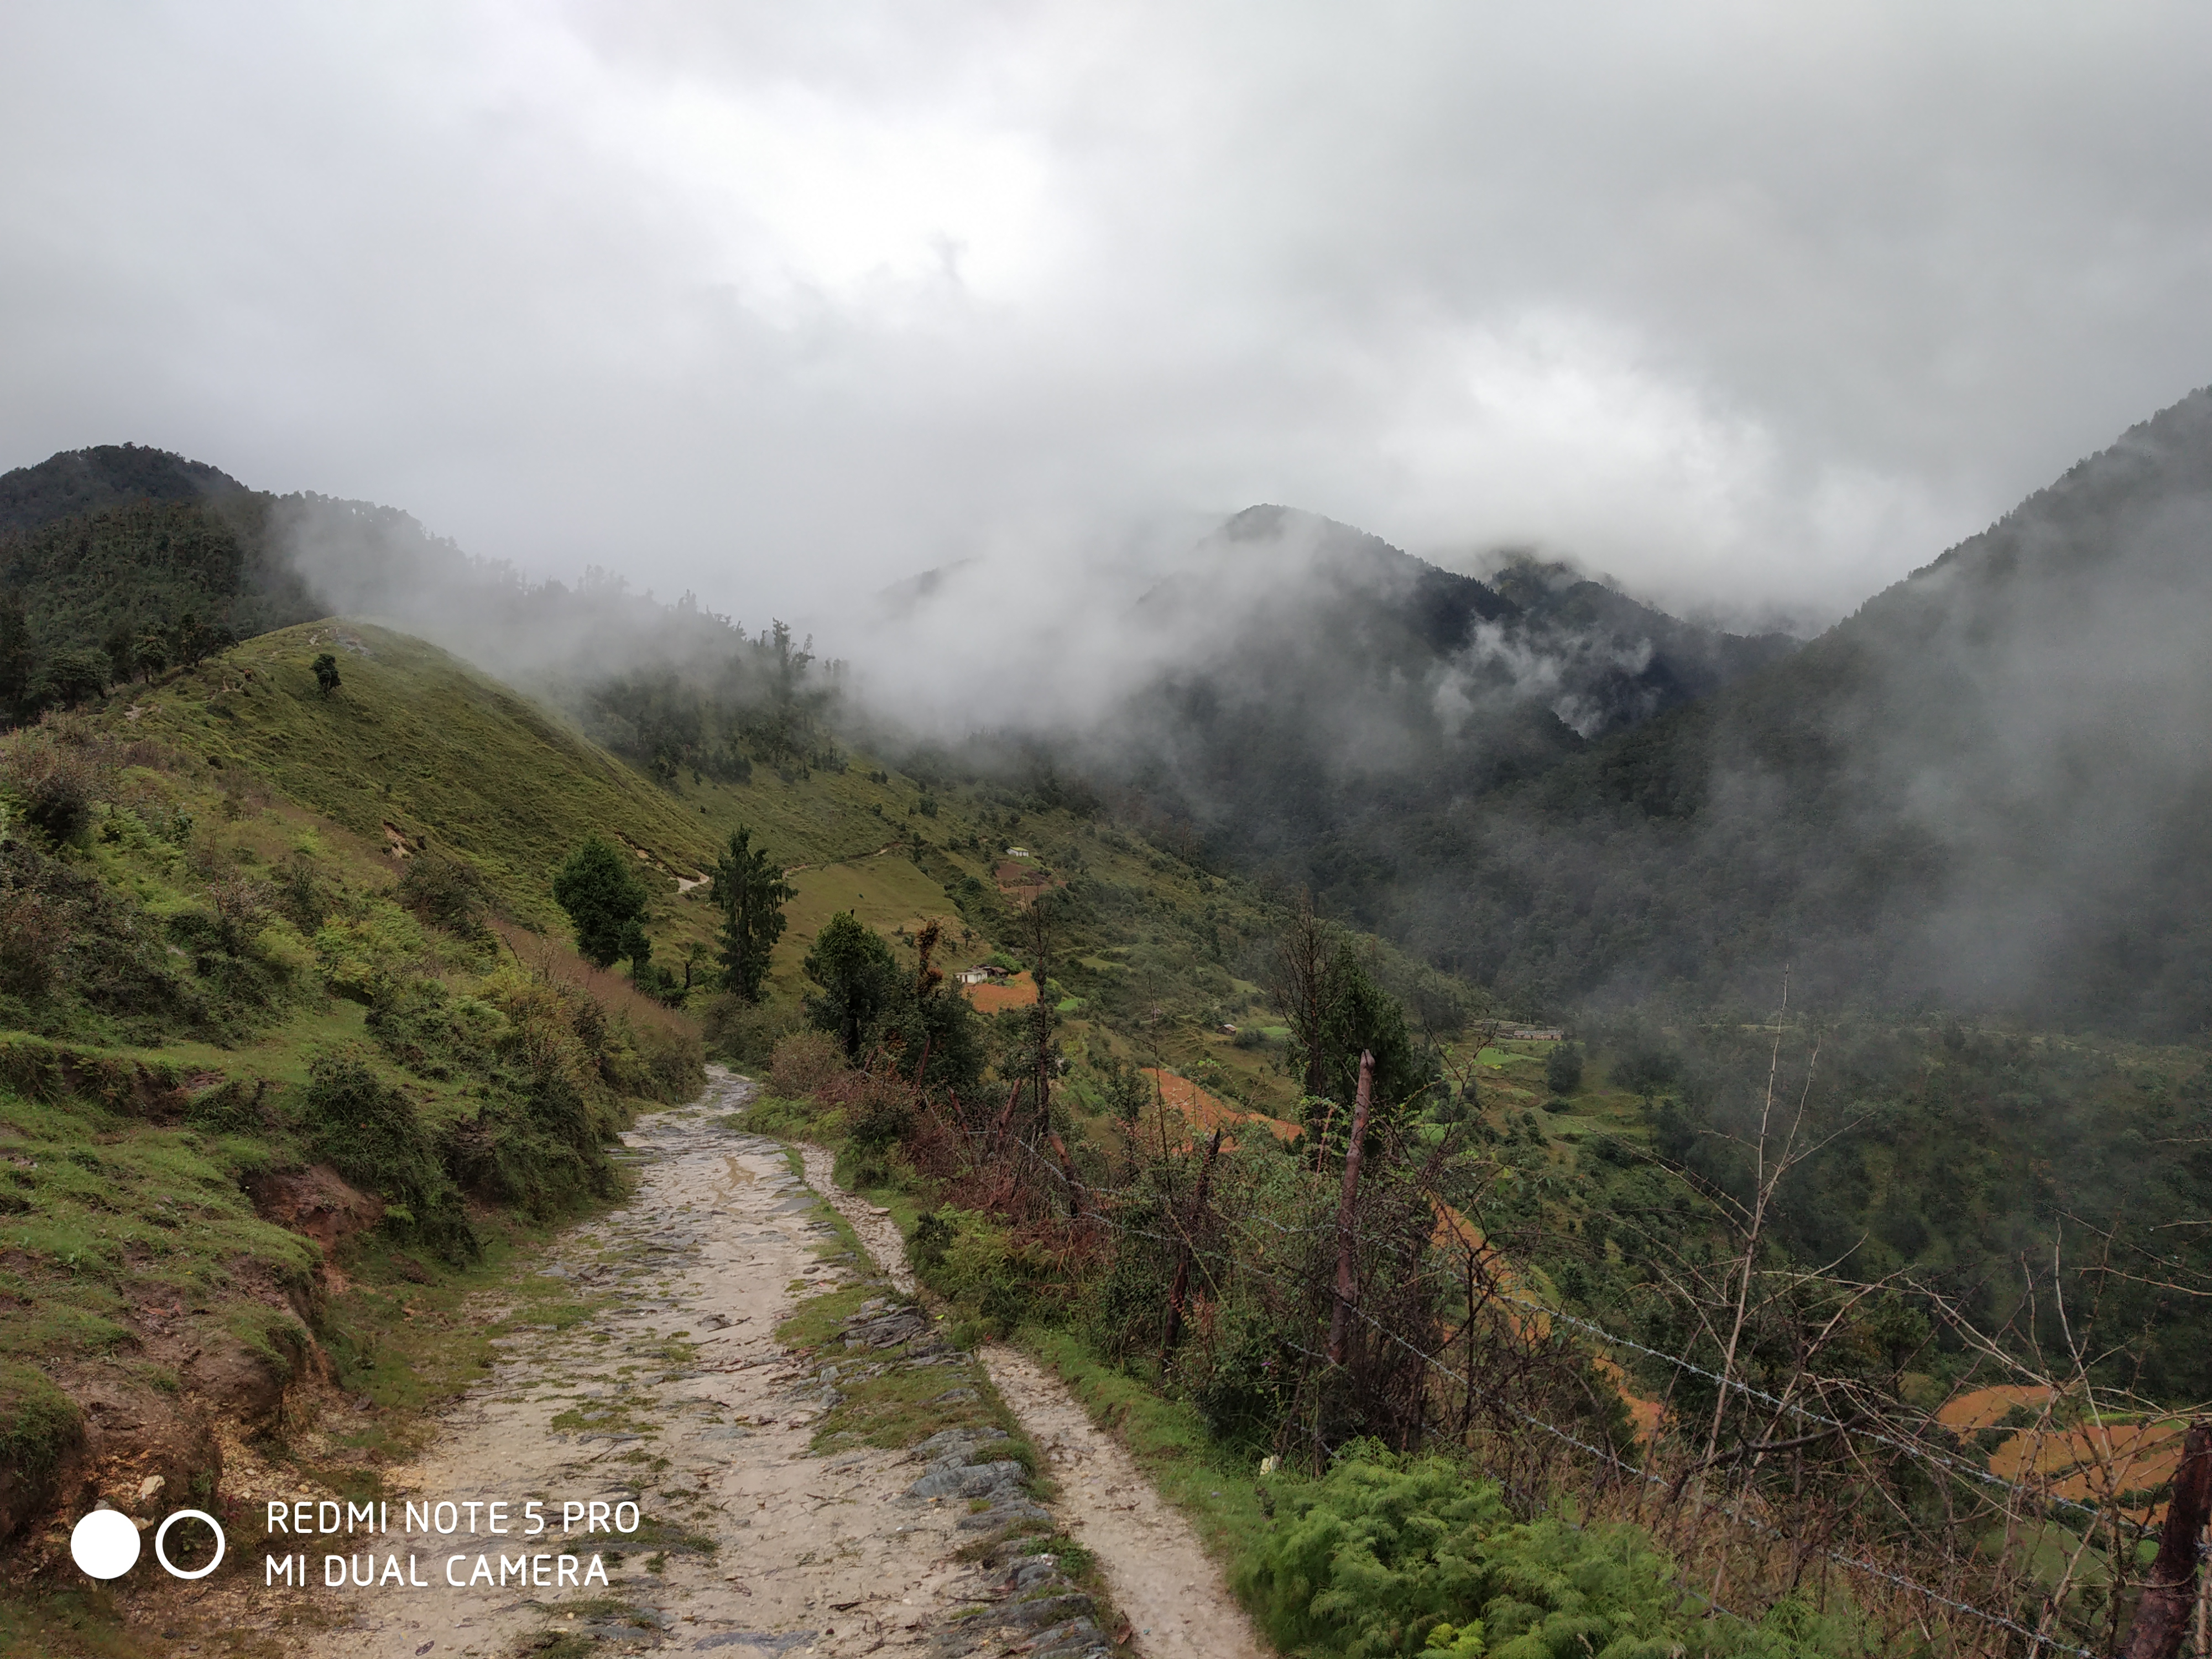
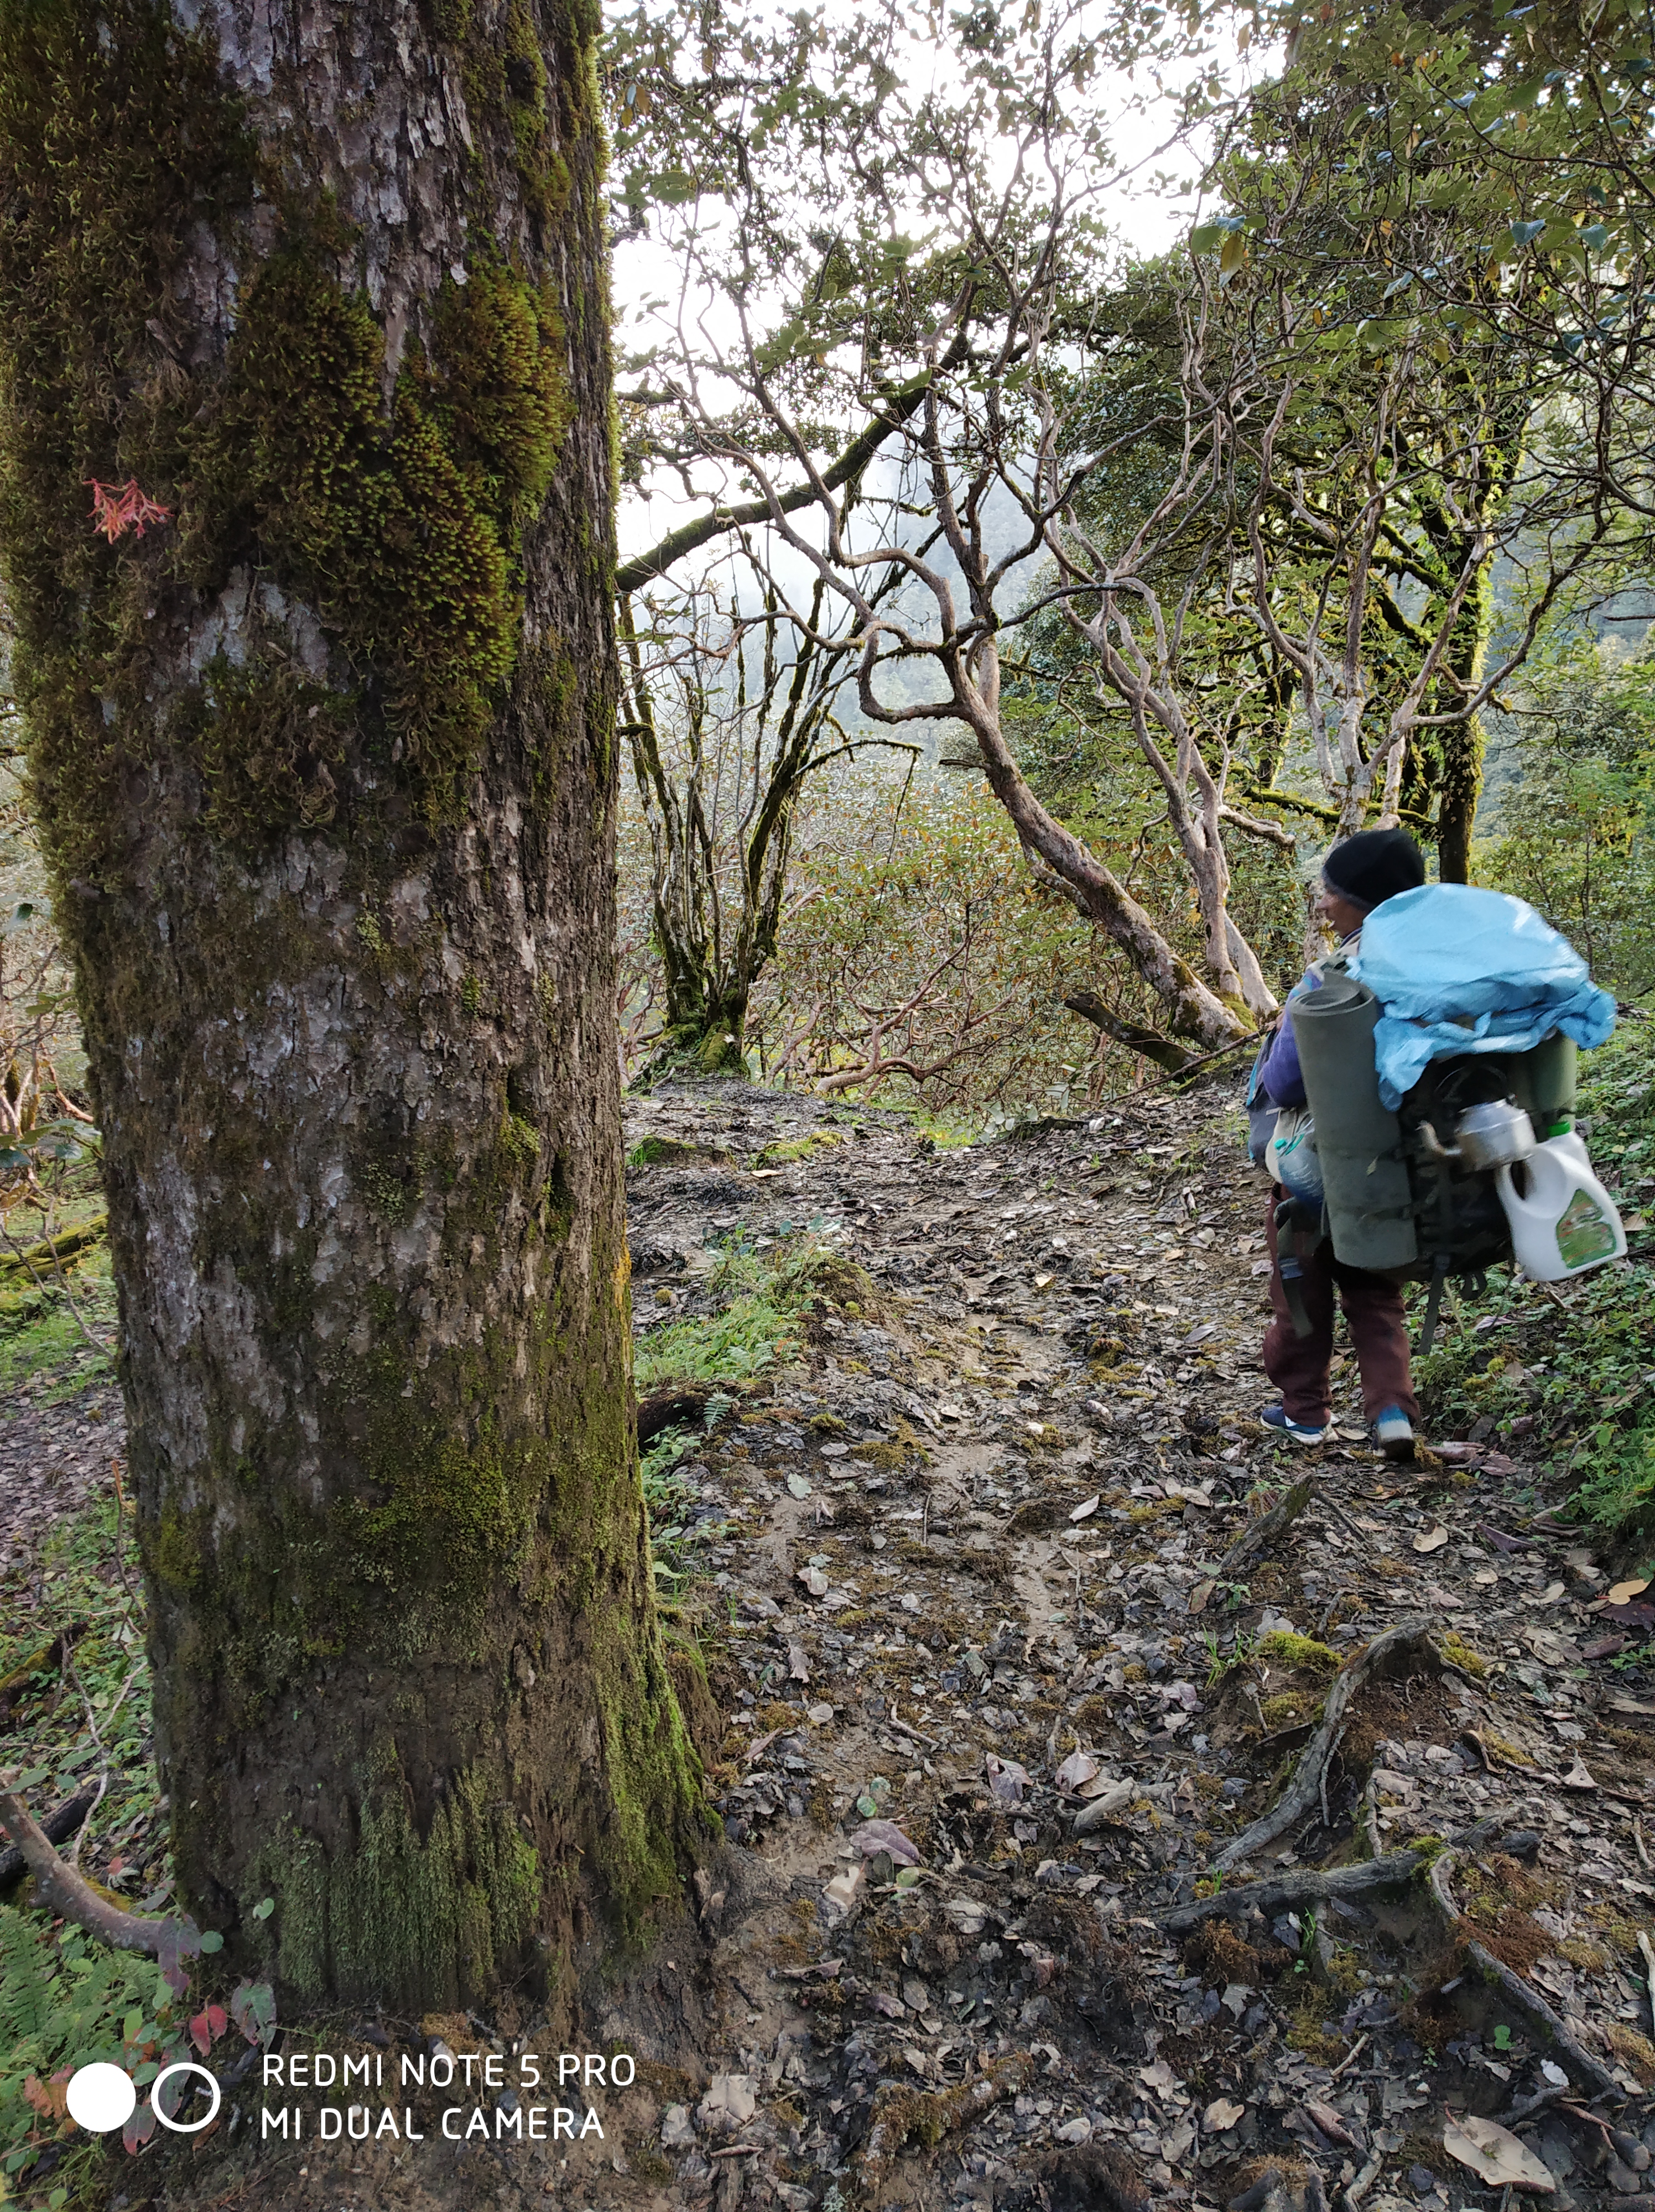
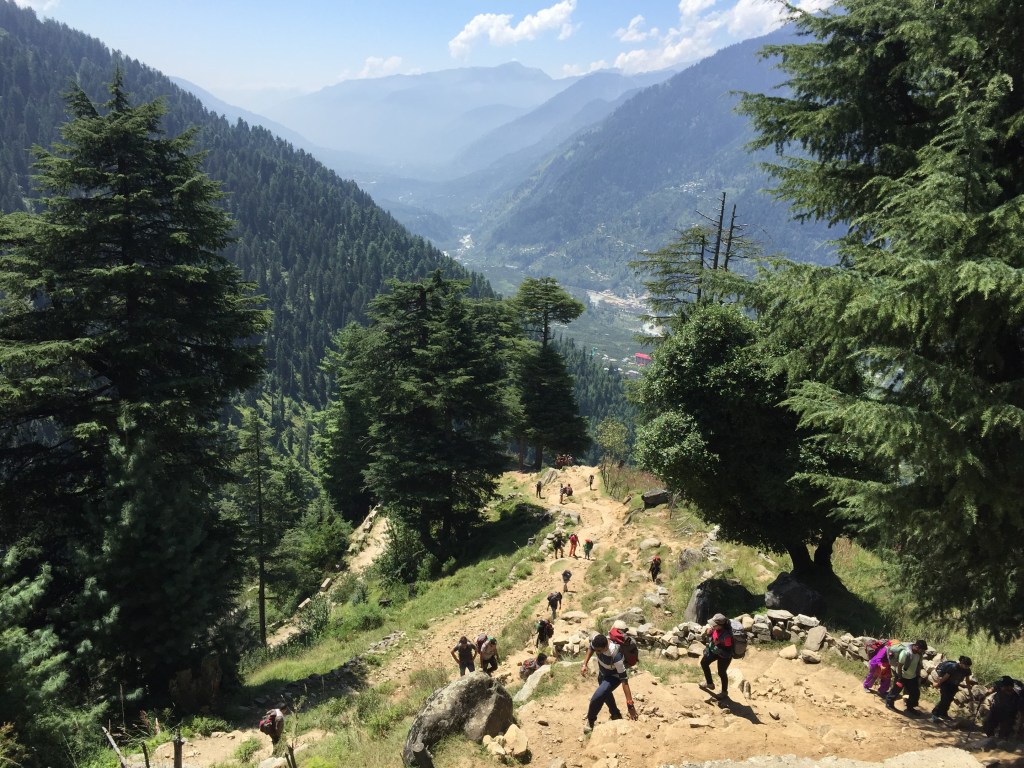
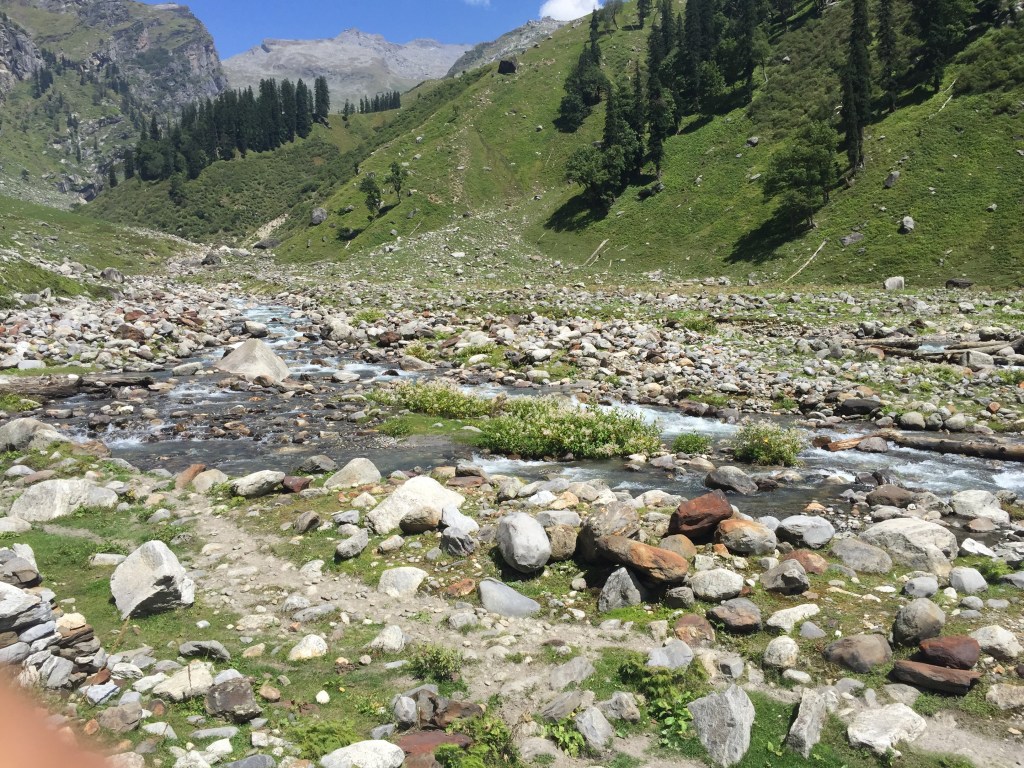
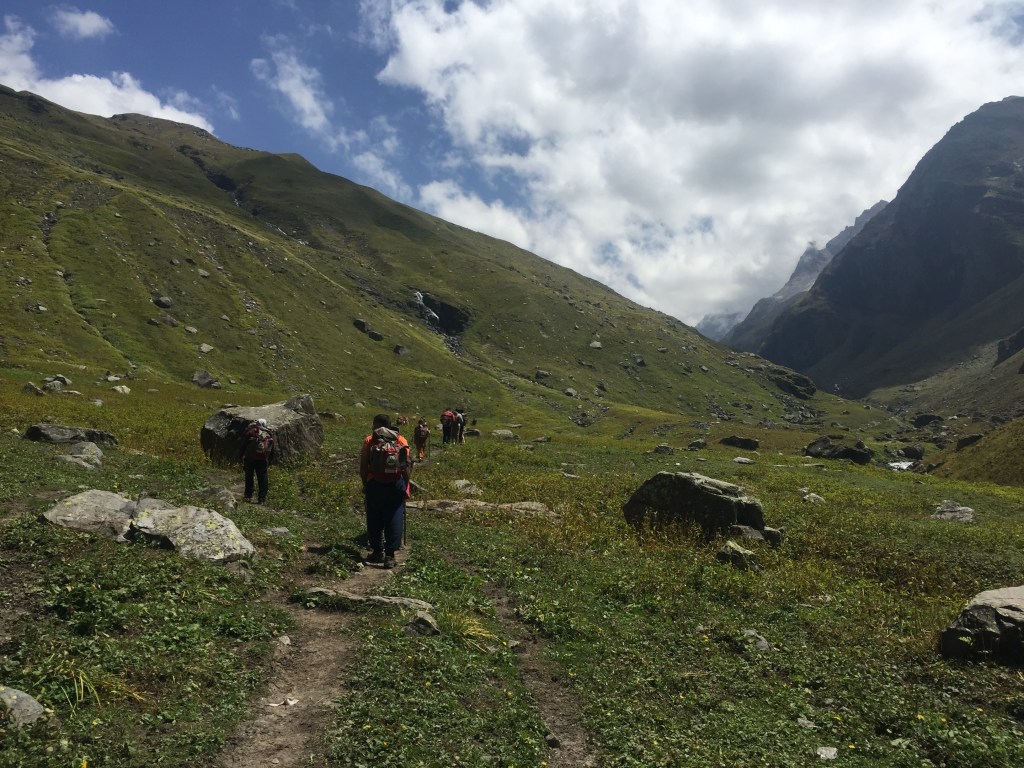
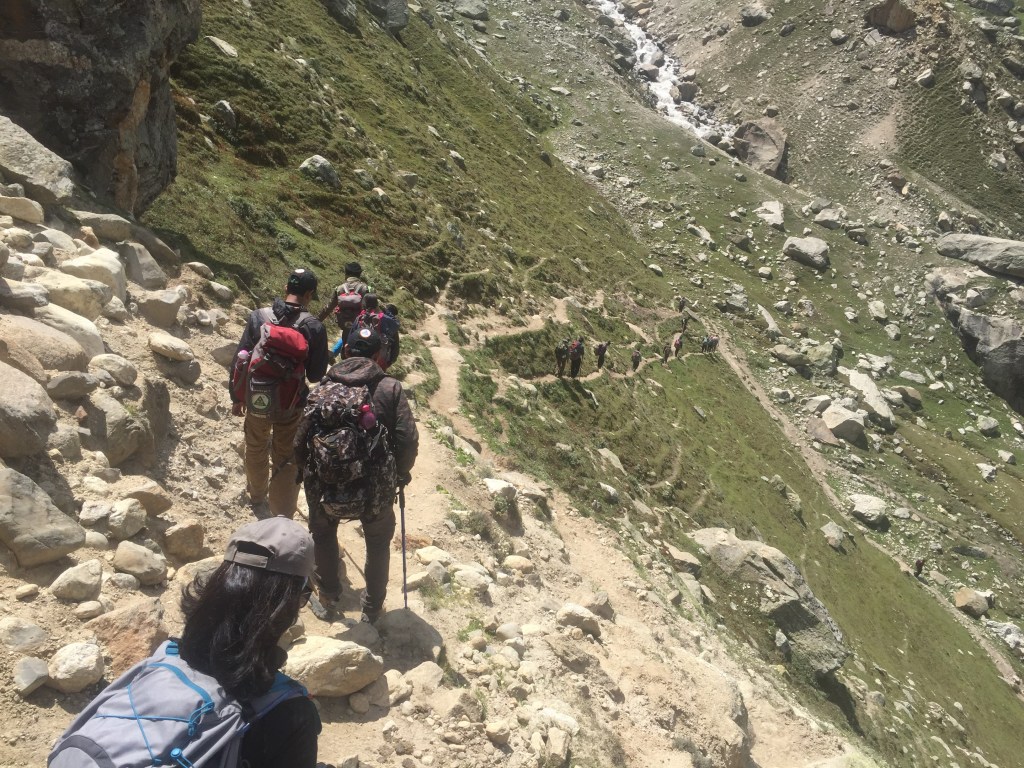
We left for Chikka at around 8 am, first 4 km was an easy walk along the road till we reached a point where we took the right turn and finally entered into the jungle which then opened into a beautiful meadow leaving the road behind.

Towards Chikka
From where we took the turn towards the mountain (PC: VIJAY)

This where the real trek starts, it took us around 4 hours to reach the lunch point.

At lunch point
View from lunch point

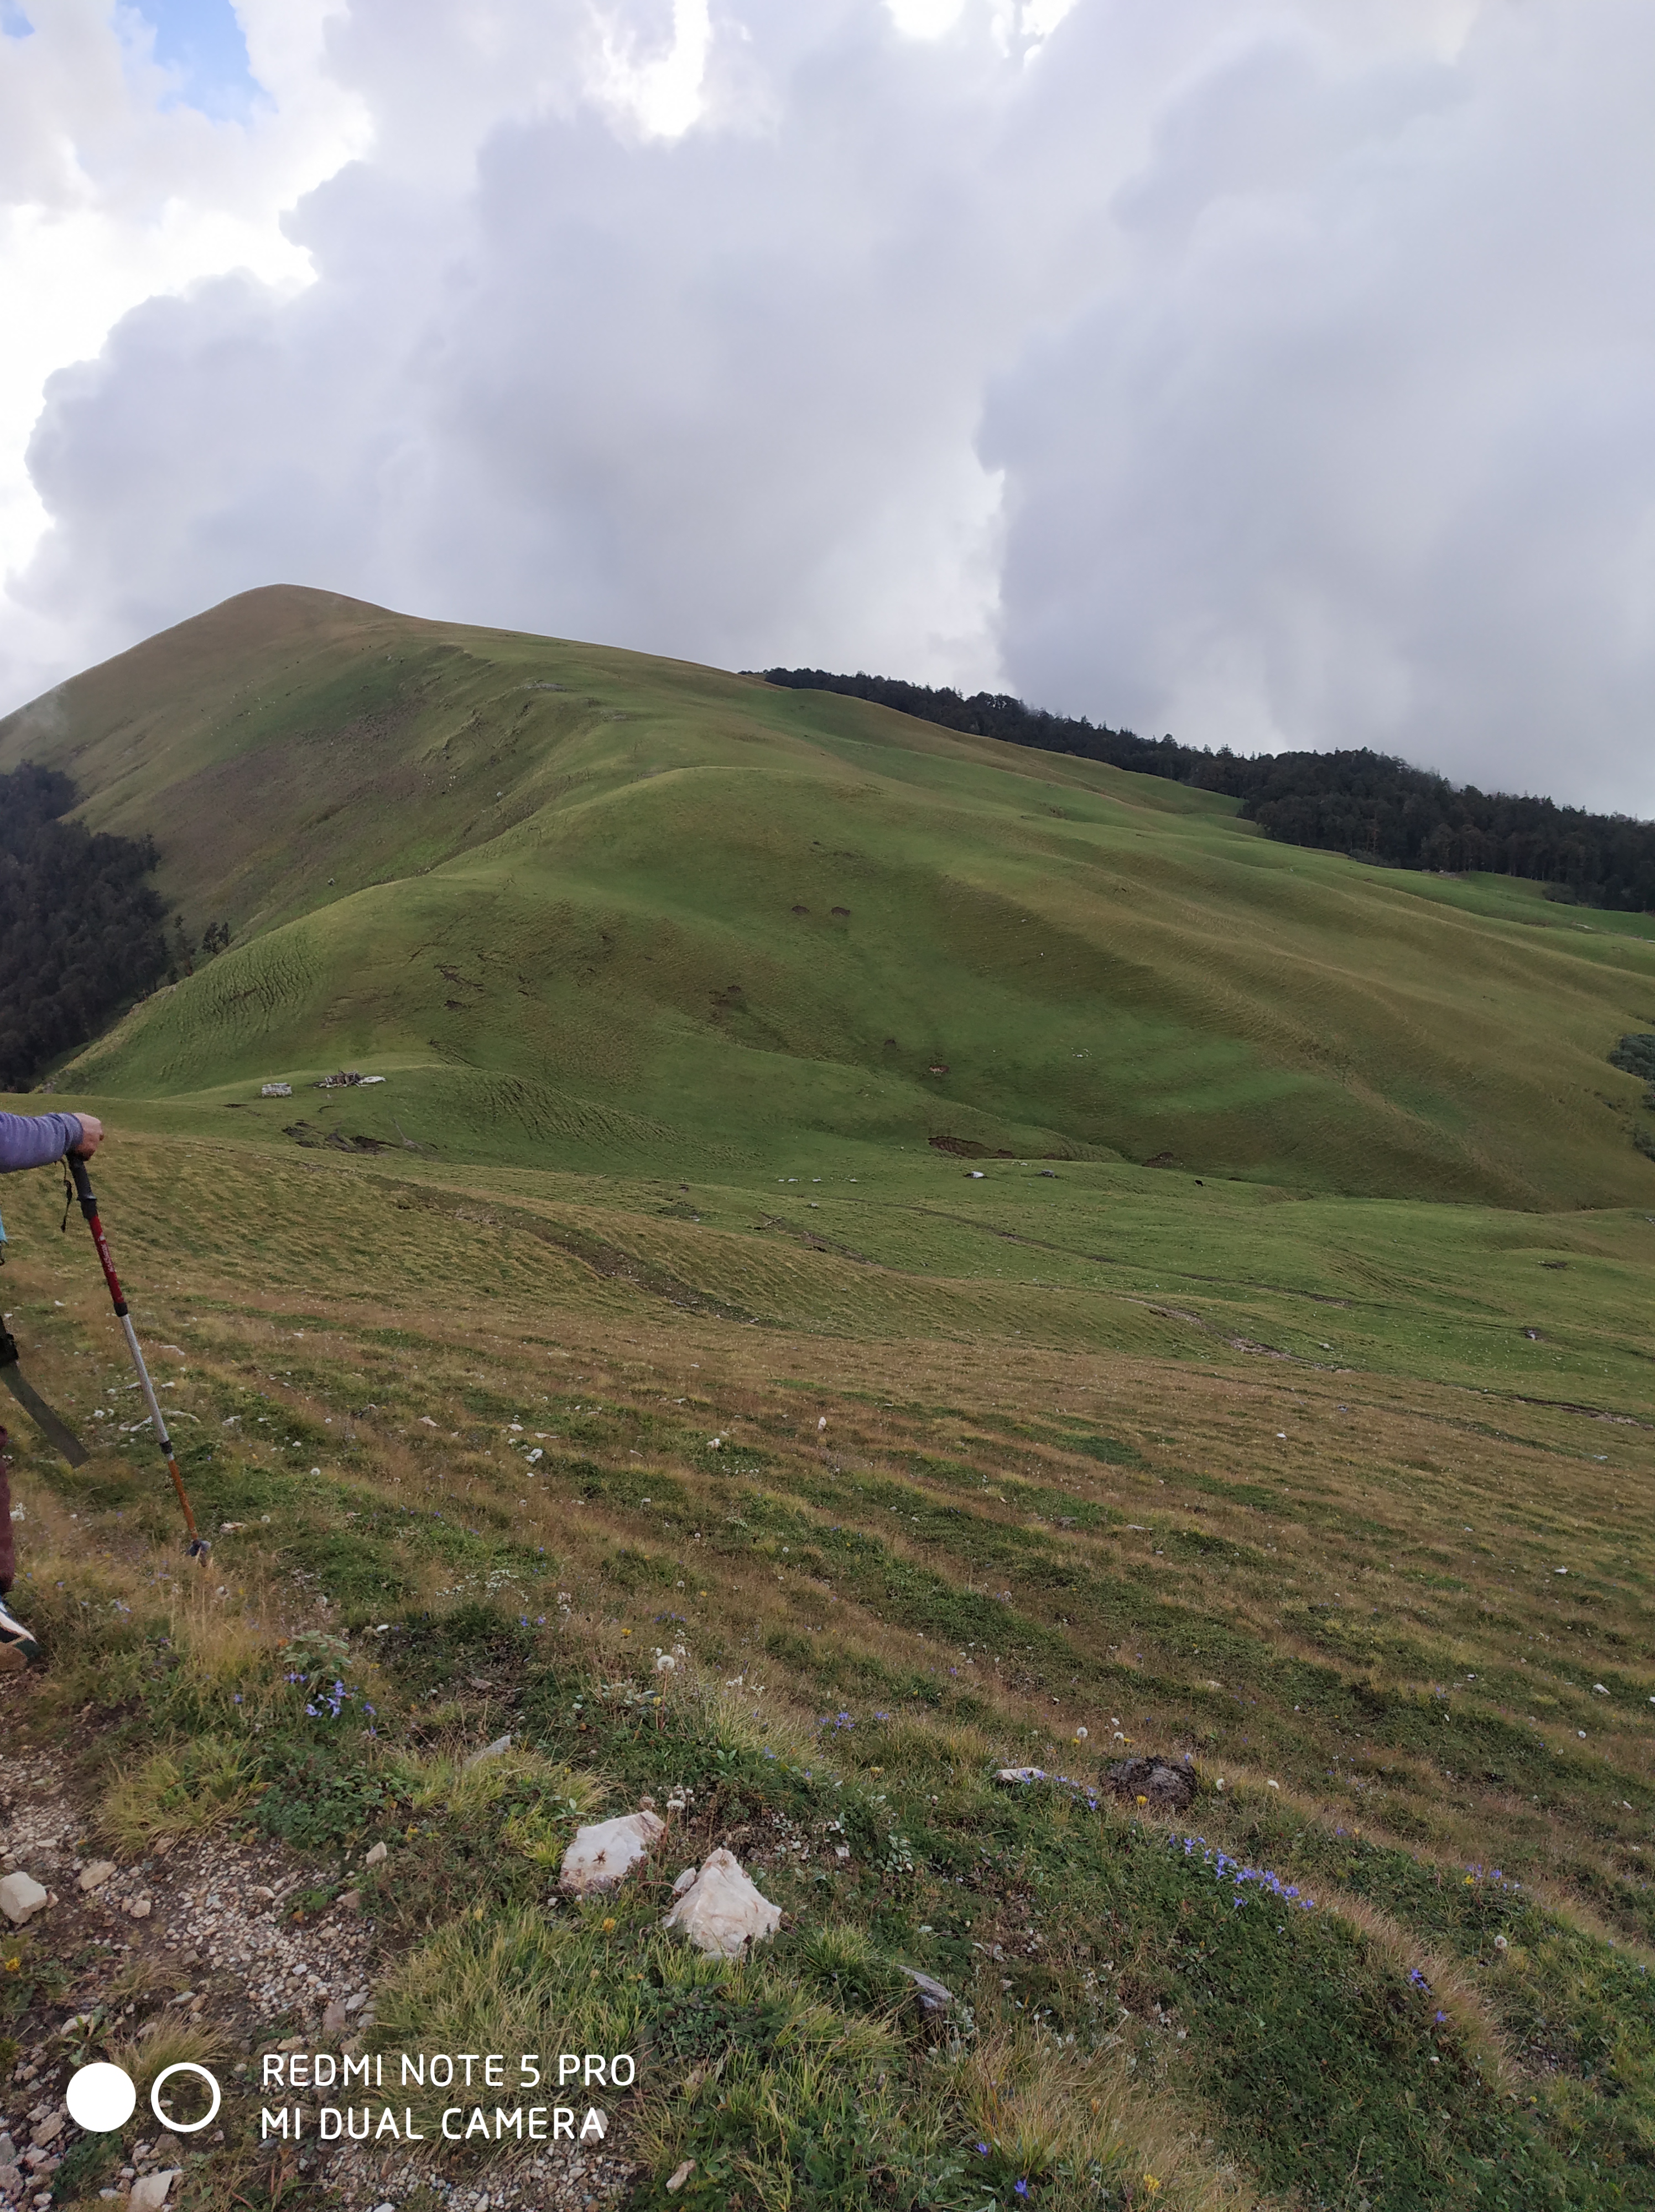
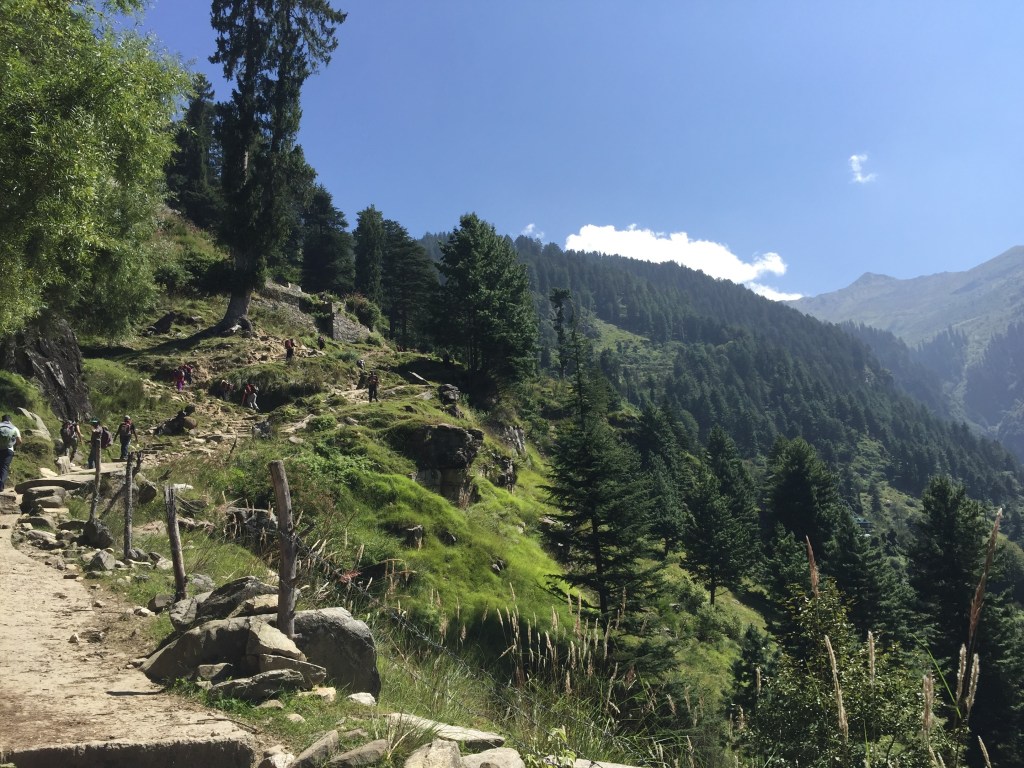
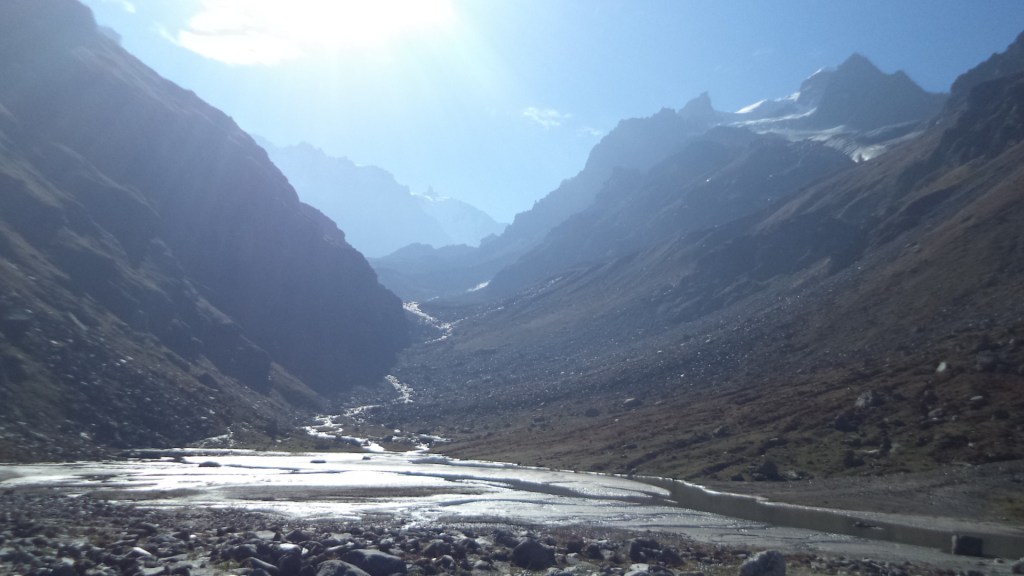
It’s stunning in real many more times than it seems to be in the picture. We were heading towards that mountain in the above picture.

It accompanied us throughout the trek (PC: NAVEEN BHARADWAJ)

From here till Chikka it was a flat trail with some gradual ascent. It was a beautiful day to trek with perfect weather(advice: Do carry sunscreen with you to avoid tanning).

Towards Chikka

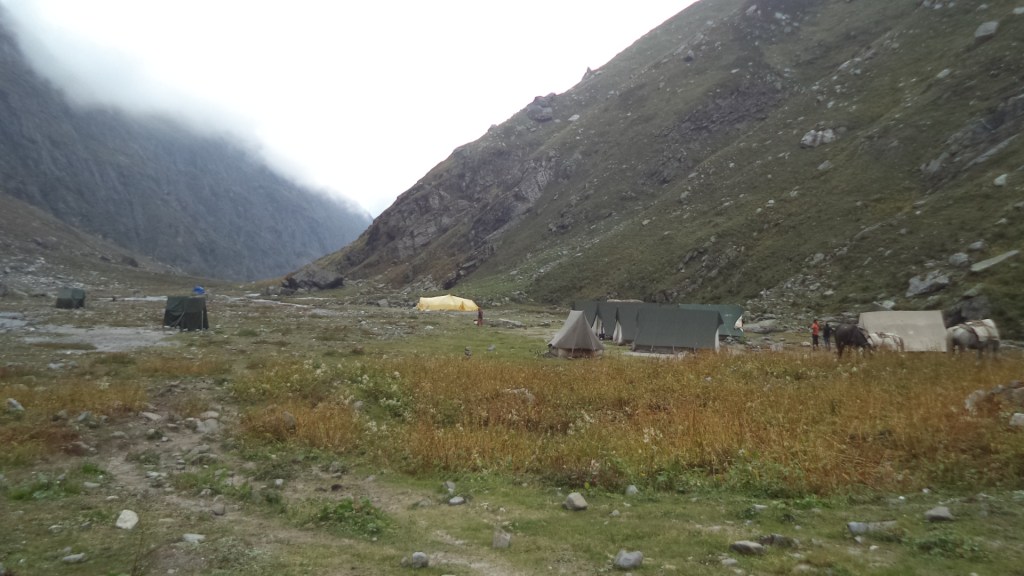
Finally, we reached Chikka at around 3 in the afternoon.

Just before the camp site (PC: NAVEEN BHARADWAJ)

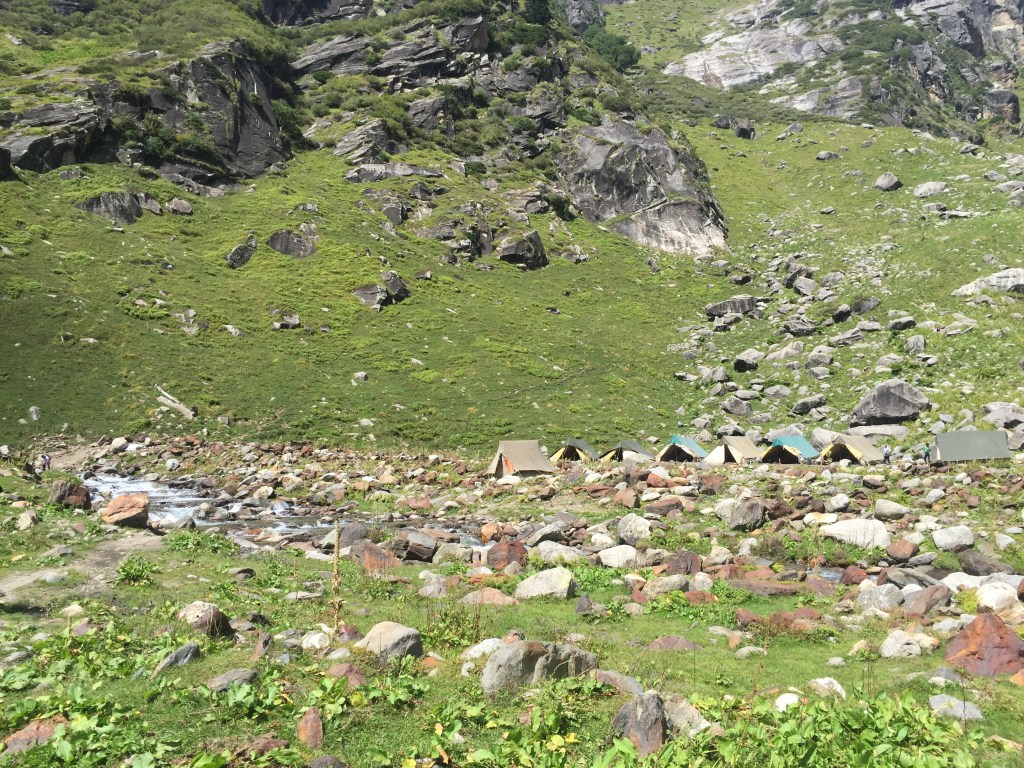
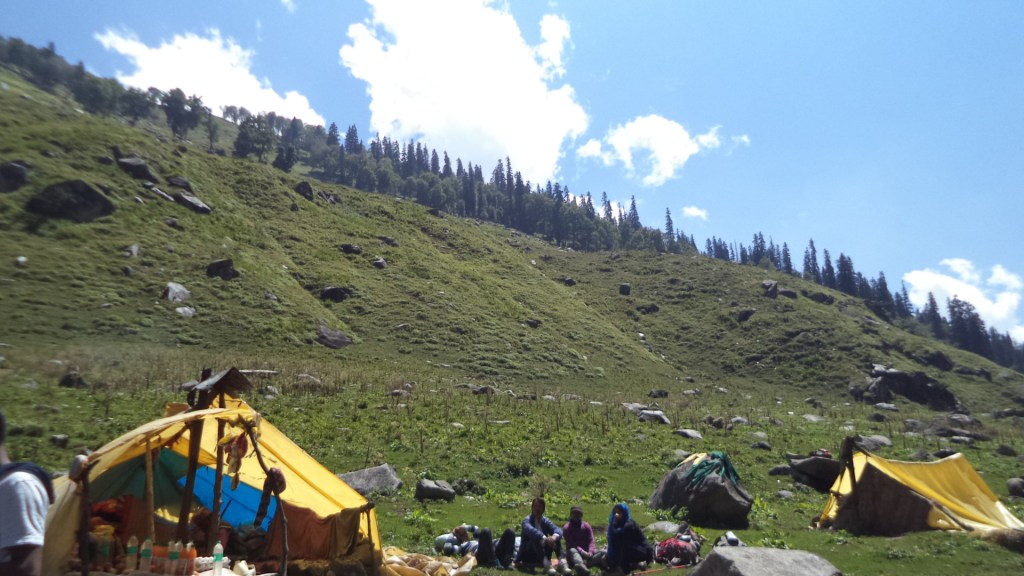
As you can see in the picture, that was our Chikka campsite. A beautiful campsite hidden in the mountains. This was my favourite campsites of all. Credit goes to the beautiful scenery. This was my first time into the mountains and I wanted to get lost there away from the noisy city into this peaceful place.

Just before camp site (PC: NAVEEN BHARADWAJ)

So we needed to cross this just before the camps. Little carelessness can throw you into the streams. We explored nearby to enjoy this place ( Tip: this is the best way to get acclimatize). Whenever you reach the above camp don’t go to sleep, explore the campsite and nearby places and enjoy, it will help you get acclimatized very soon. We climbed a huge rock near the campsite for better views.

View of campsite (PC: NAVEEN BHARADWAJ)

We trekked from the opposite side towards Chikka. Just before dinner, we did some funny skits to entertain ourselves. Finally, we all fell asleep after dinner followed by the tent talks (We were a bunch of trekkers in one tent sharing each other about our life stories). Some had serious stories, some had a sad one while others had funny one, it was interesting to hear different stories. This was my first time sleeping in a sleeping bag and staying in a tent.

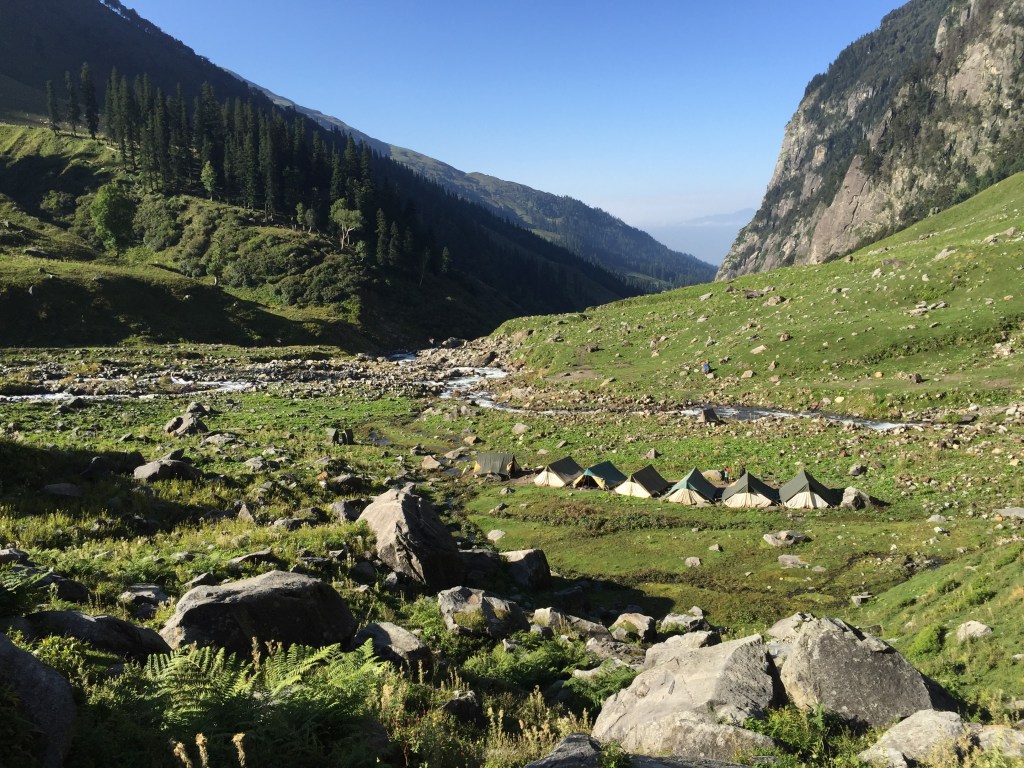
Day 5 – Trek to Balu ka Ghera (11,808 ft.) 10 kms

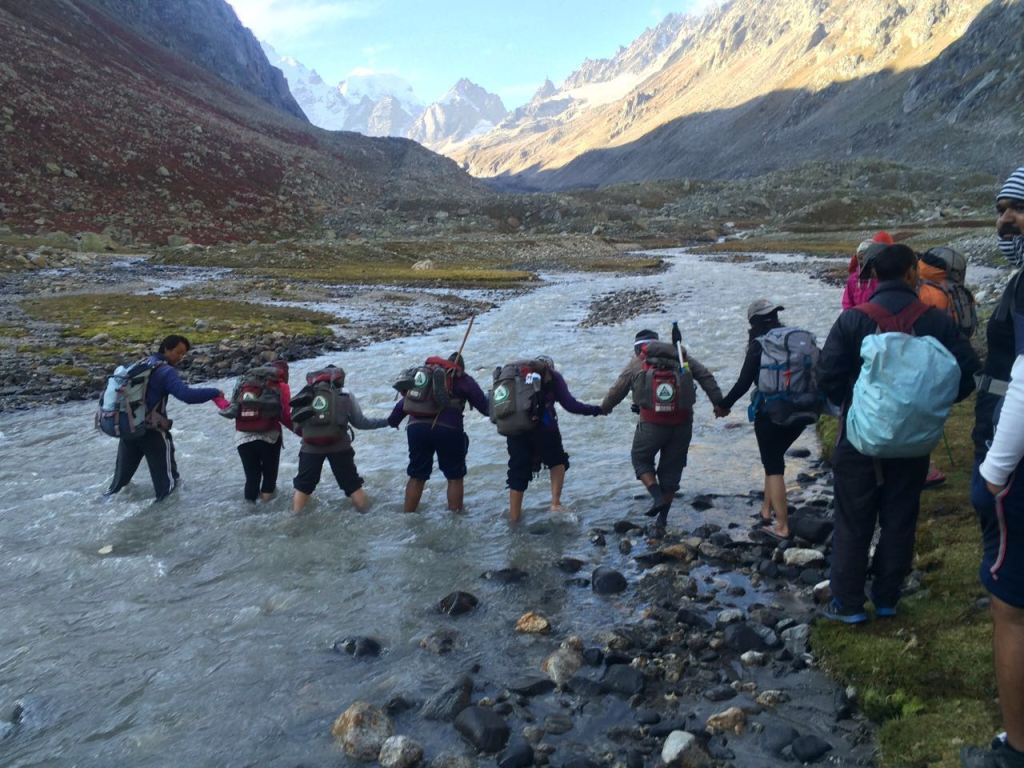
Today’s trek was a little longer than yesterday. So as usual after breakfast, we were ready to move at around 8 in the morning. Today’s trail was the same as yesterday, flat trail with a gradual ascent with one extra thing to do “stream crossing”. Yes, you heard me right we needed to cross a stream that too on foot and later I got to know that this was not the first (precaution: do carry slippers with you). While crossing stream shoe will get wet which is not preferred and crossing with the barefoot is also not advisable as some sharp rocks inside the stream may hurt your leg. So slippers are suggested here.

While crossing stream

If your shoes get wet then it becomes uncomfortable to trek, your foot becomes wet and walking with wet shoes may make you fall ill because cold hits your head and also you may get Acute Mountain sickness (AMS). AMS DETAILS

Stream crossing

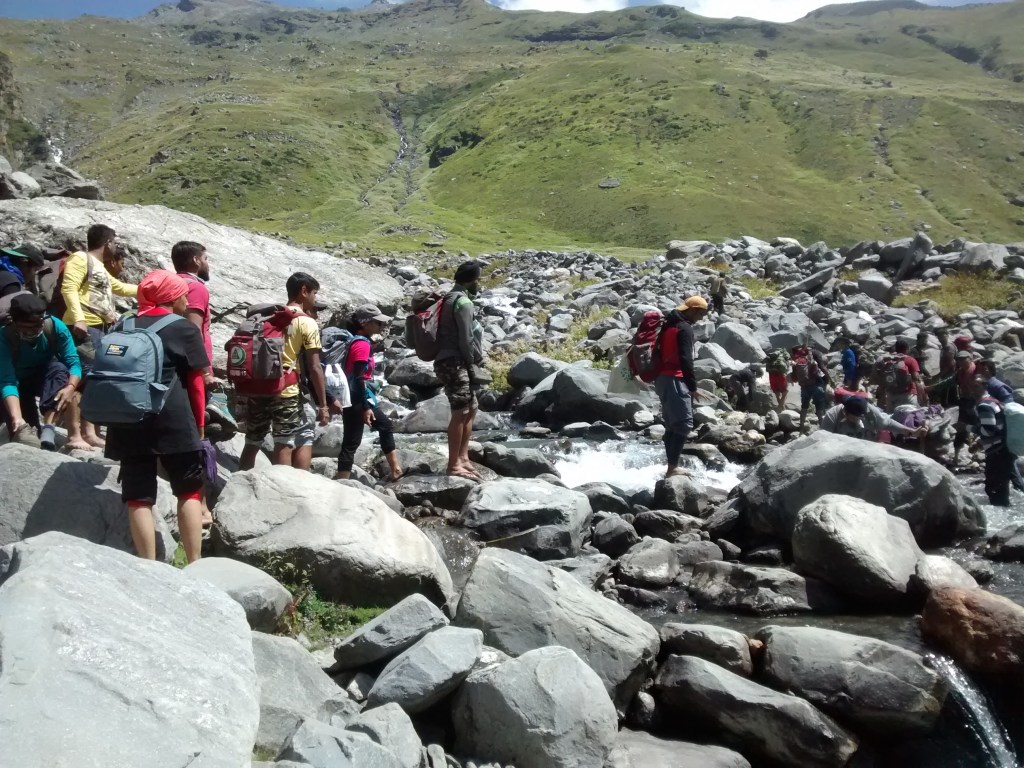
Other than this, slippers are useful in the campsites where you need to move often inside and outside. Sadly I didn’t had my slippers with me, so I crossed it barefoot on my risk. Guide and trek leader we’re standing in the middle and was helping us to cross the stream. It took us around 30 to 40 minutes to cross. After taking some rest we finally went ahead and reached our lunch point.

Lunch point (PC: NAVEEN BHARADWAJ)

We reached lunch point at around 12:30 pm. It was a good sunny day. We finally moved ahead after finishing our lunch. From here it took us around 3 hours to reach today’s destination.

Towards Balu ka Ghera

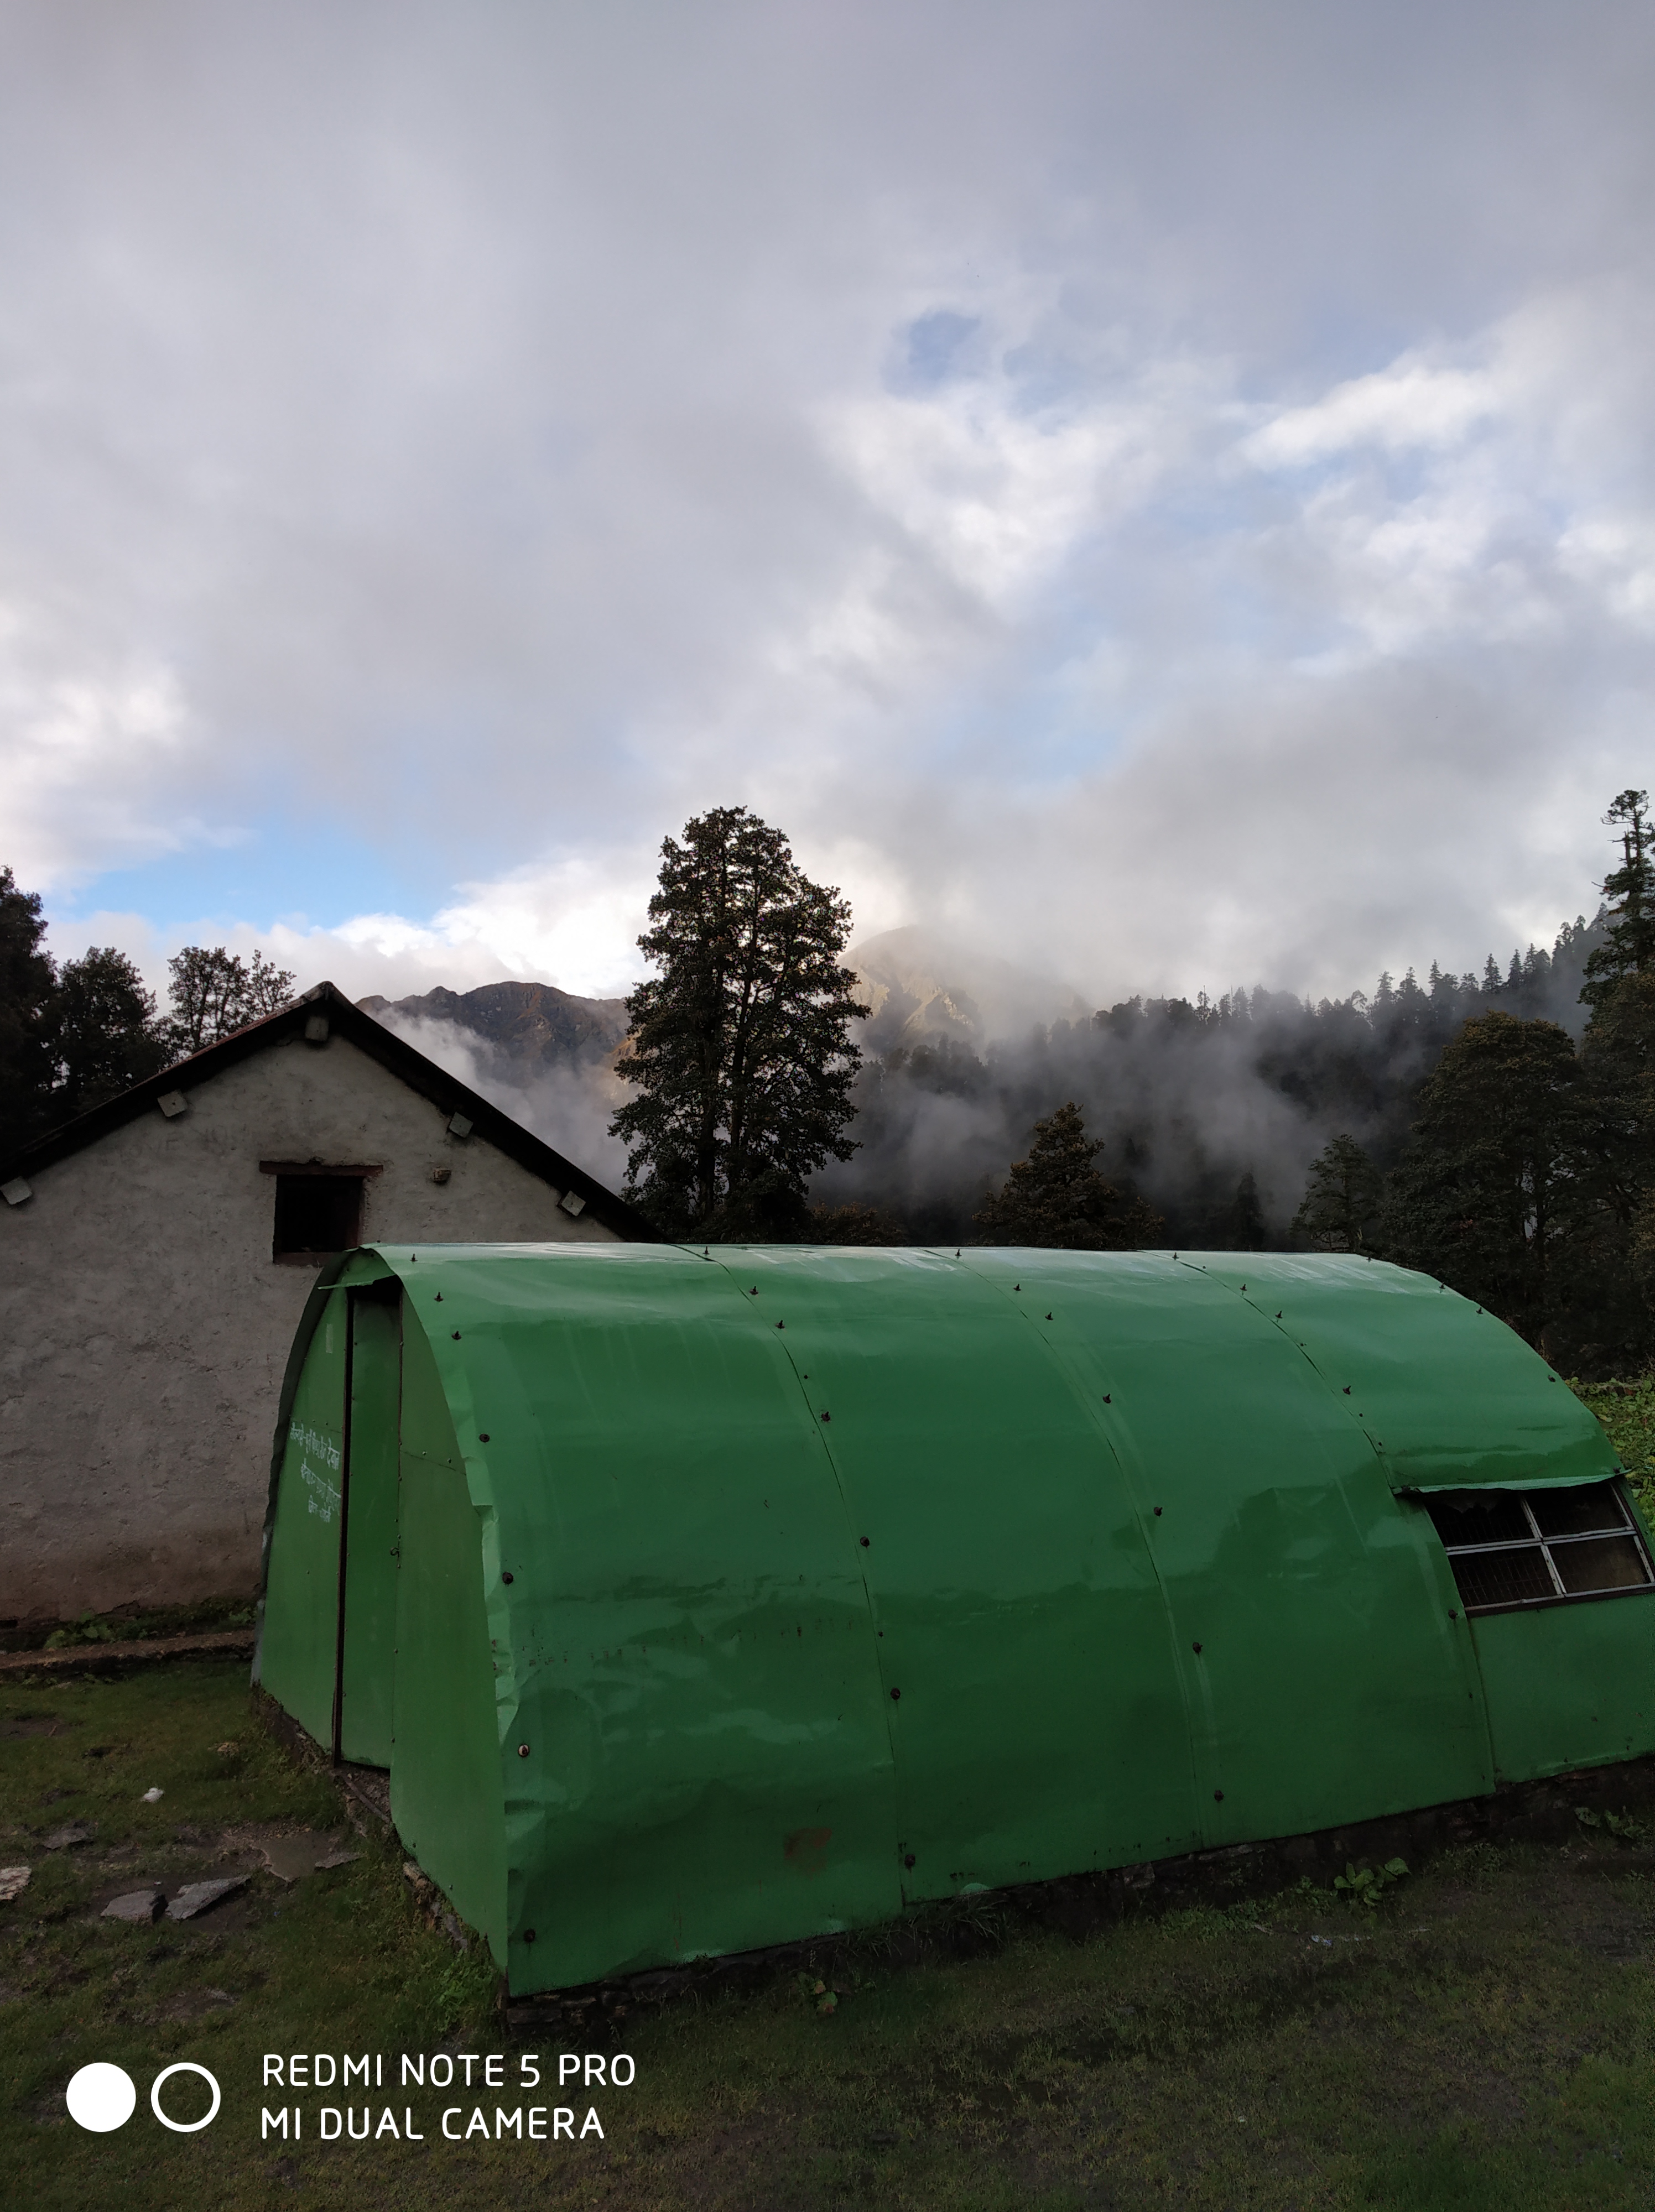
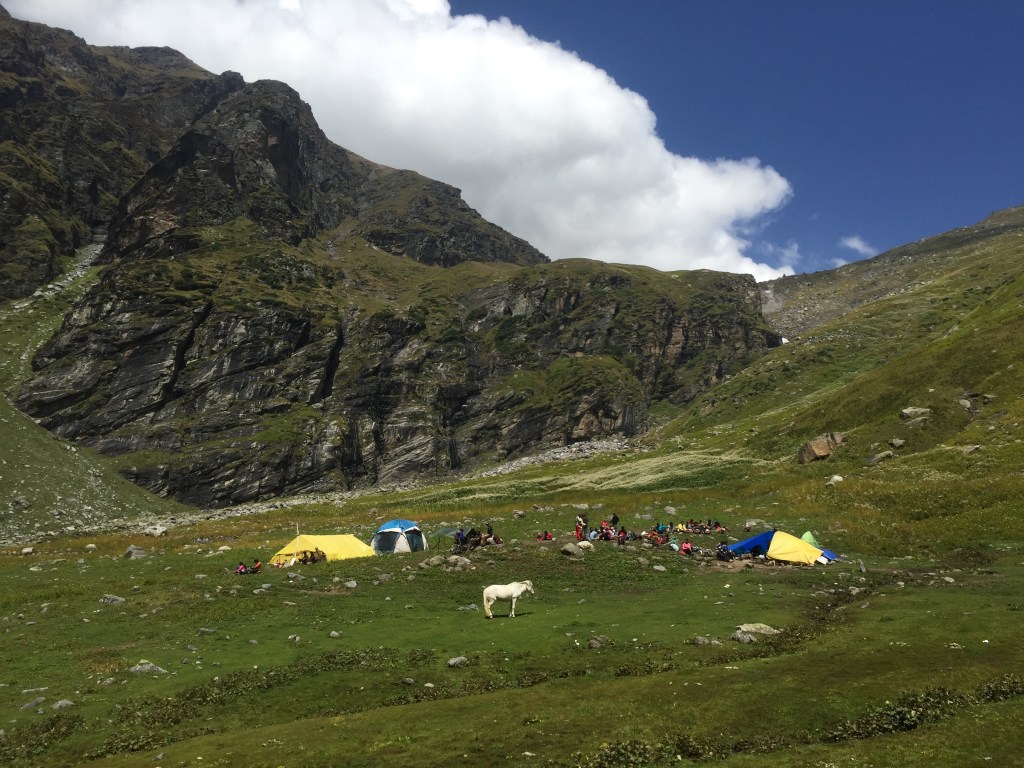
Finally, we reached the campsite at around 3:45 pm. It was yet another beautiful campsite. When you reach the campsite it gives you an amazing feeling that I did it. I loved the campsite.

Balu ka Ghera

After reaching the camp, some took rest in the camp while me and others were playing ‘lagori’ (seven stones) game. It’s also called ‘pittu game’ in the Hindi language. It was fun and it really helped me a lot to get acclimatize. We also played cricket.

At campsite

The one who is batting, he’s our trek leader (Tenzing). Amazing trek leader who guided us all throughout the trek by giving knowledge about how to walk on different terrain and sharing his experiences. After all, that playing, we were hungry and had a good dinner. I must say YHAI’S cooking staff made very tasty foods. Then we went inside the camps and slept with excitement as we were about to go for the final push tomorrow to the Hampta pass.

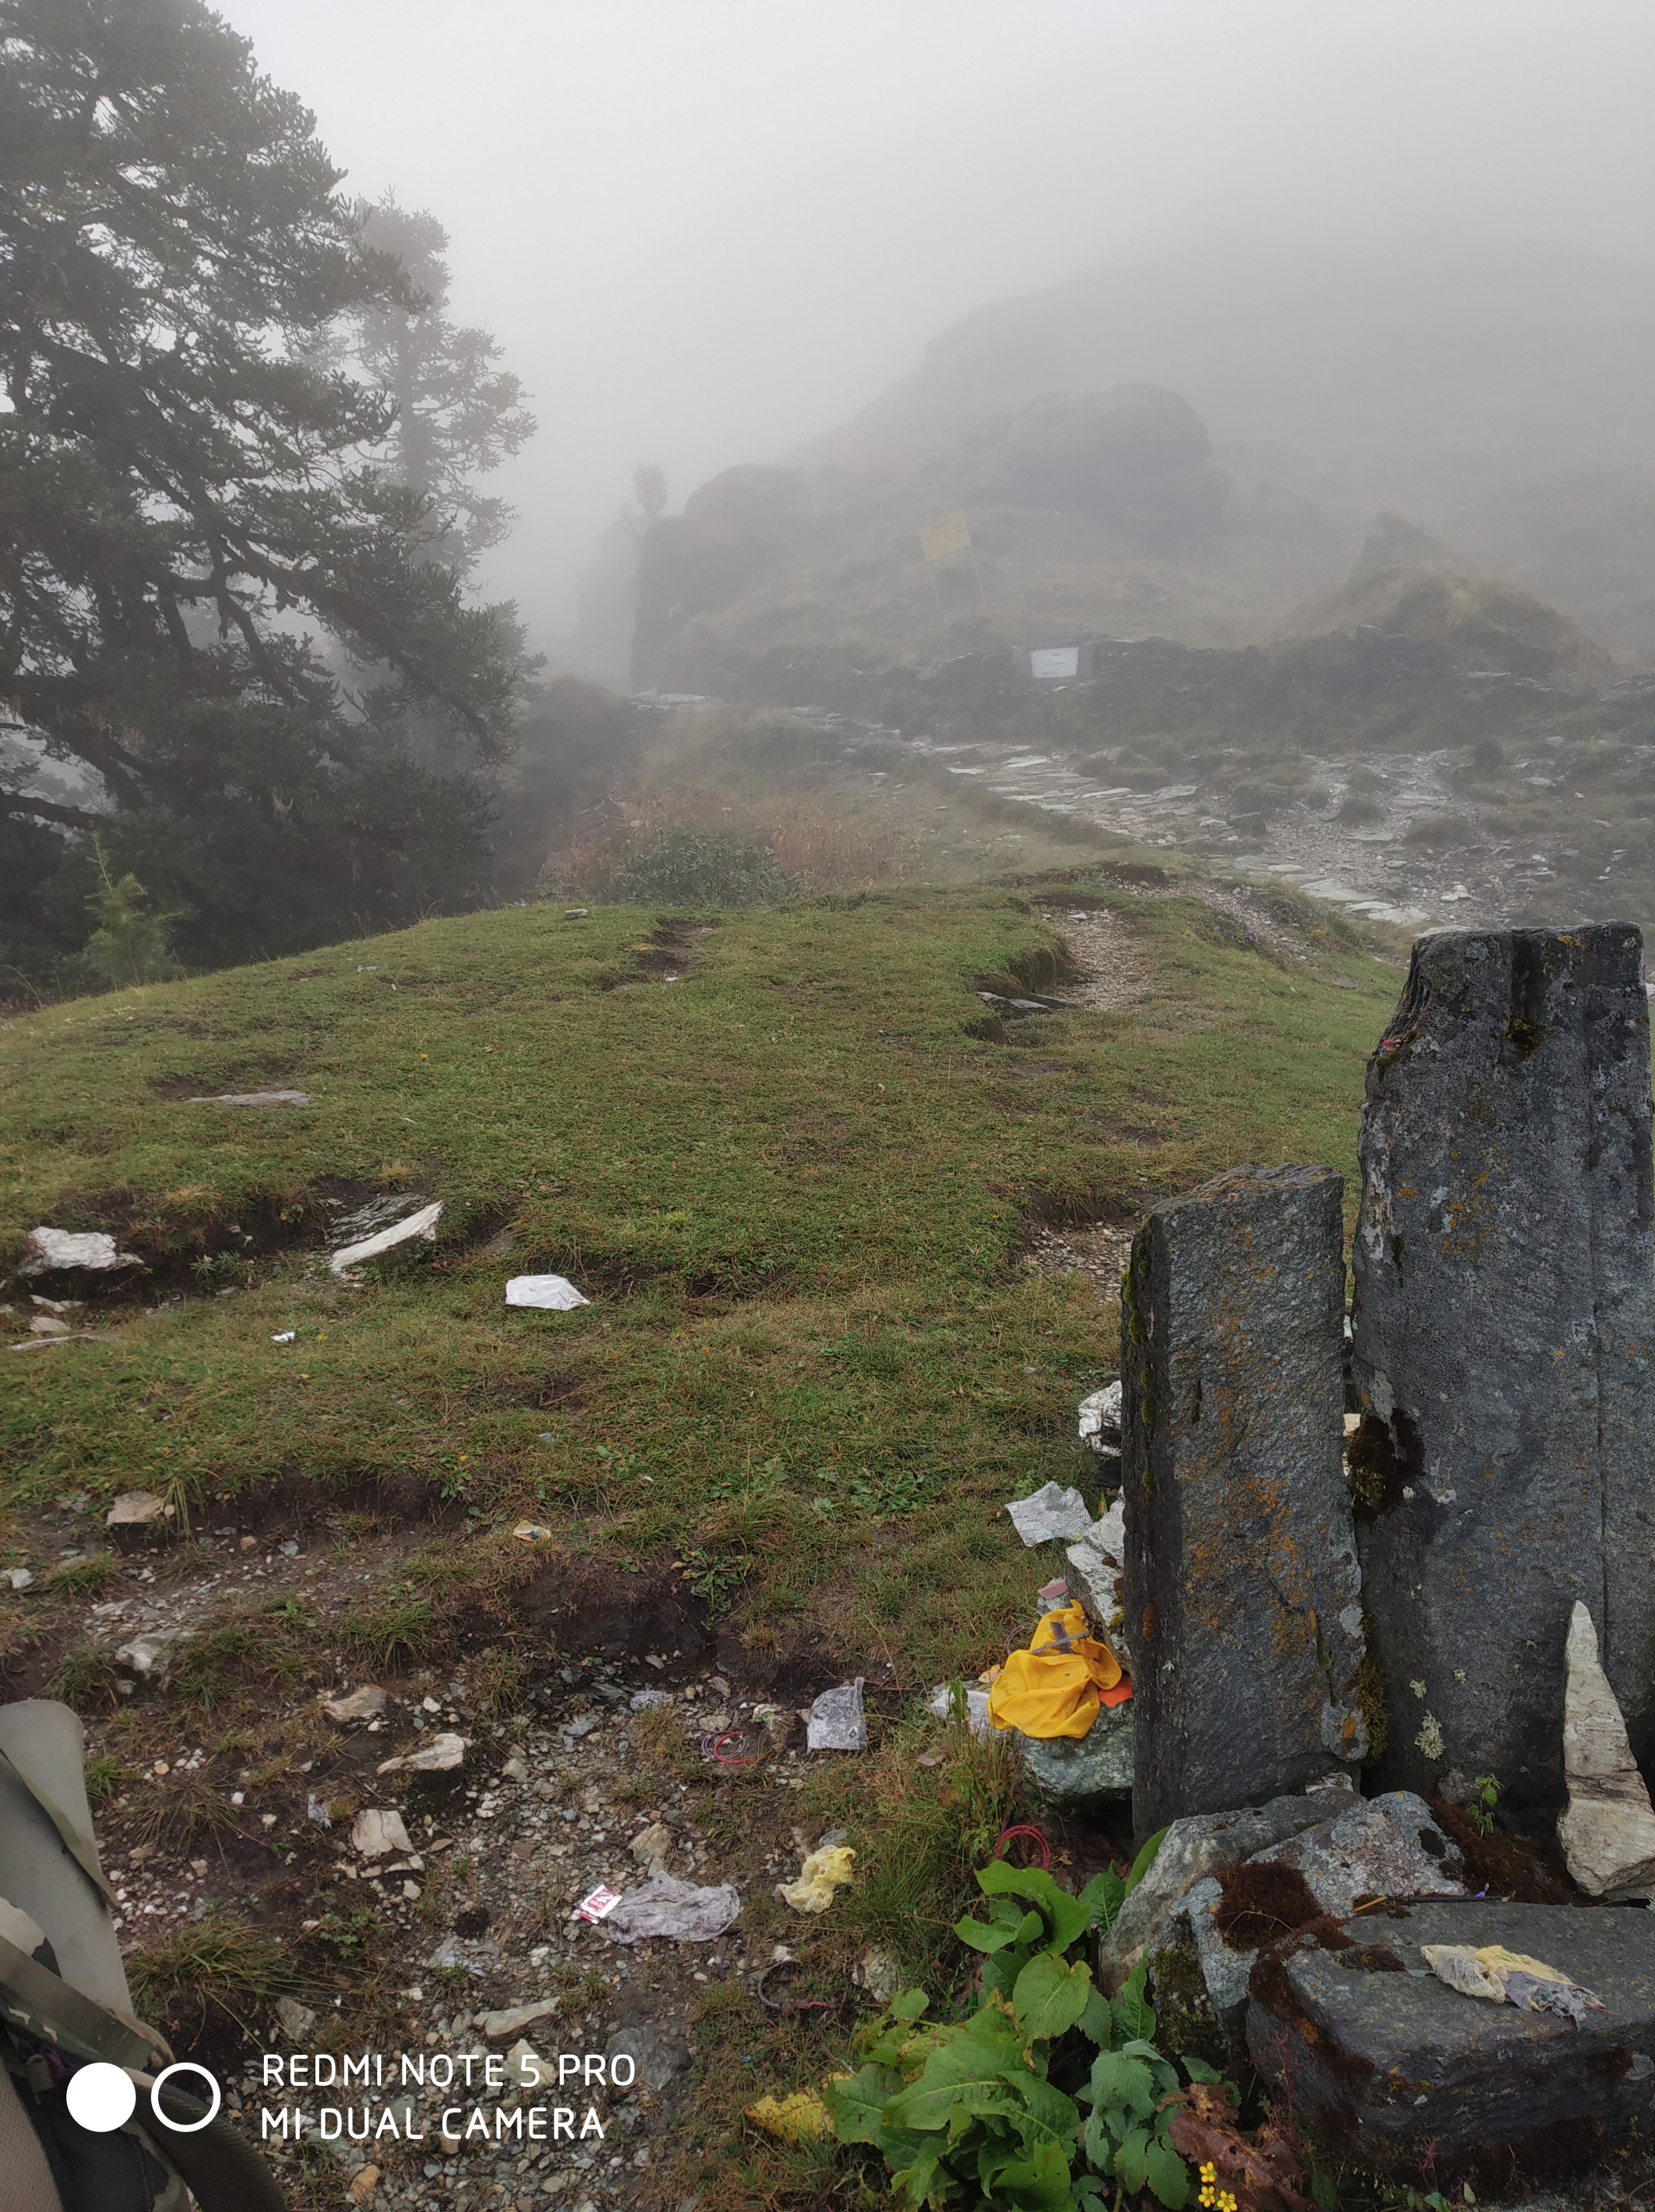
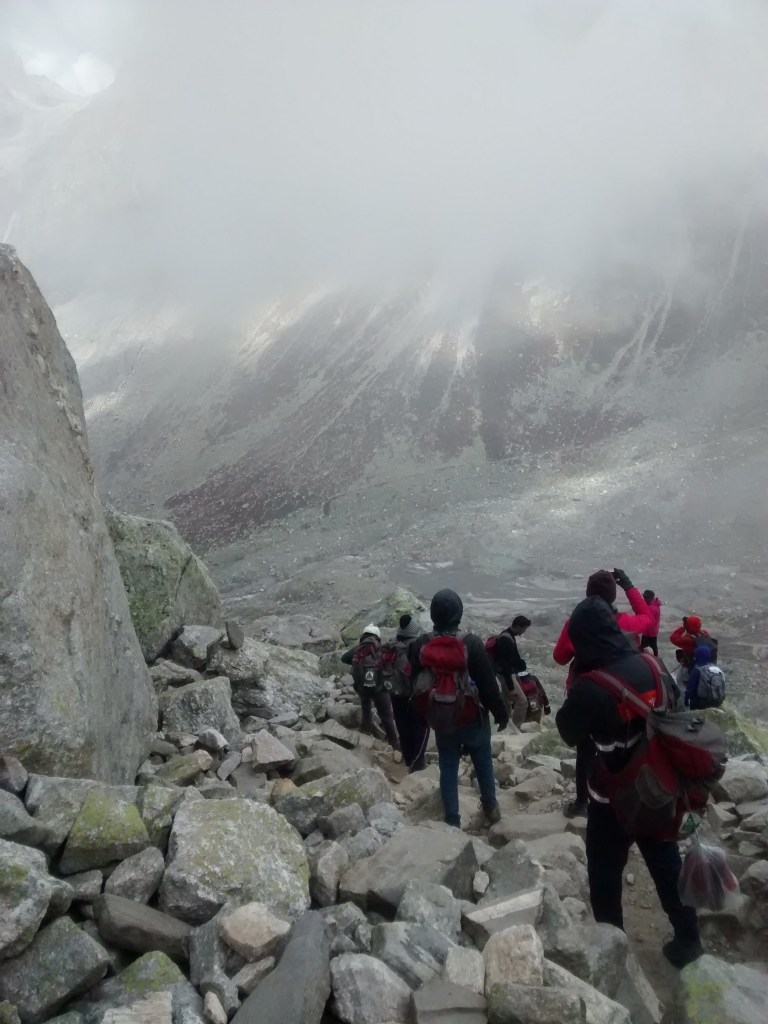
Day – 6 Trek to Siagouru (10,824 ft.) Via Hampta pass (14,100 ft.) 13 km.

This was the longest and difficult day of all. The pass crossing day. The ultimate day for which we came here, trek towards the final destination.

Towards Hampta pass

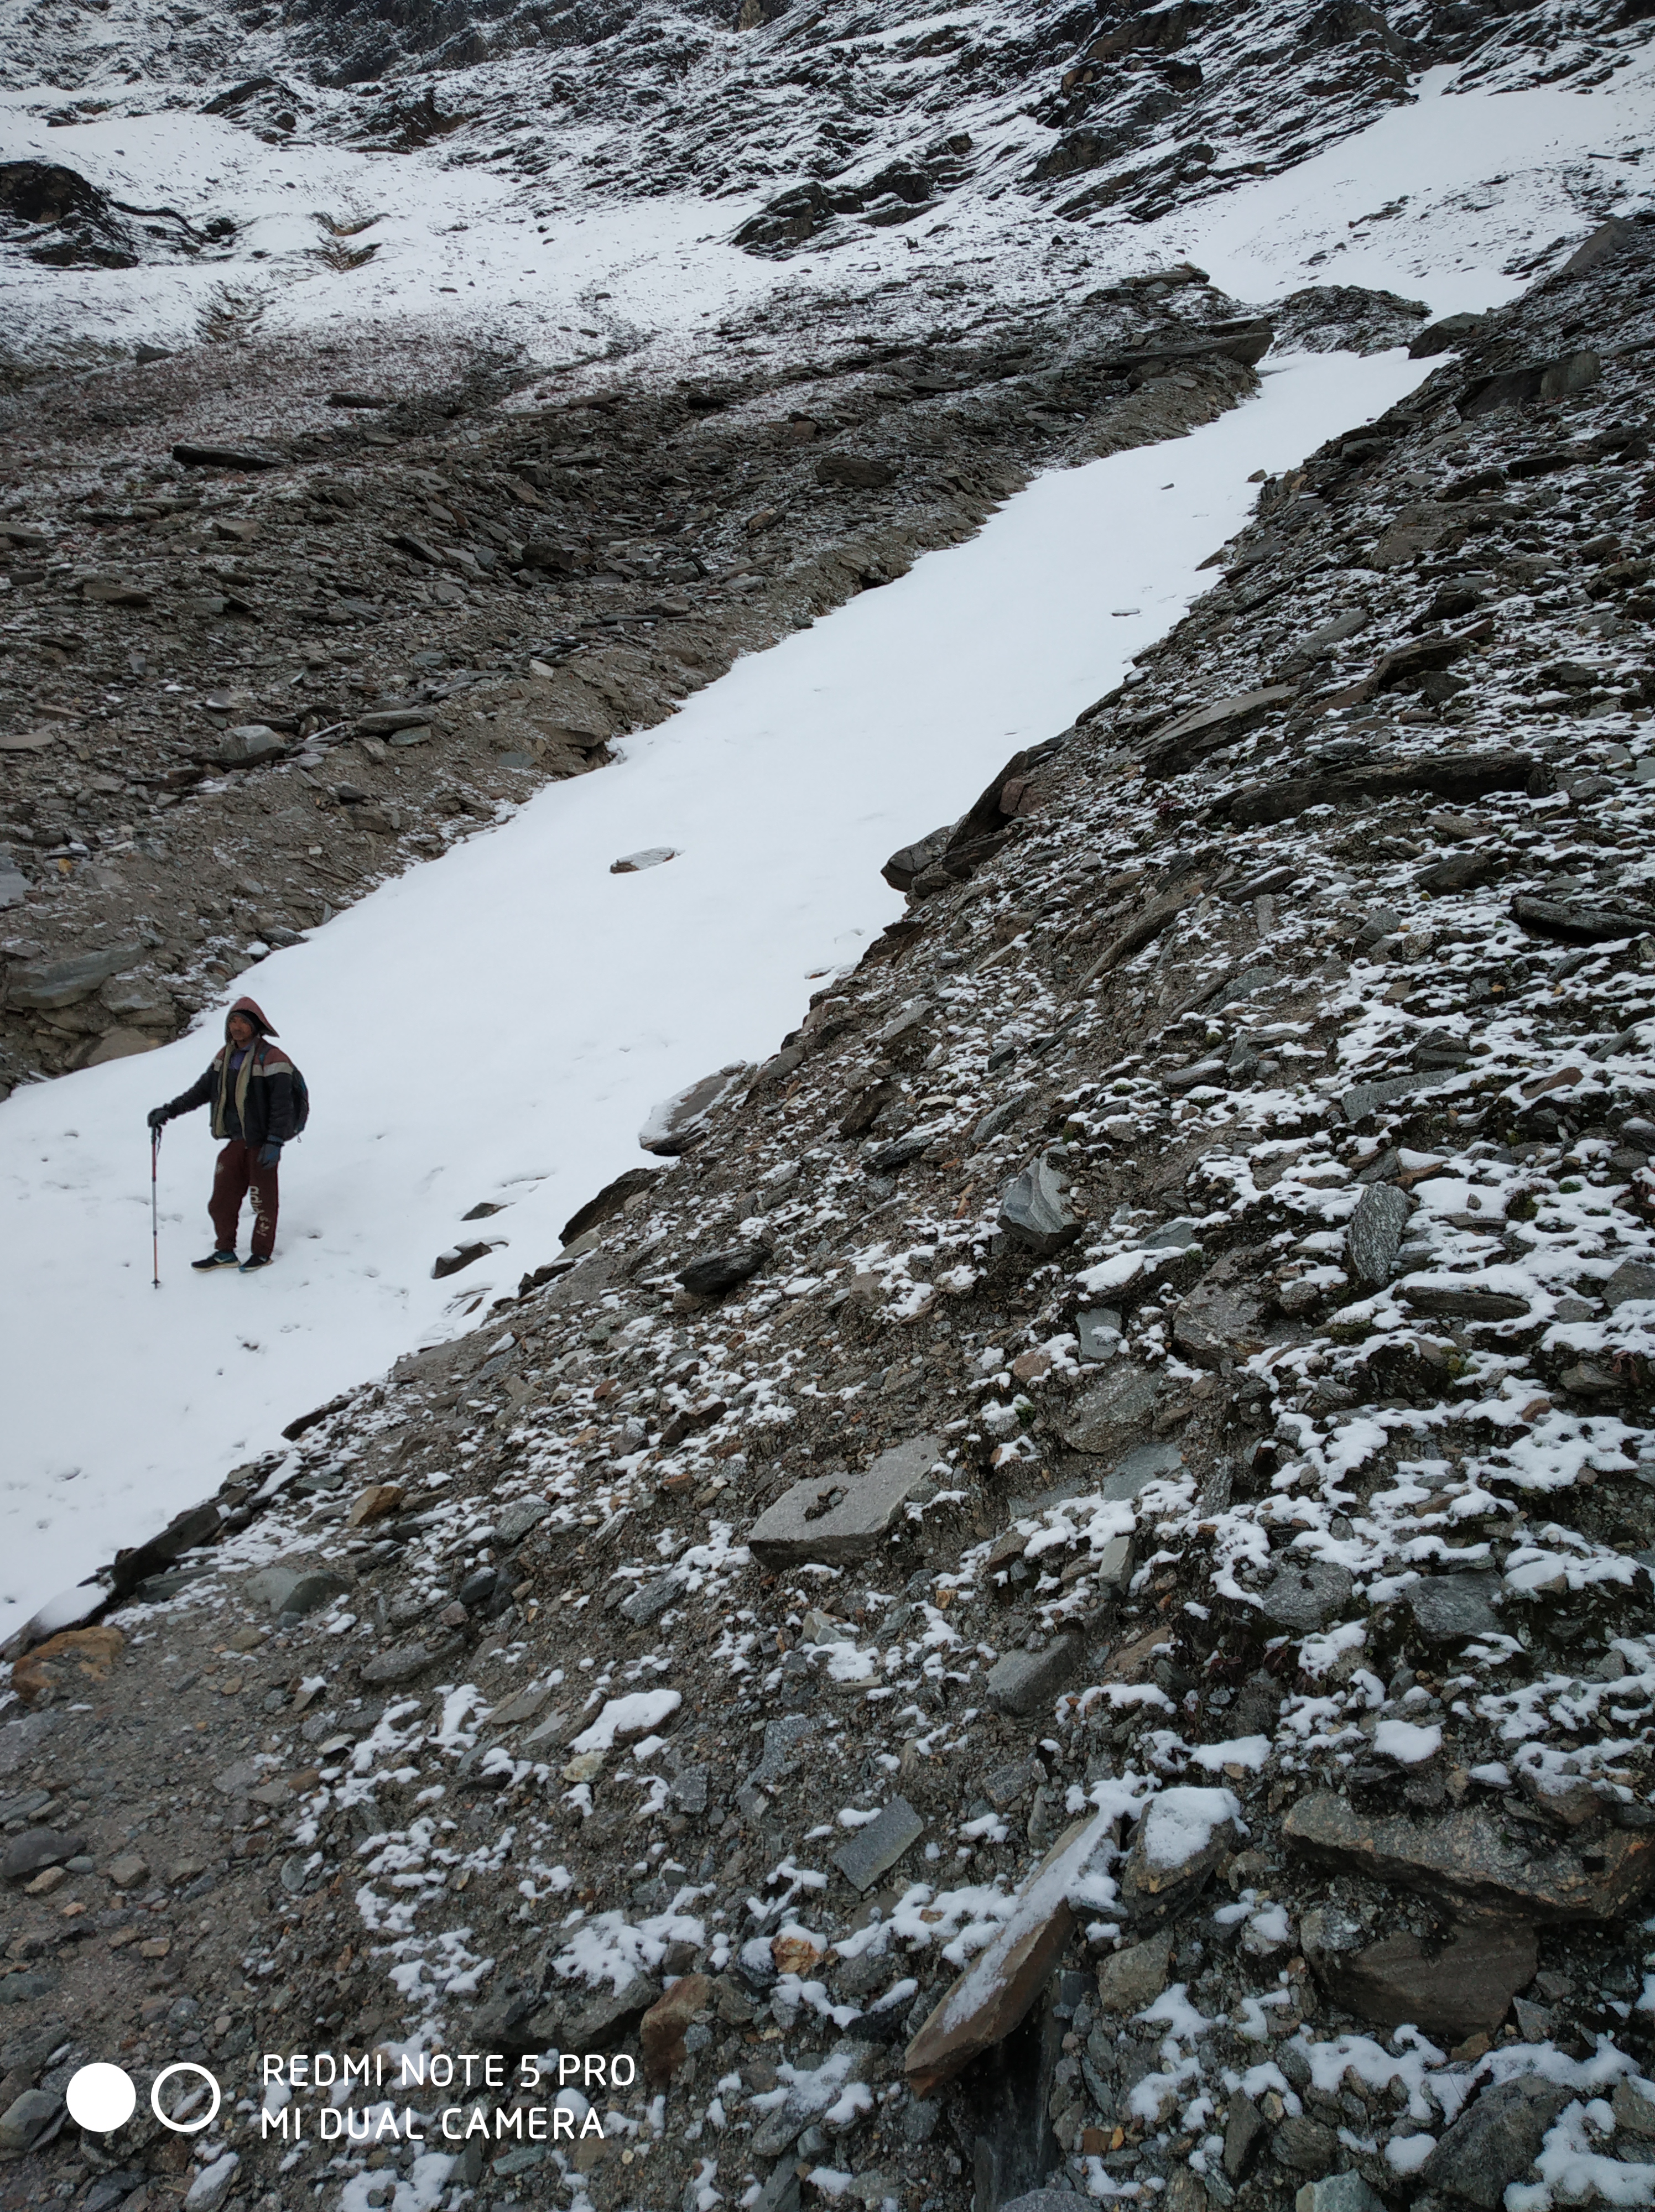
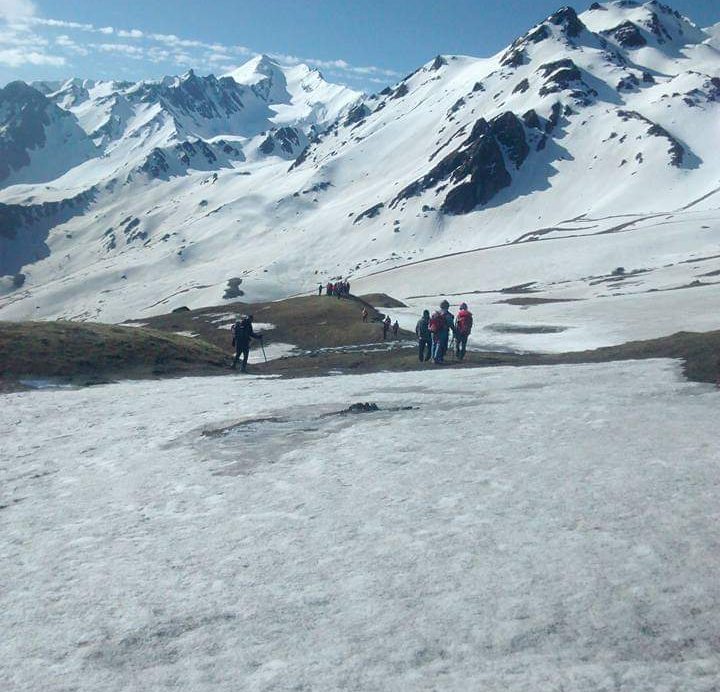
So we started around at 7 in the morning followed by breakfast and packed lunch. Today we started early as it is suggested that on pass crossing day you should reach the pass as early as possible for the better views and weather. As the weather is unpredictable in the mountains especially at 14,100 ft. Height, same goes for the peak climbing also, the early you reach the better you will get the views and weather. It was a steep climb till Hampta and then steep descend till Siagouru.

Just before climibing

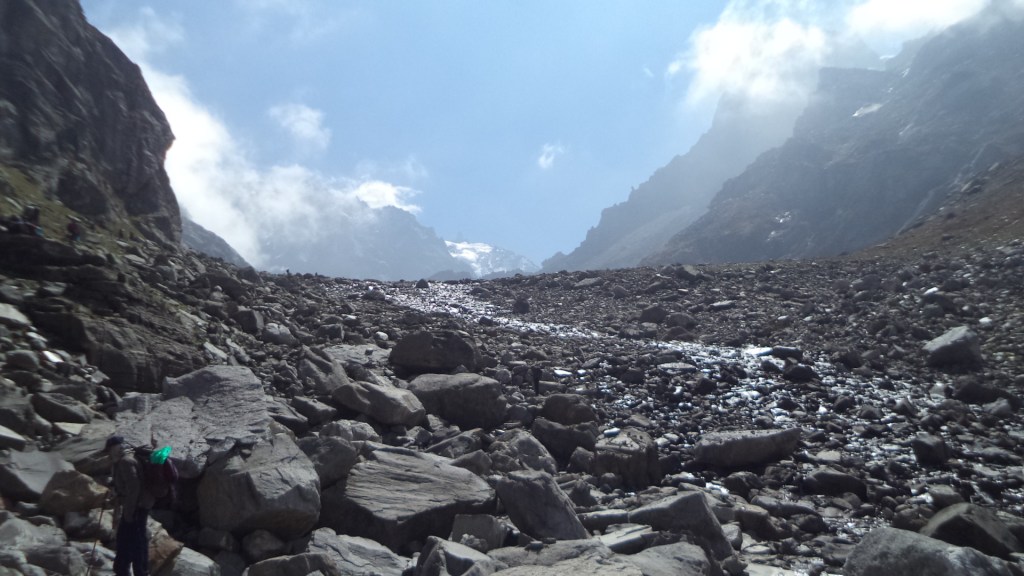
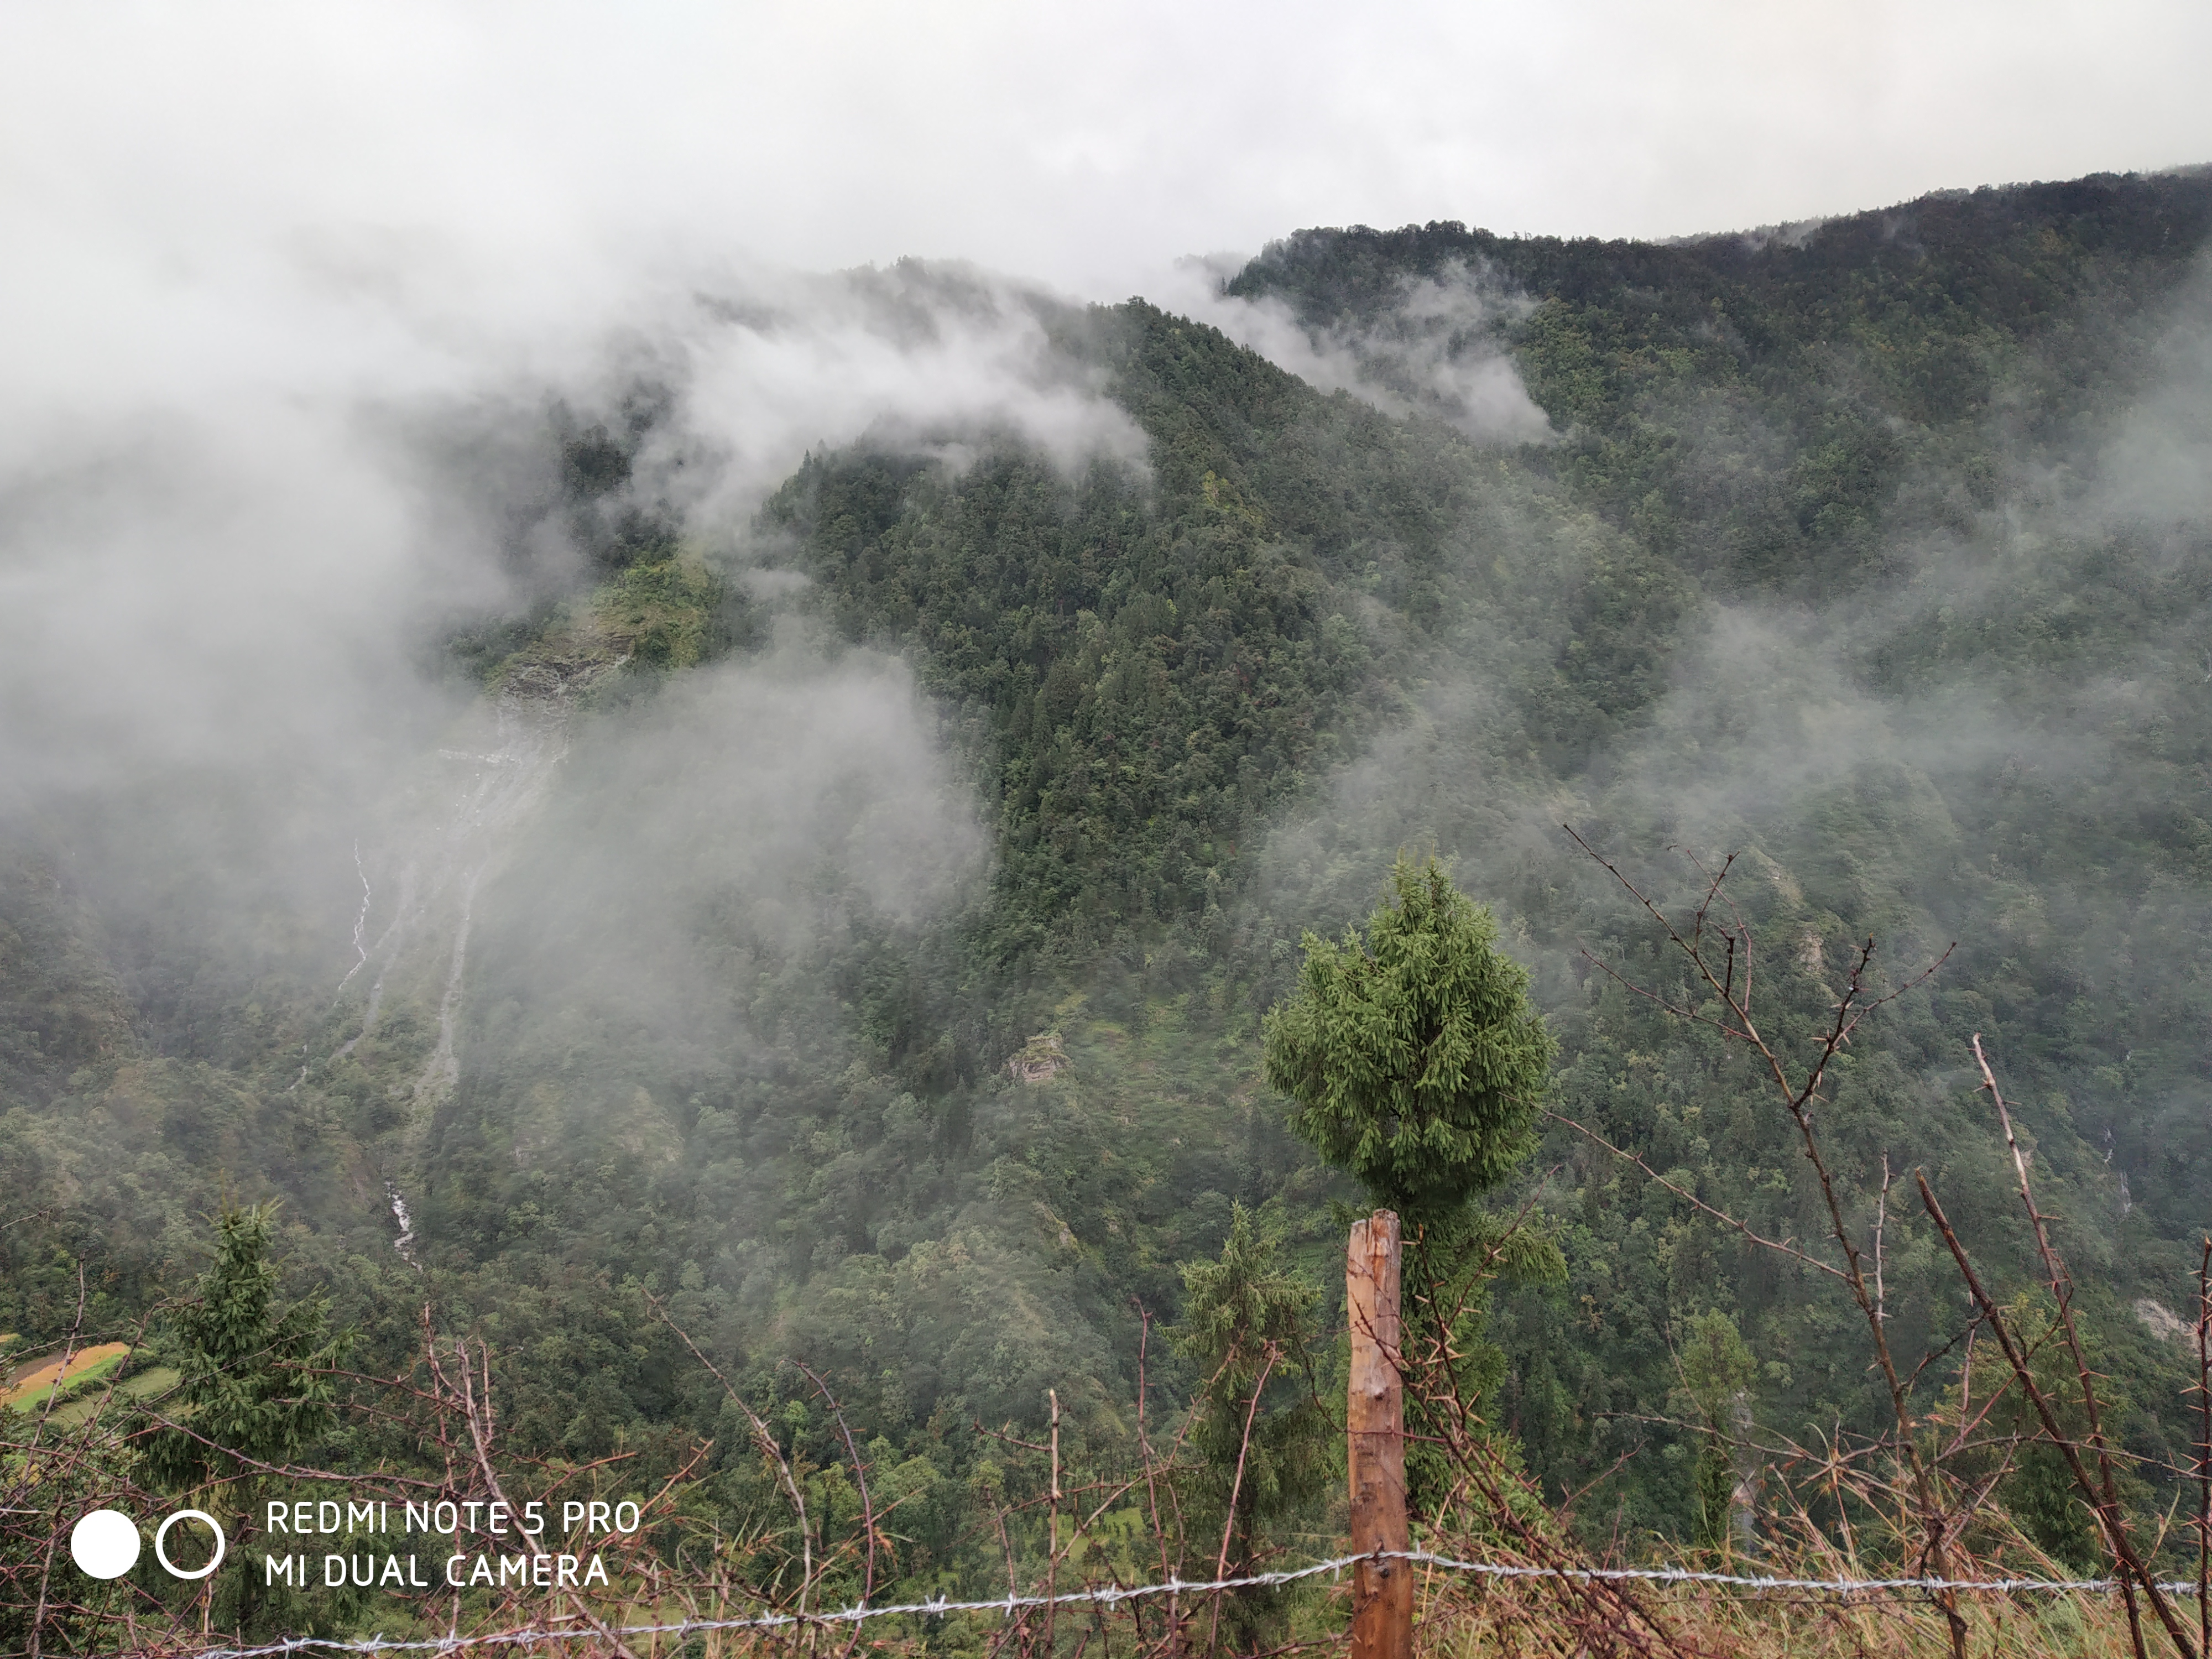
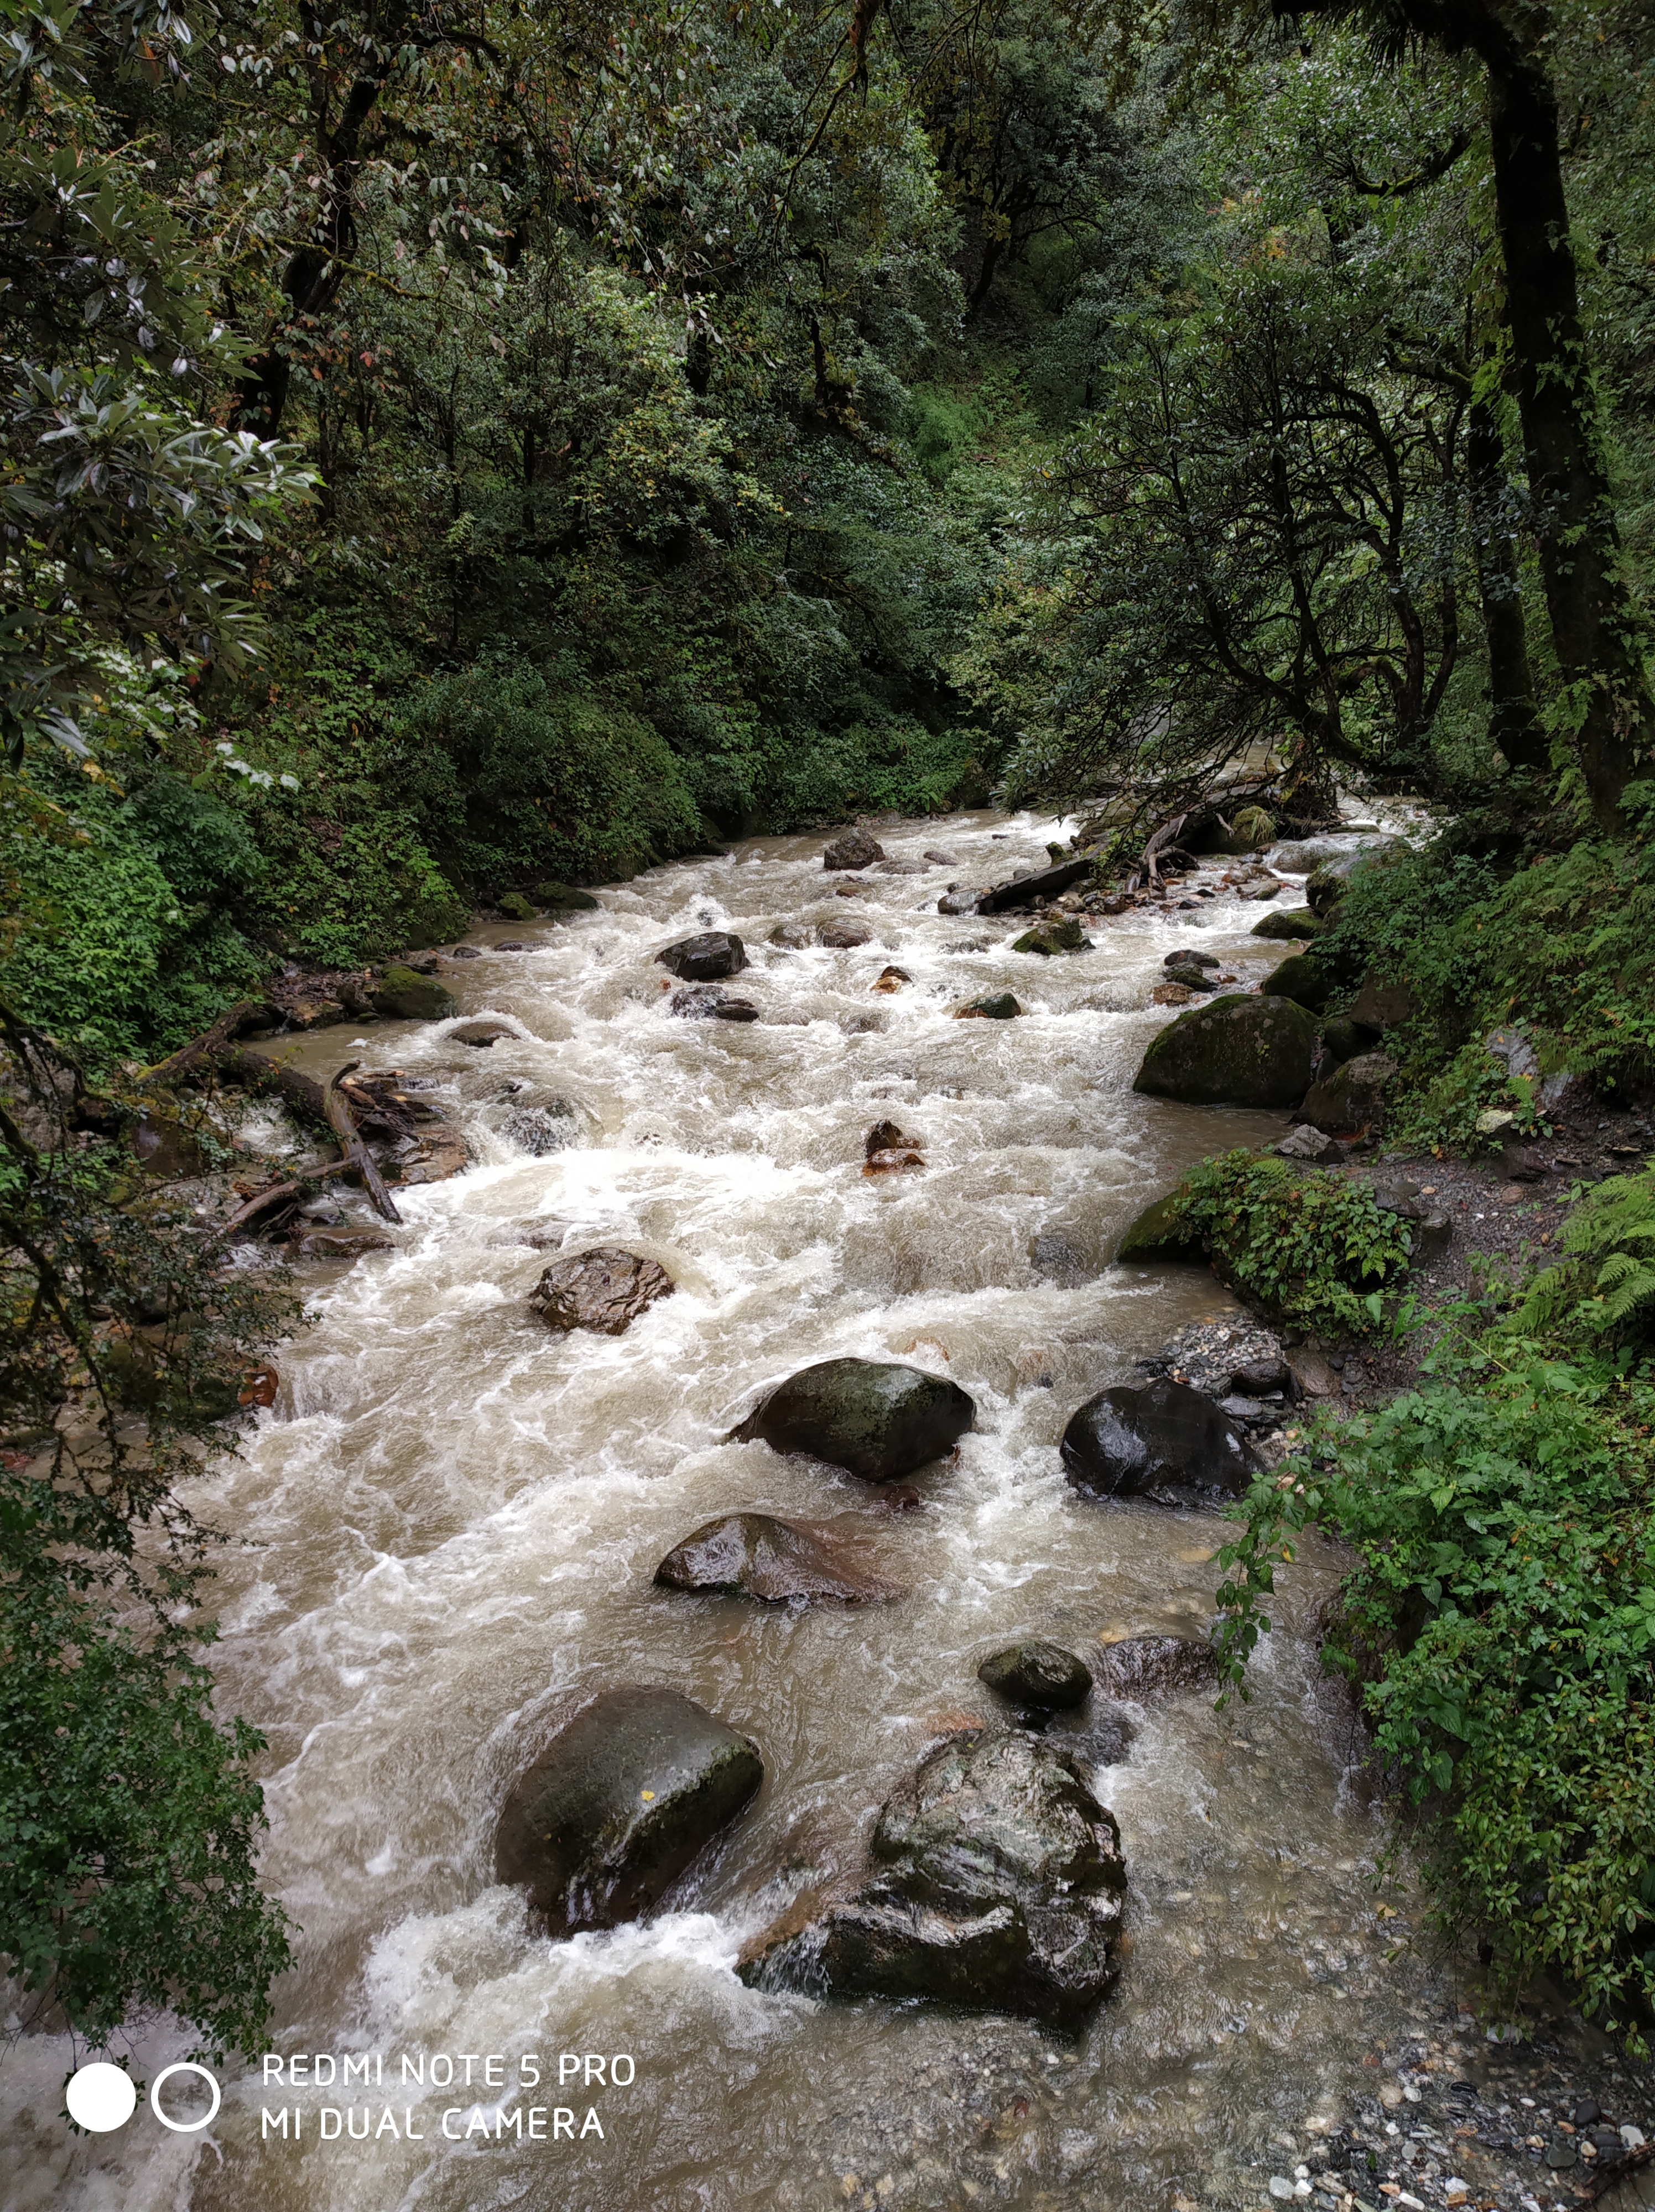
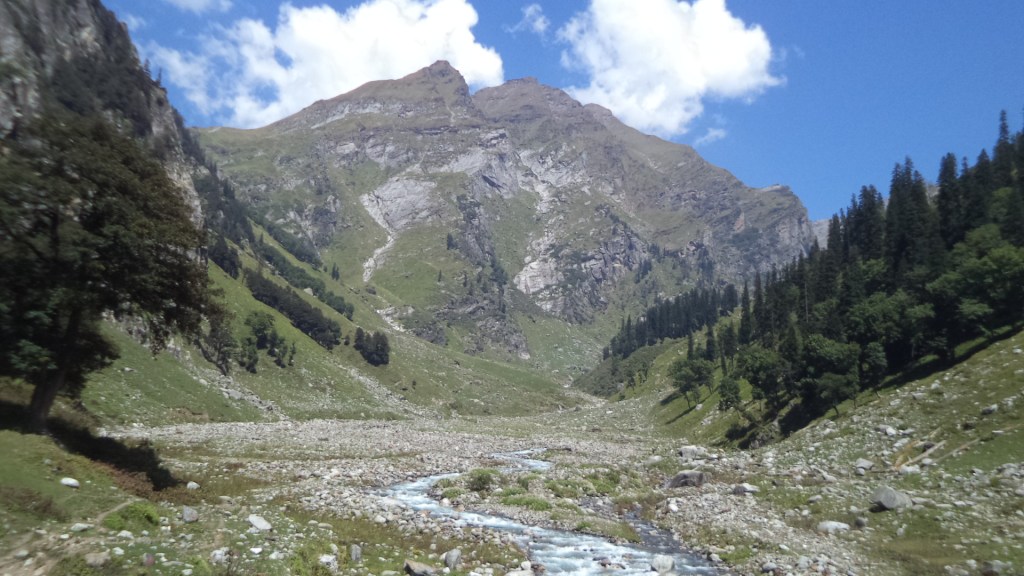
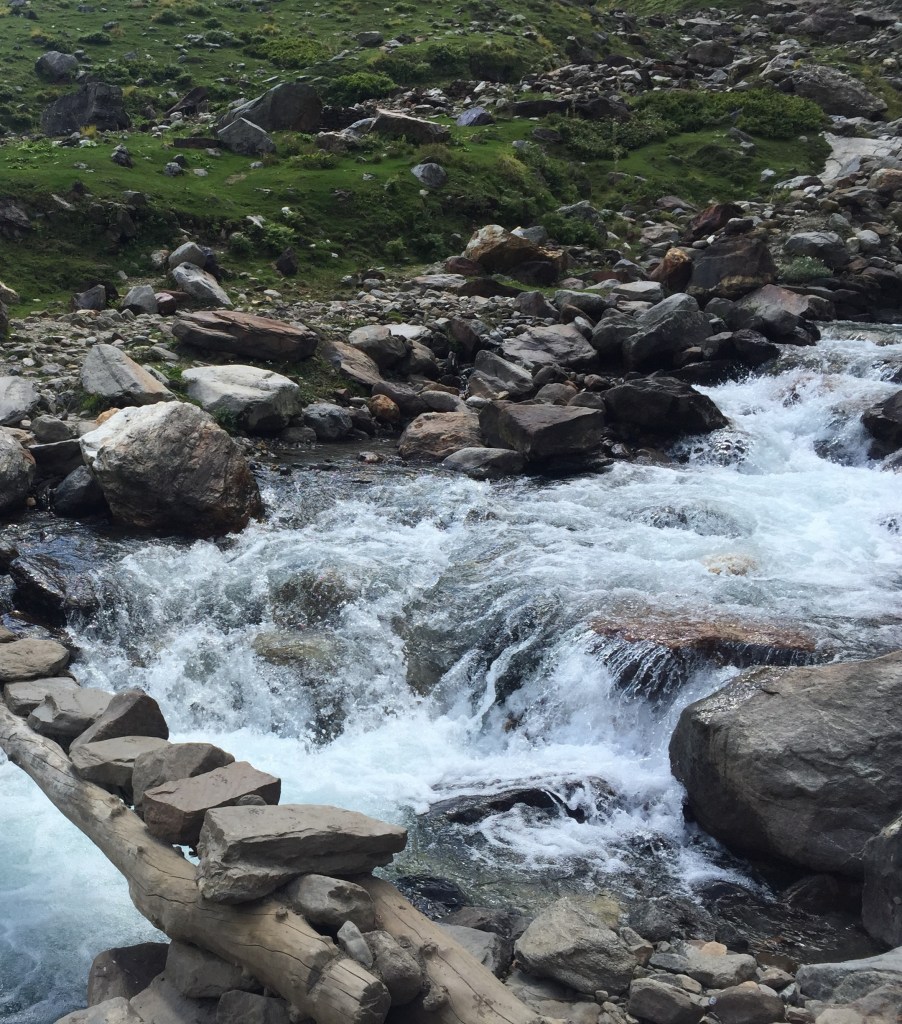
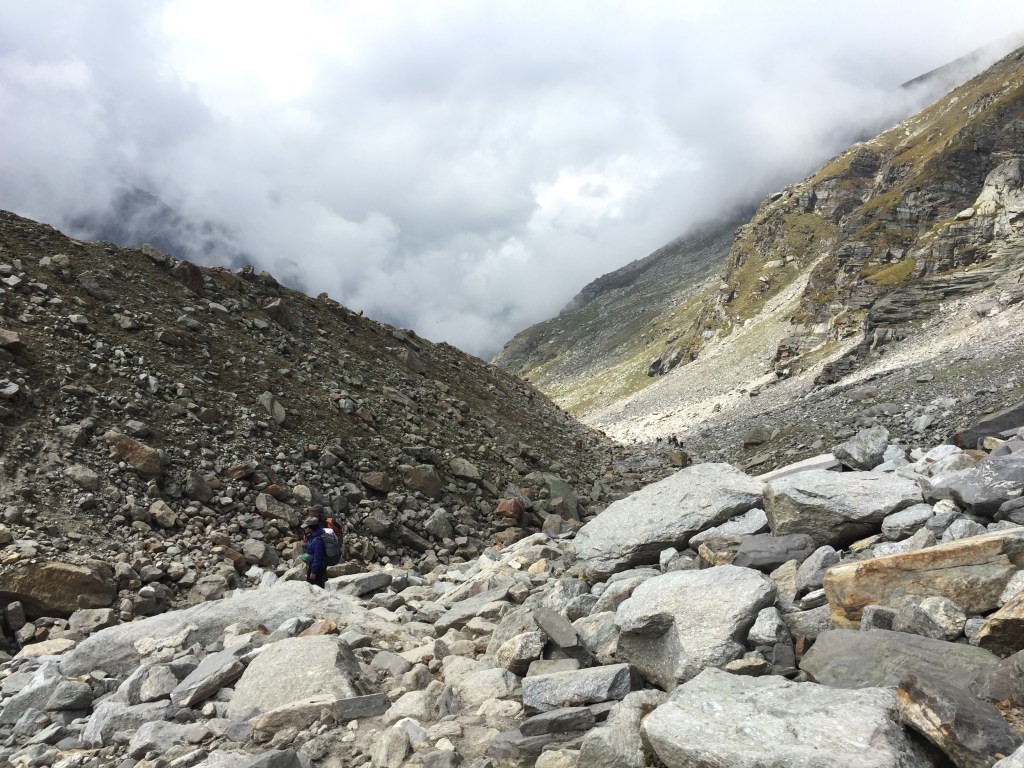
The stream which is flowing in the pic it’s called ‘Hampta river’. It was a difficult terrain as we needed to walk on rocks, some were big and some were small loose rocks. It is advisable to use a trekking pole, especially on pass crossing day. It was a 1-hour gradual walk-in rockfall prone area till the starting point of climbing.

Towards Hampta

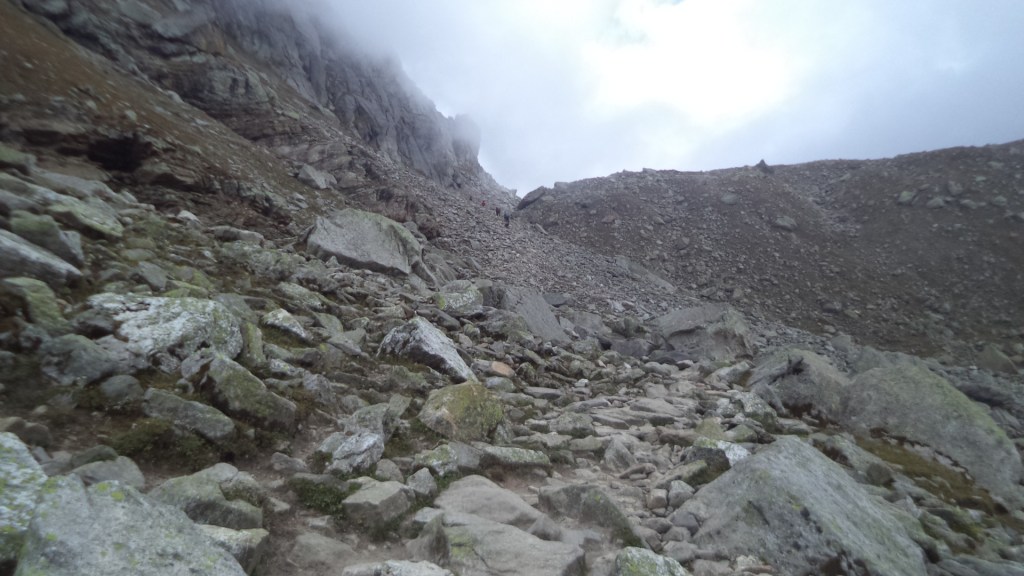
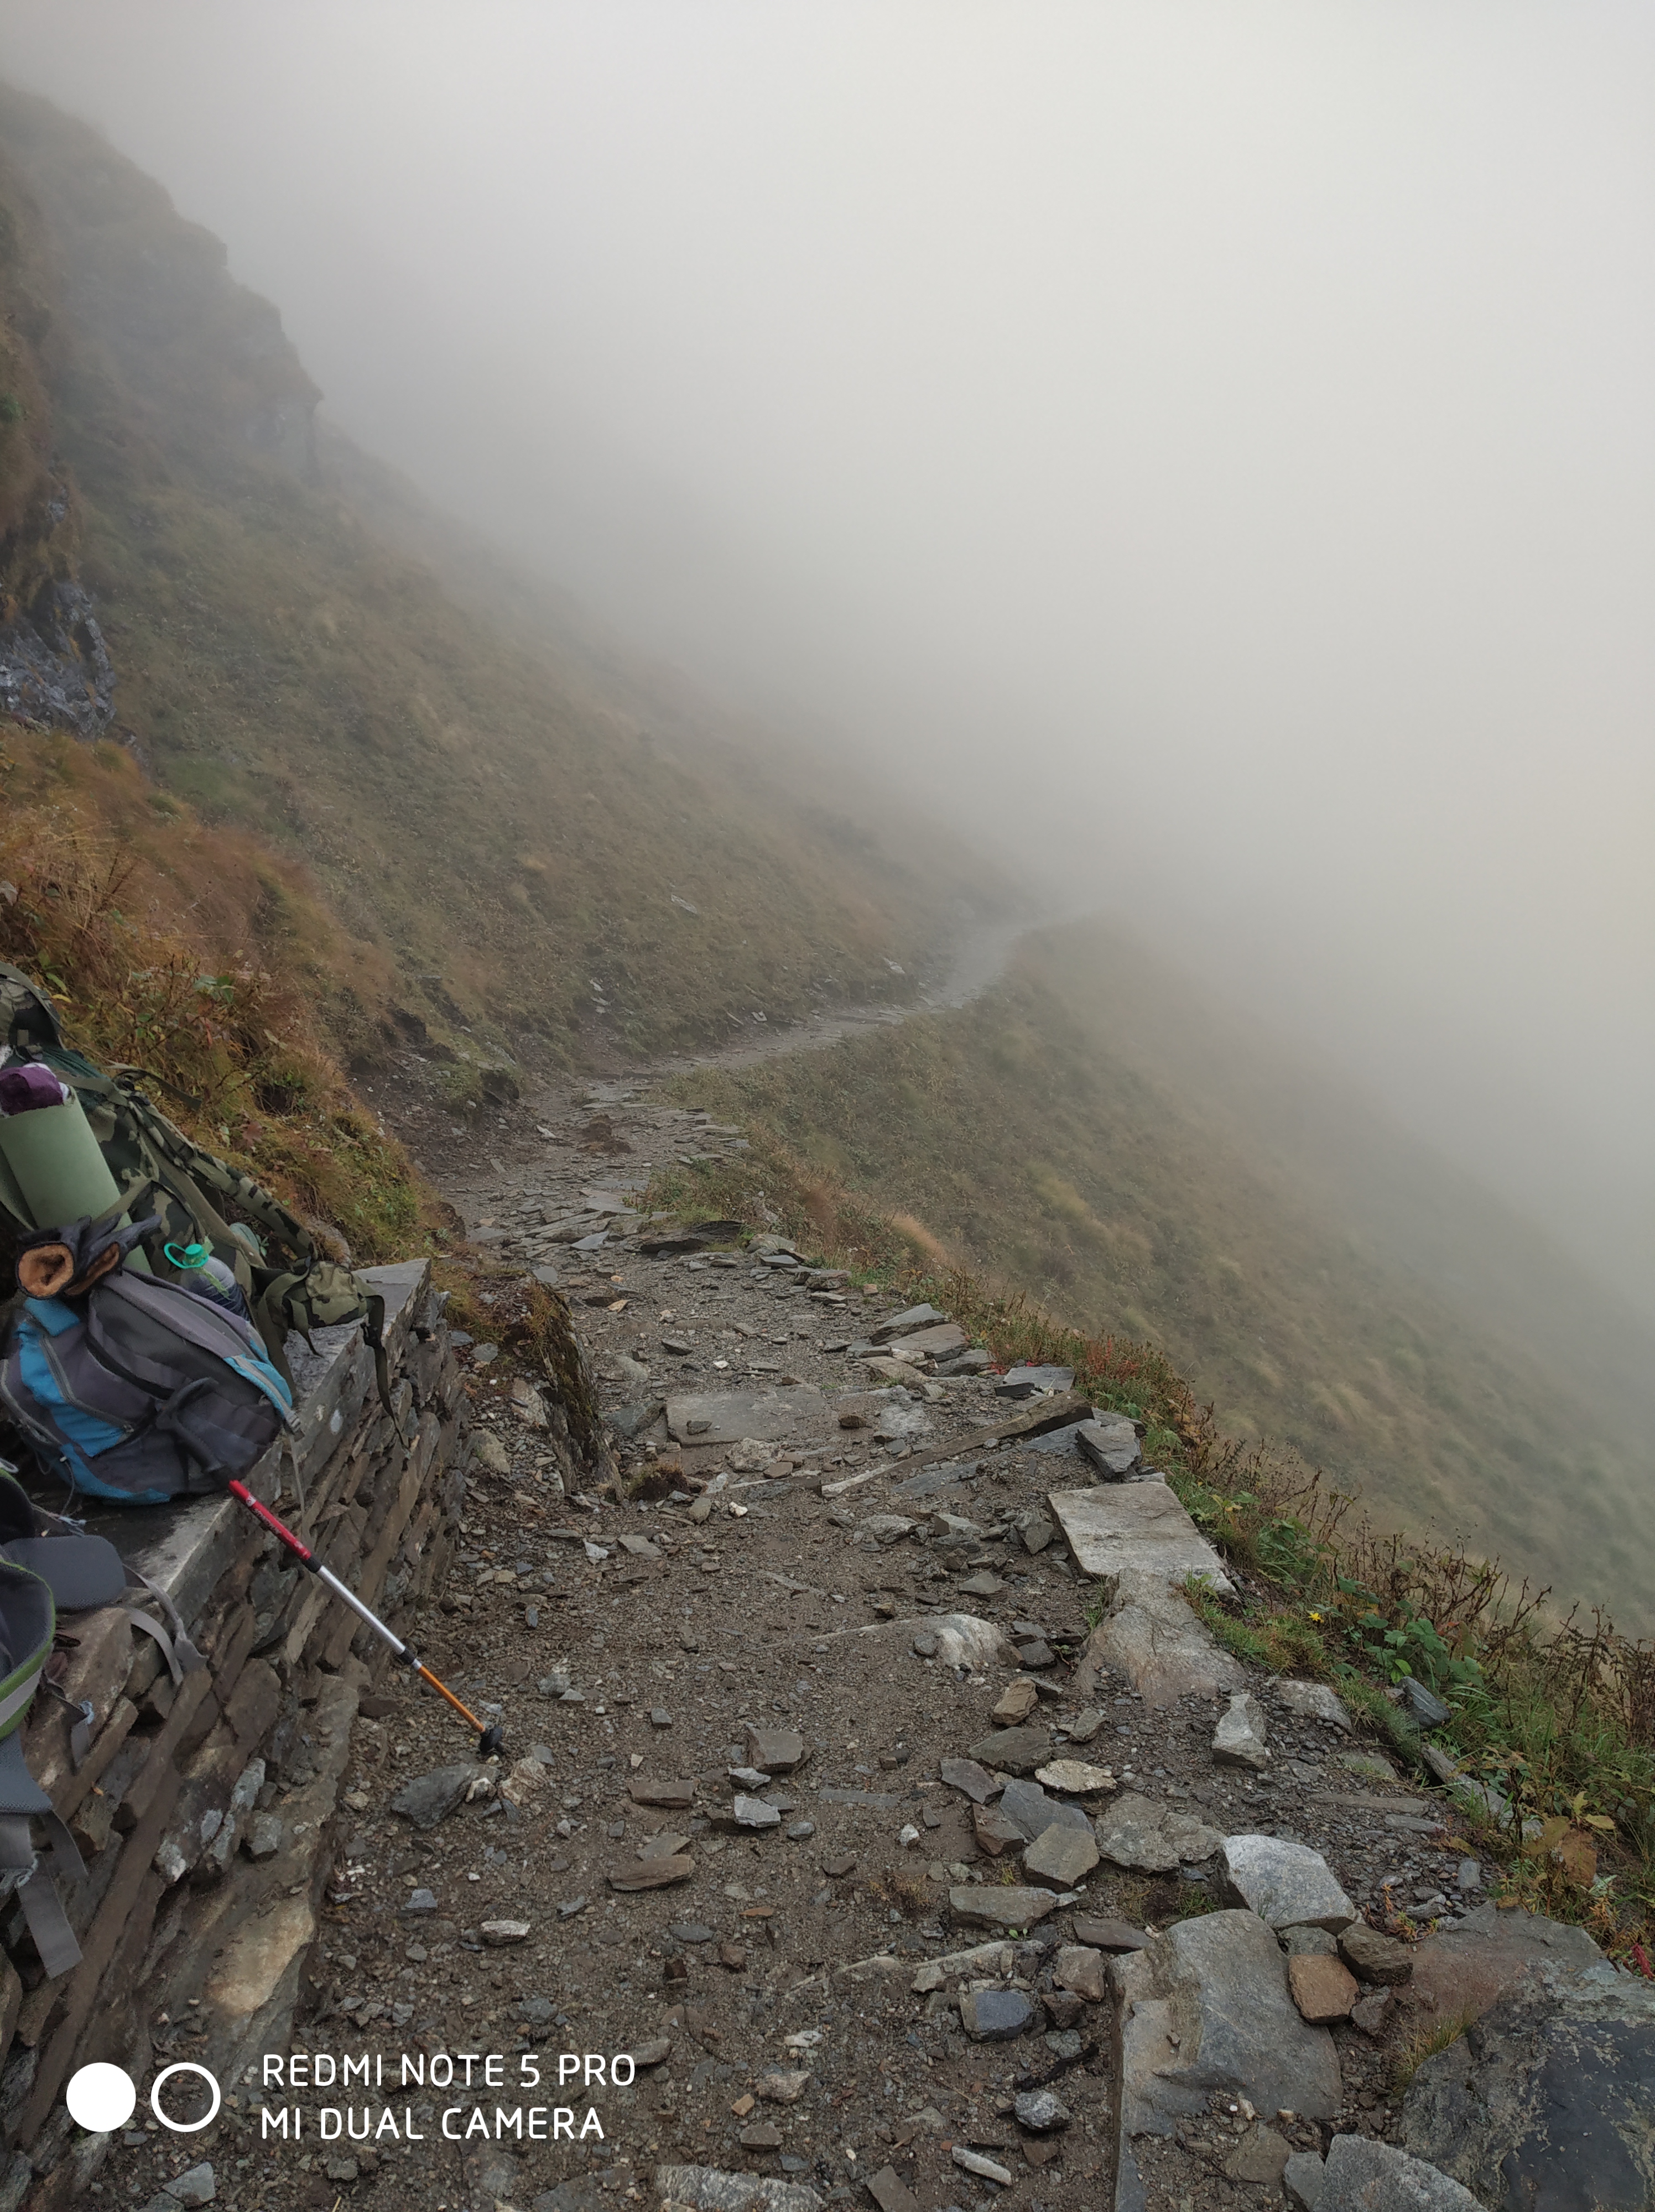
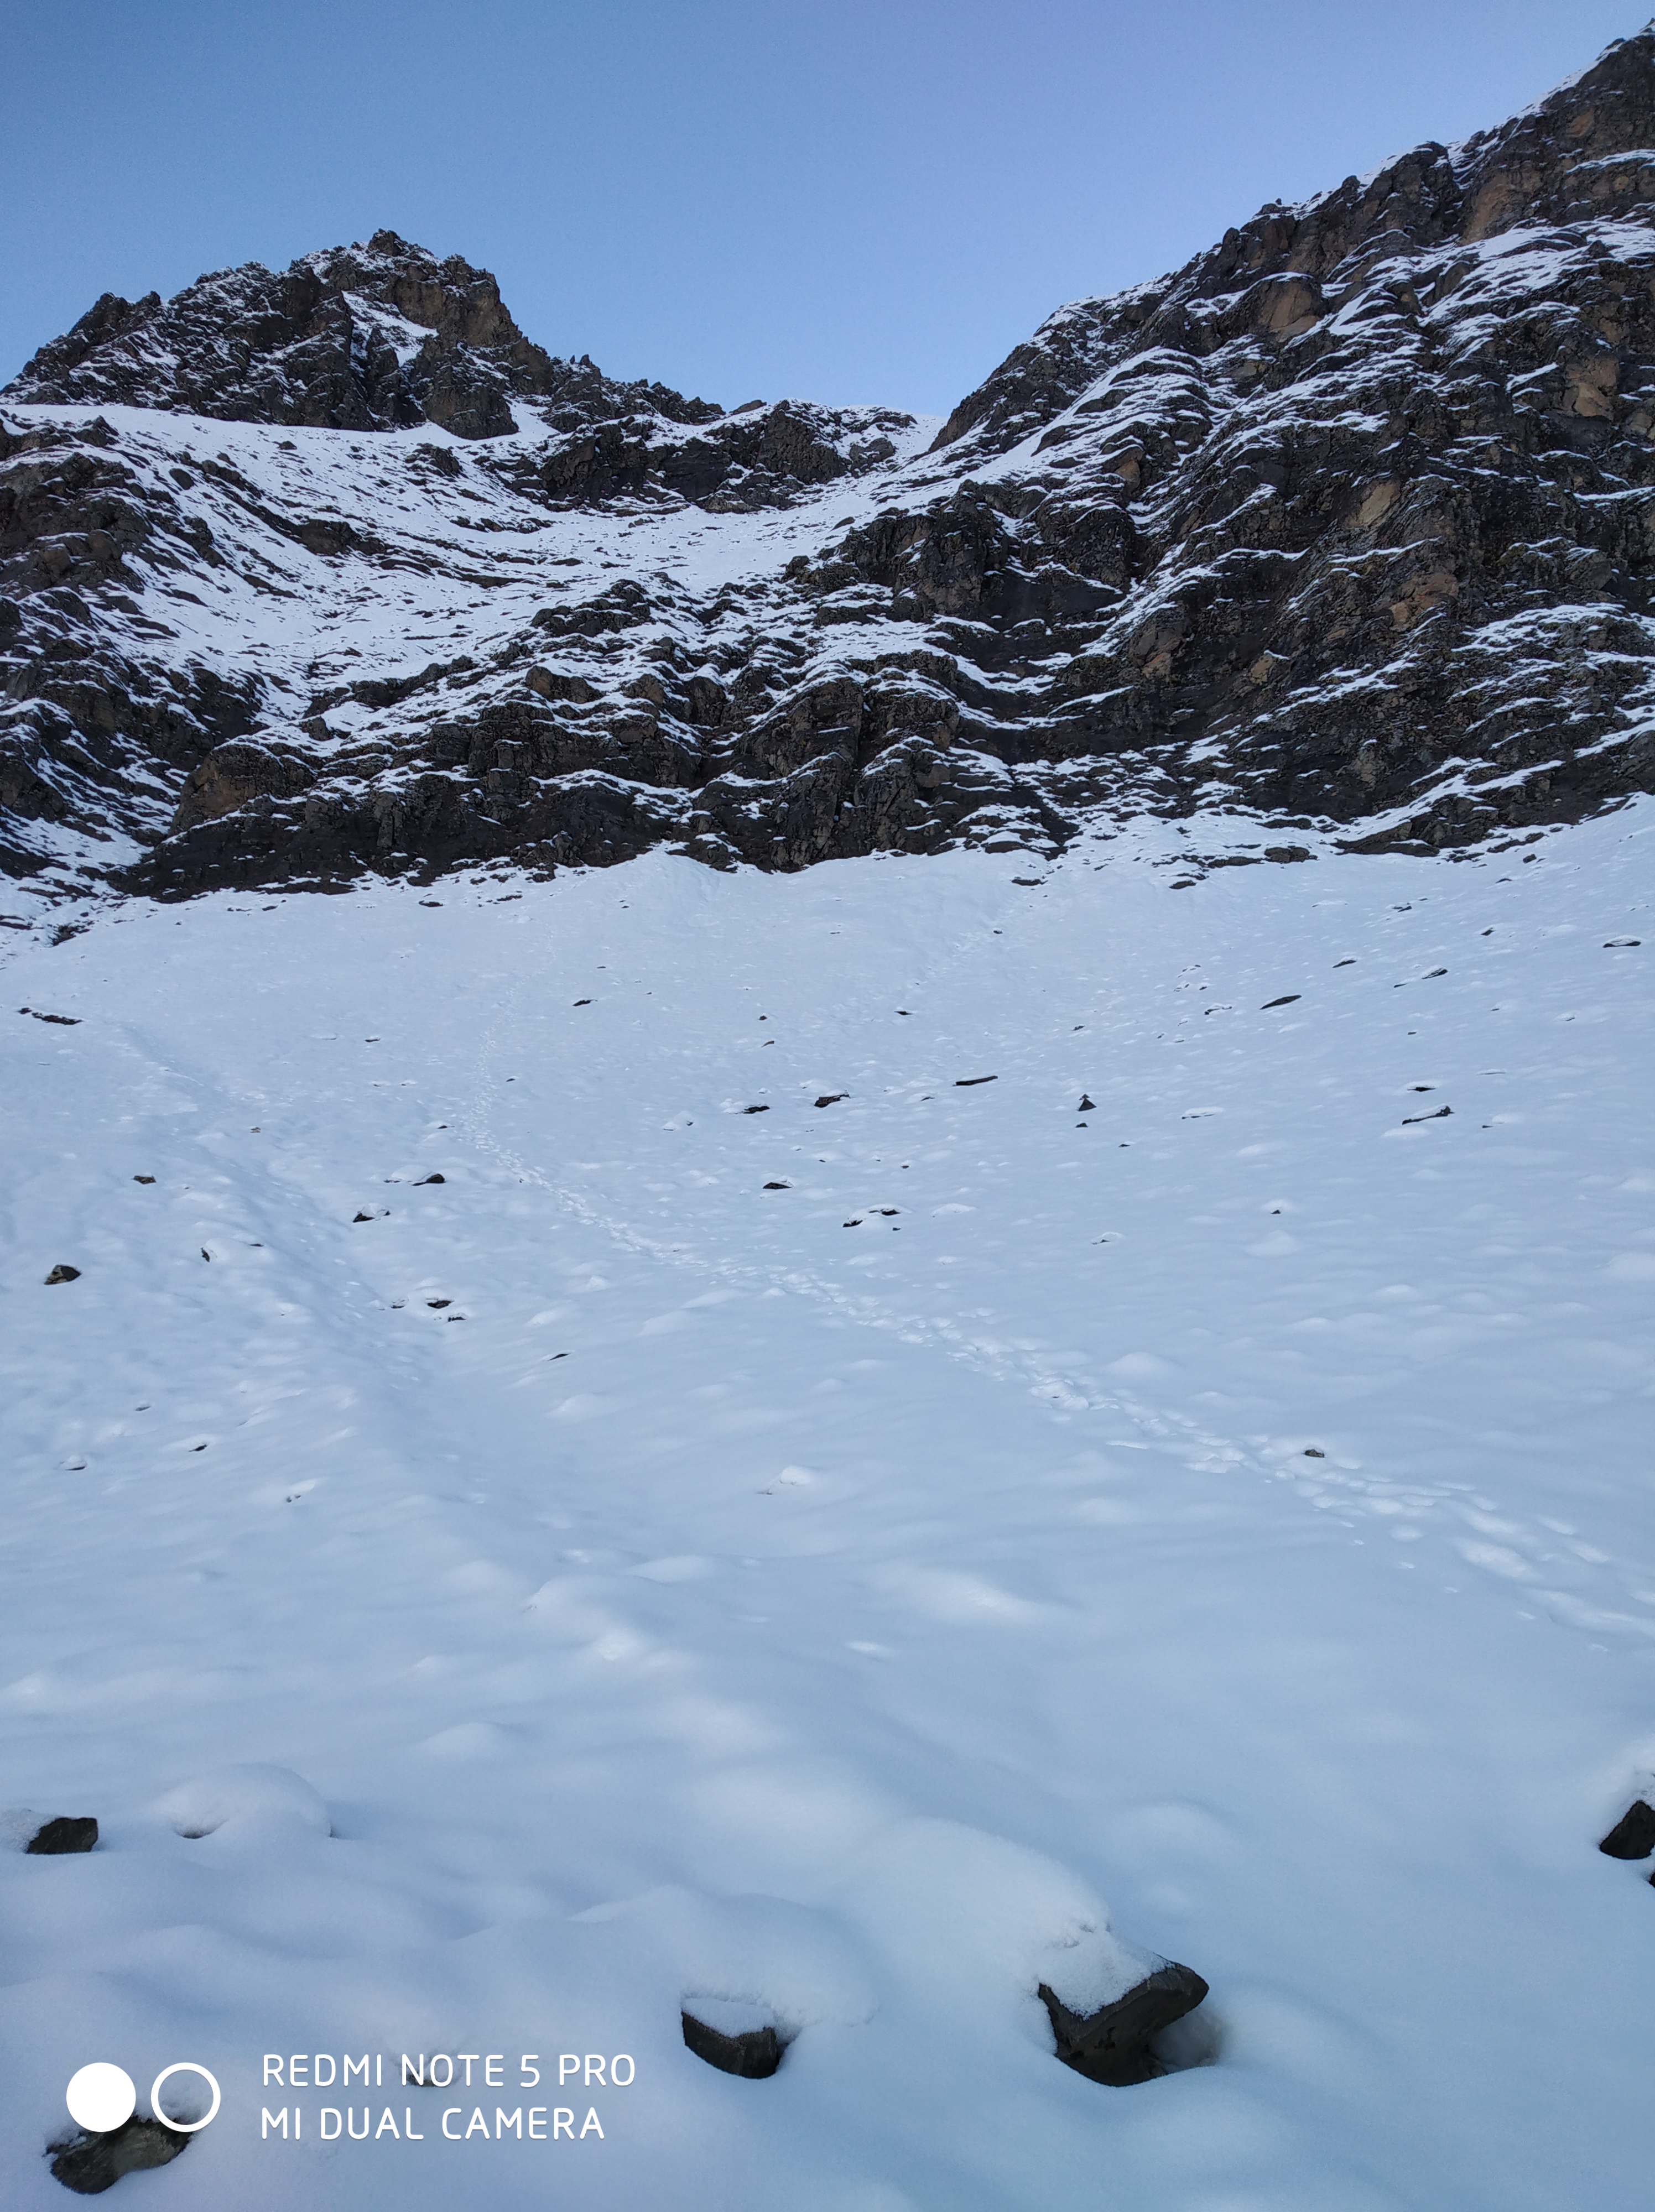
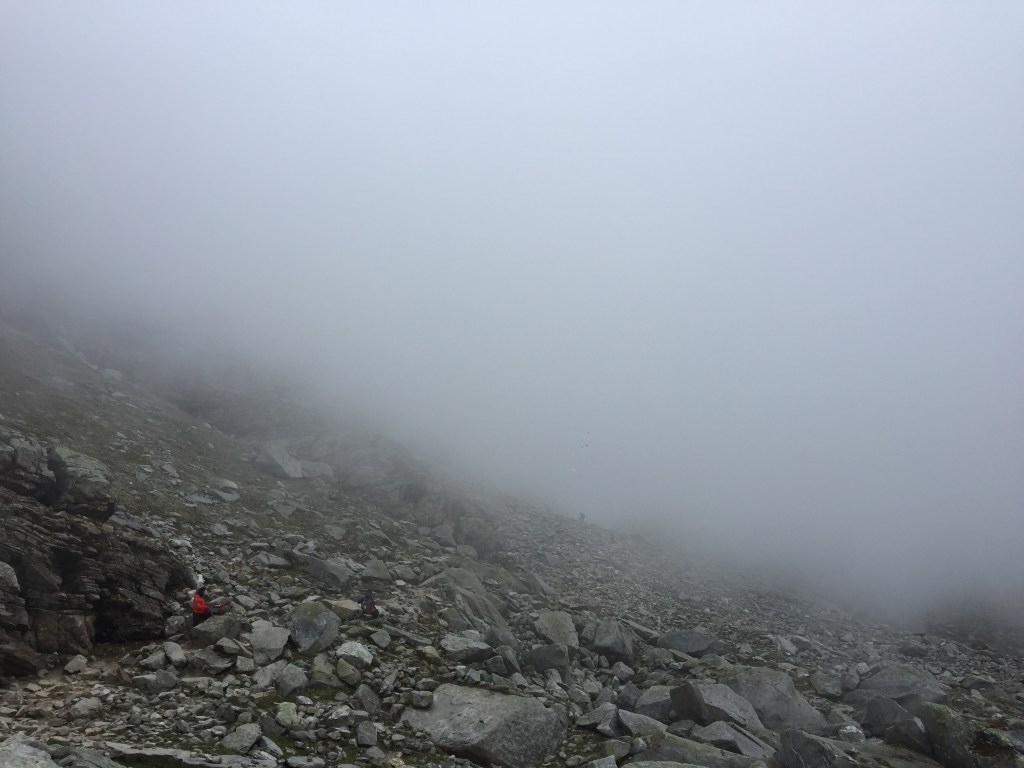
There is some point where you may get lost because you cannot see the trail. The trail vanishes so make sure you are with your team and not to get lost. Even we got the instructions from our trek leader that not to lose the sight of fellow trekker, always stay close otherwise you may get lost. The weather was perfect when we started but suddenly it changed as we were nearing Hampta pass. We wanted perfect weather but the mountain had the other plans, for every 5 minutes we got a fog wave, it was so dense you cannot even see the trekker in front of you (around 5 metres ahead of you). At one point even I also lost the trail, some trekkers were behind me and those ahead vanished. I was just stuck there for a while but finally, I got the way.

Route from where we came (PC: NAVEEN BHARADWAJ)

We had our lunch in the way. We reached Hampta at around 11 in the morning, approx 4 hours from Balu ka Ghera.

Weather sometime later

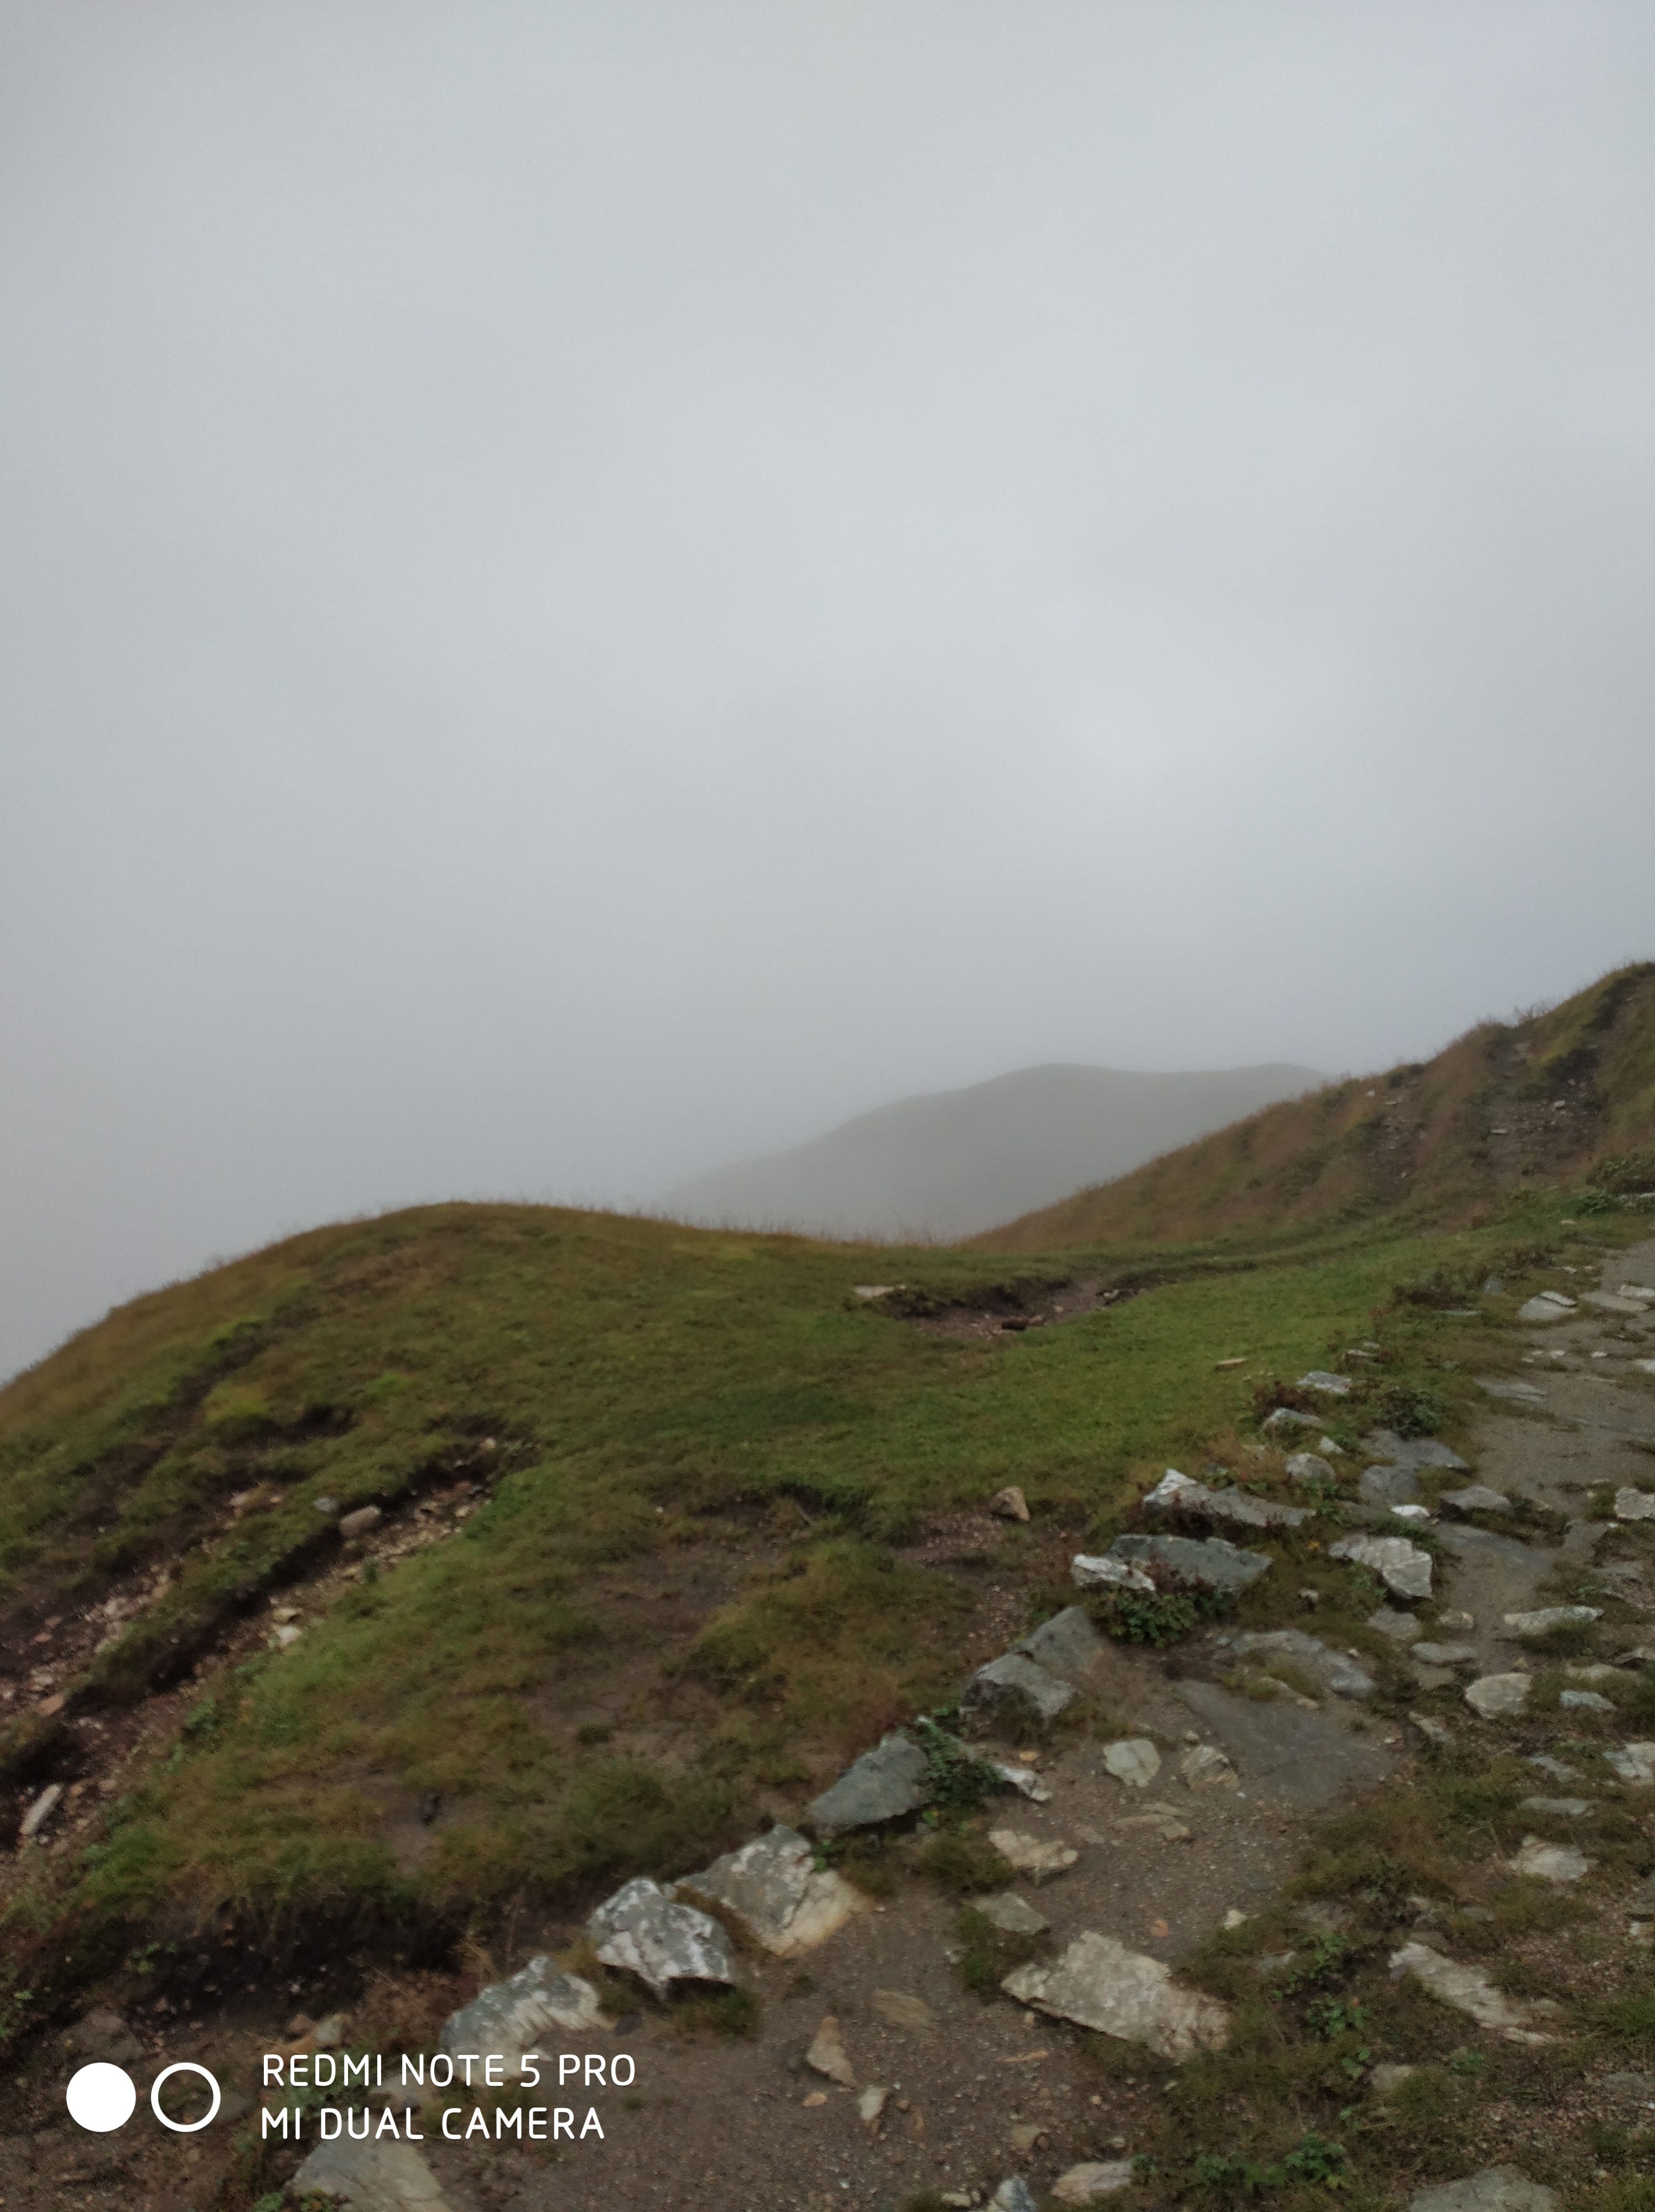
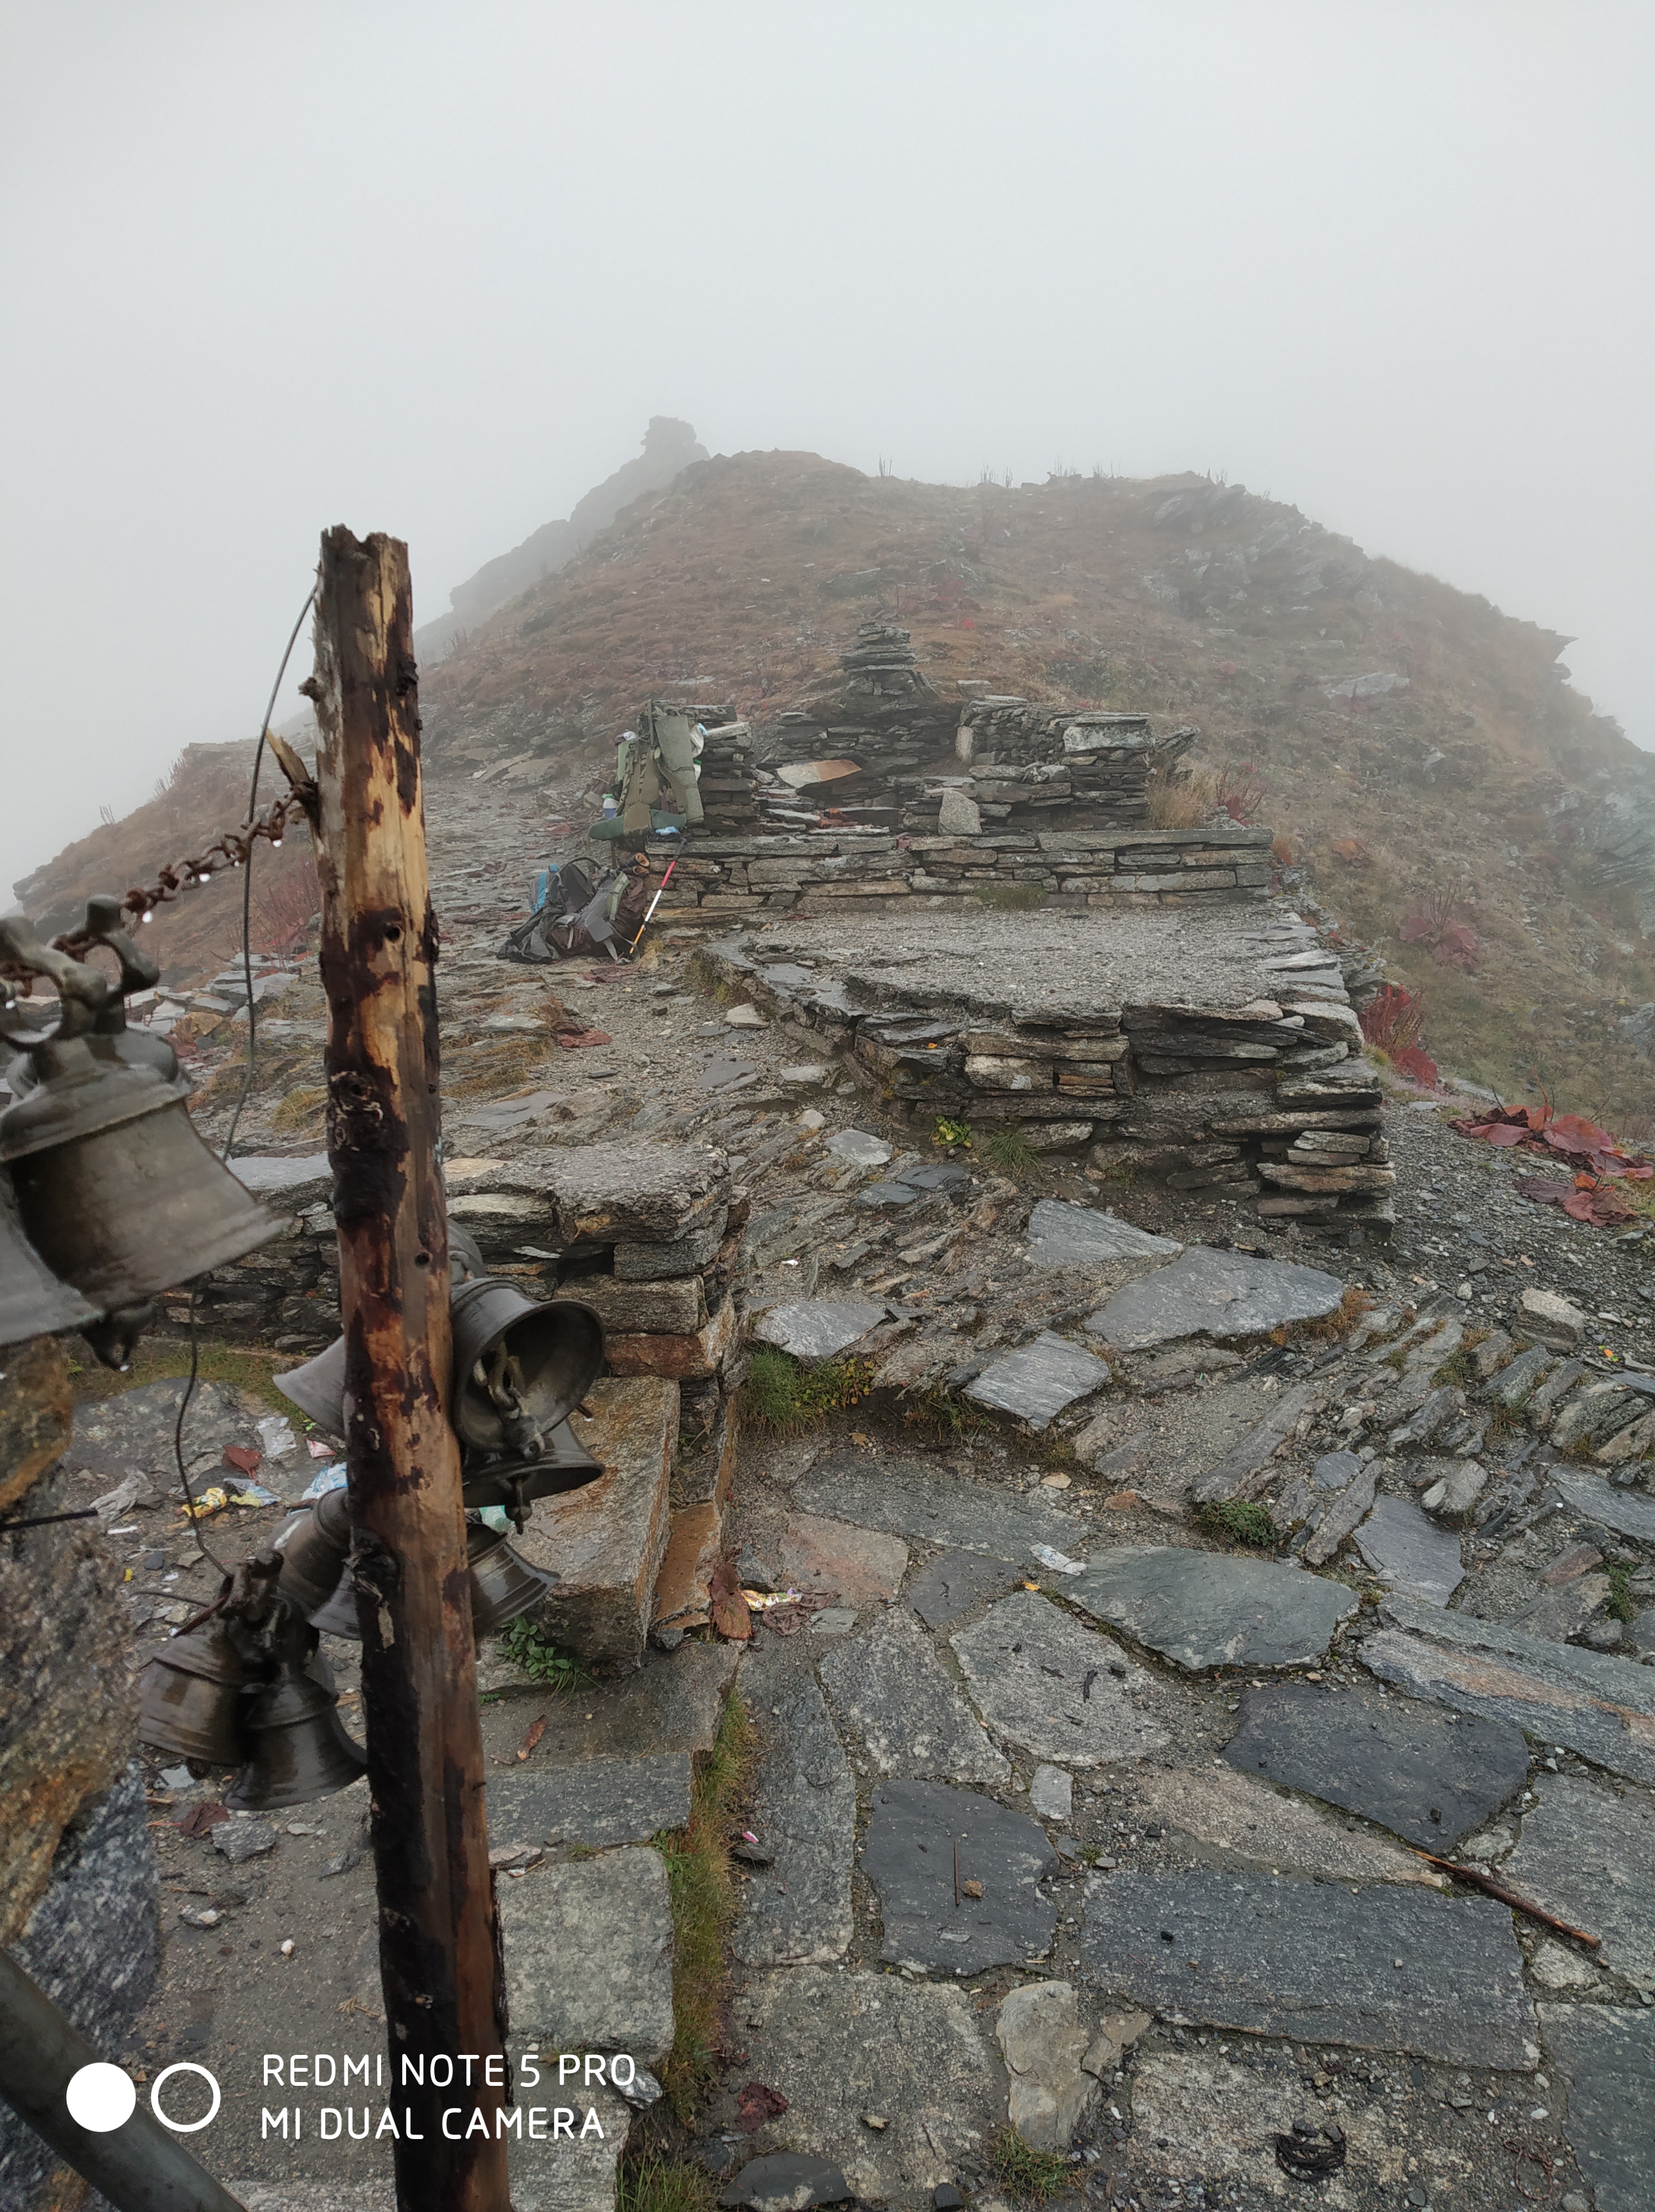
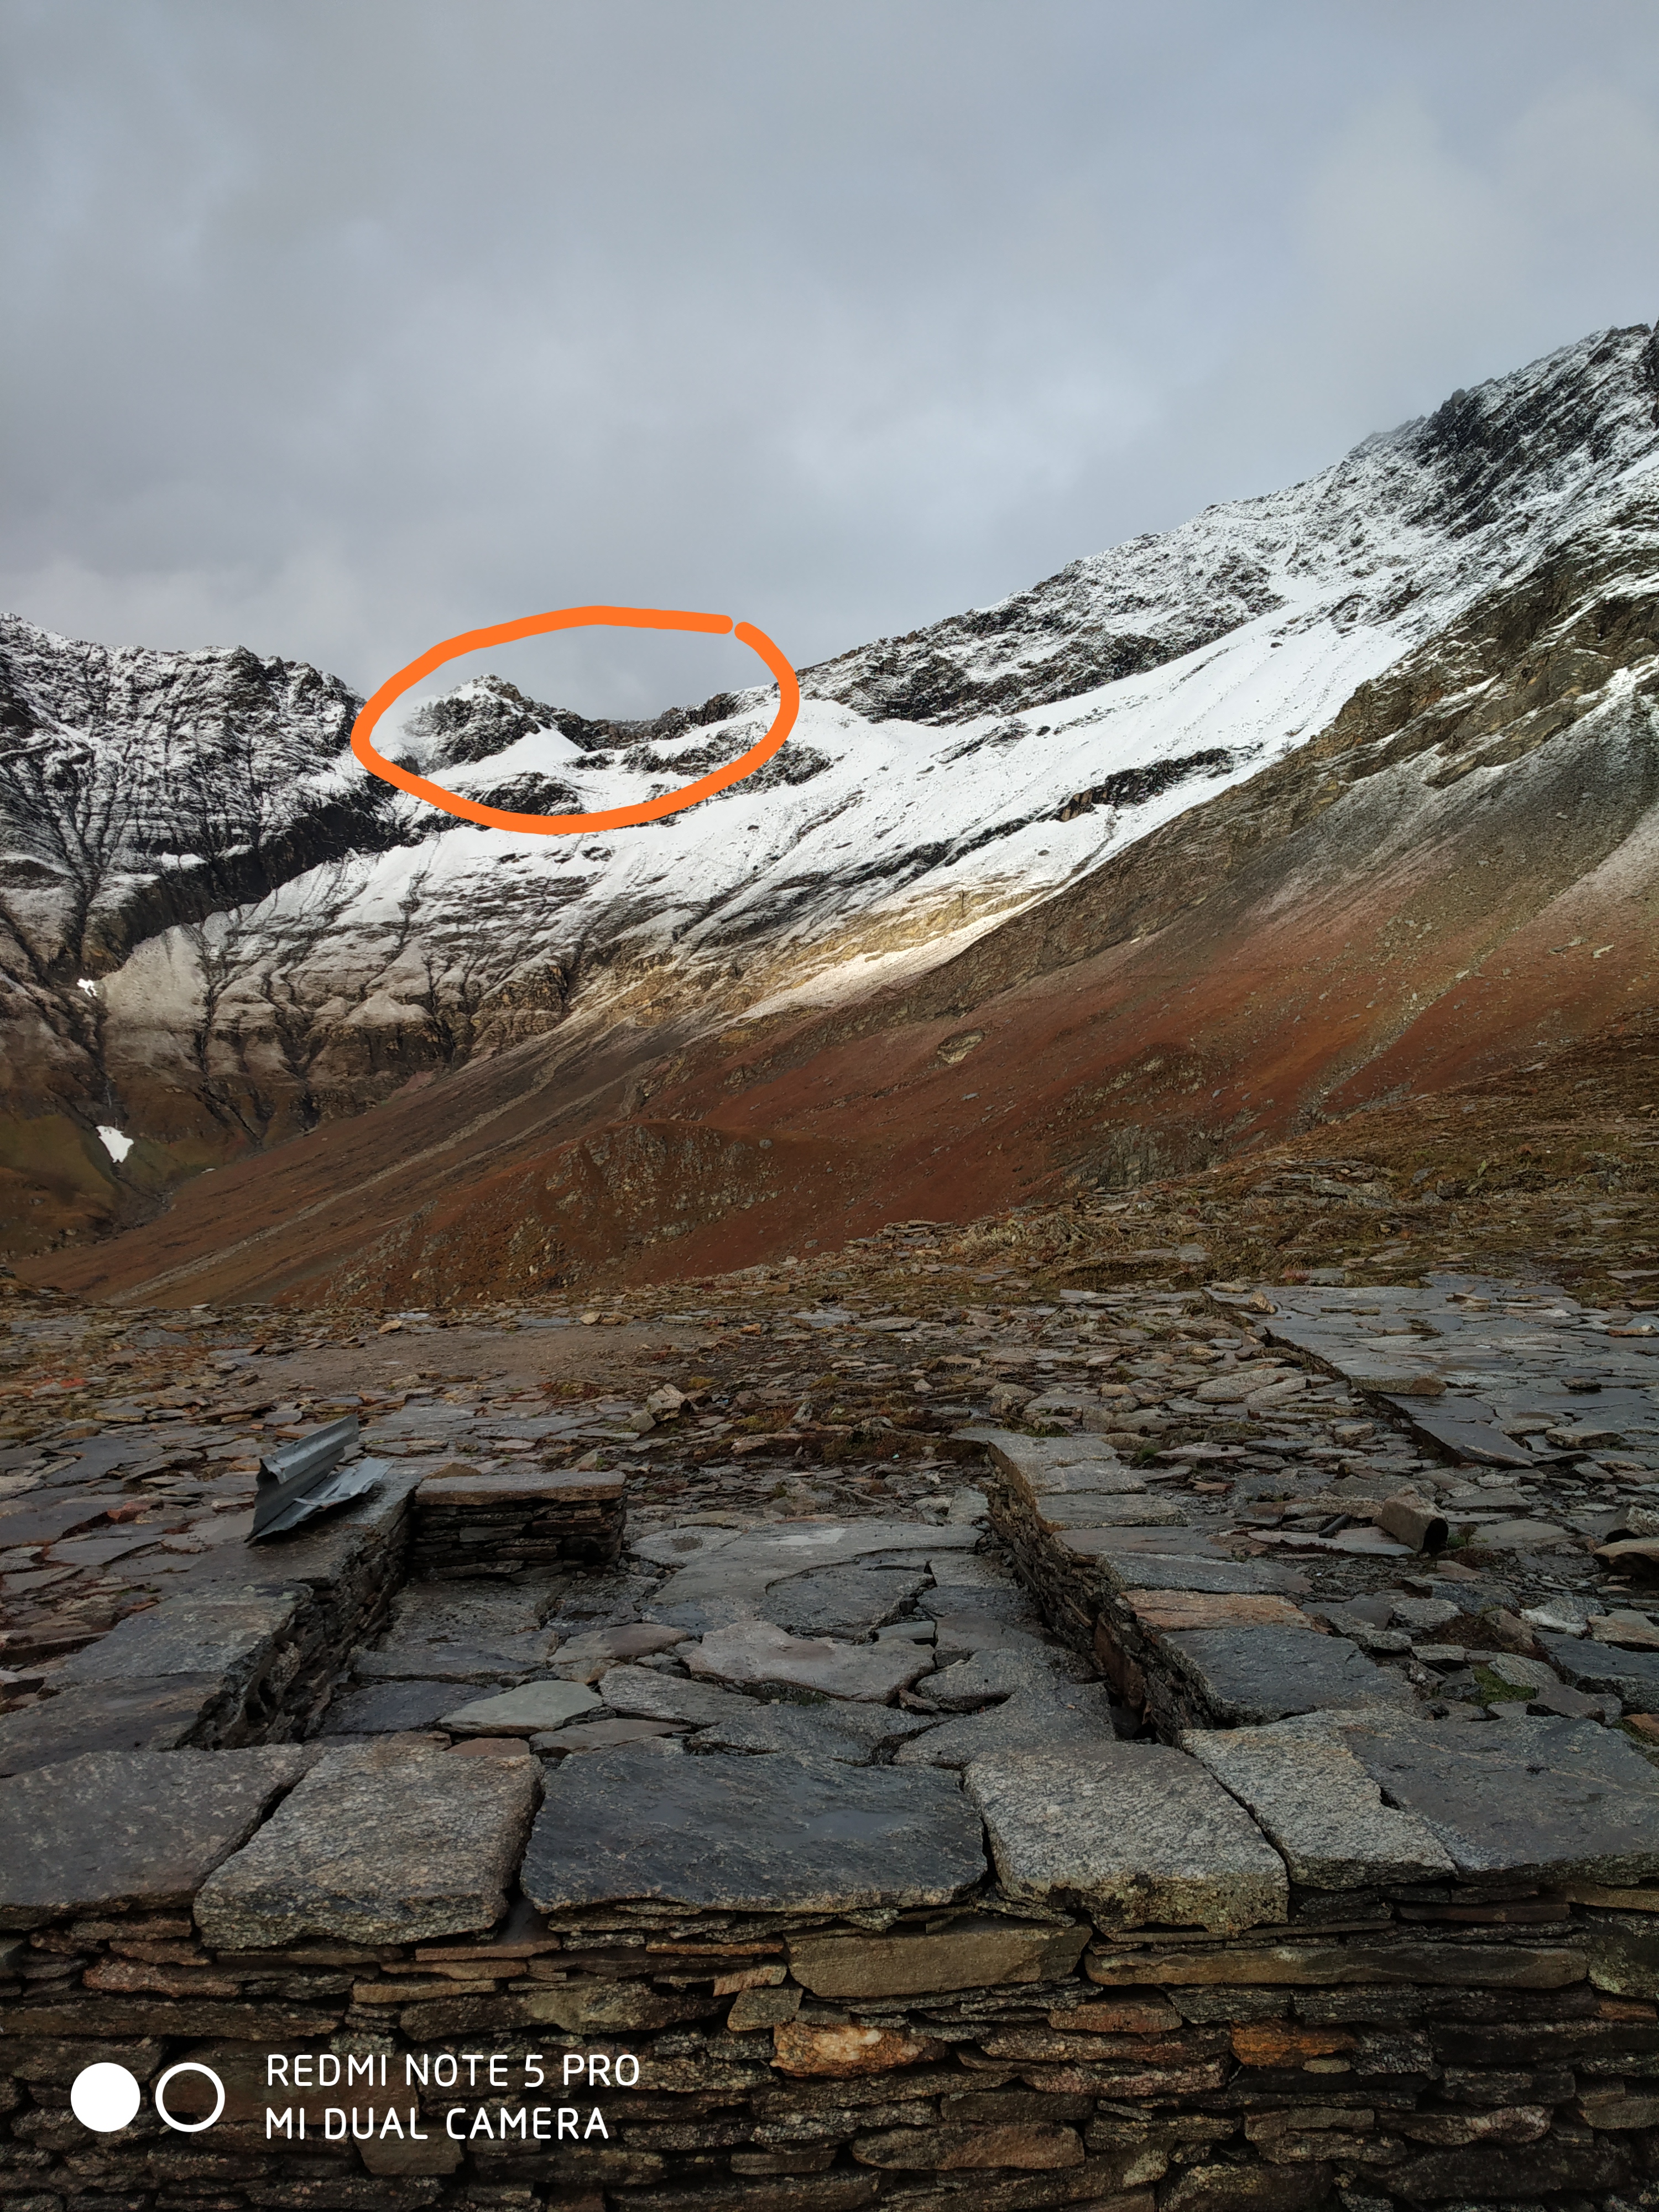
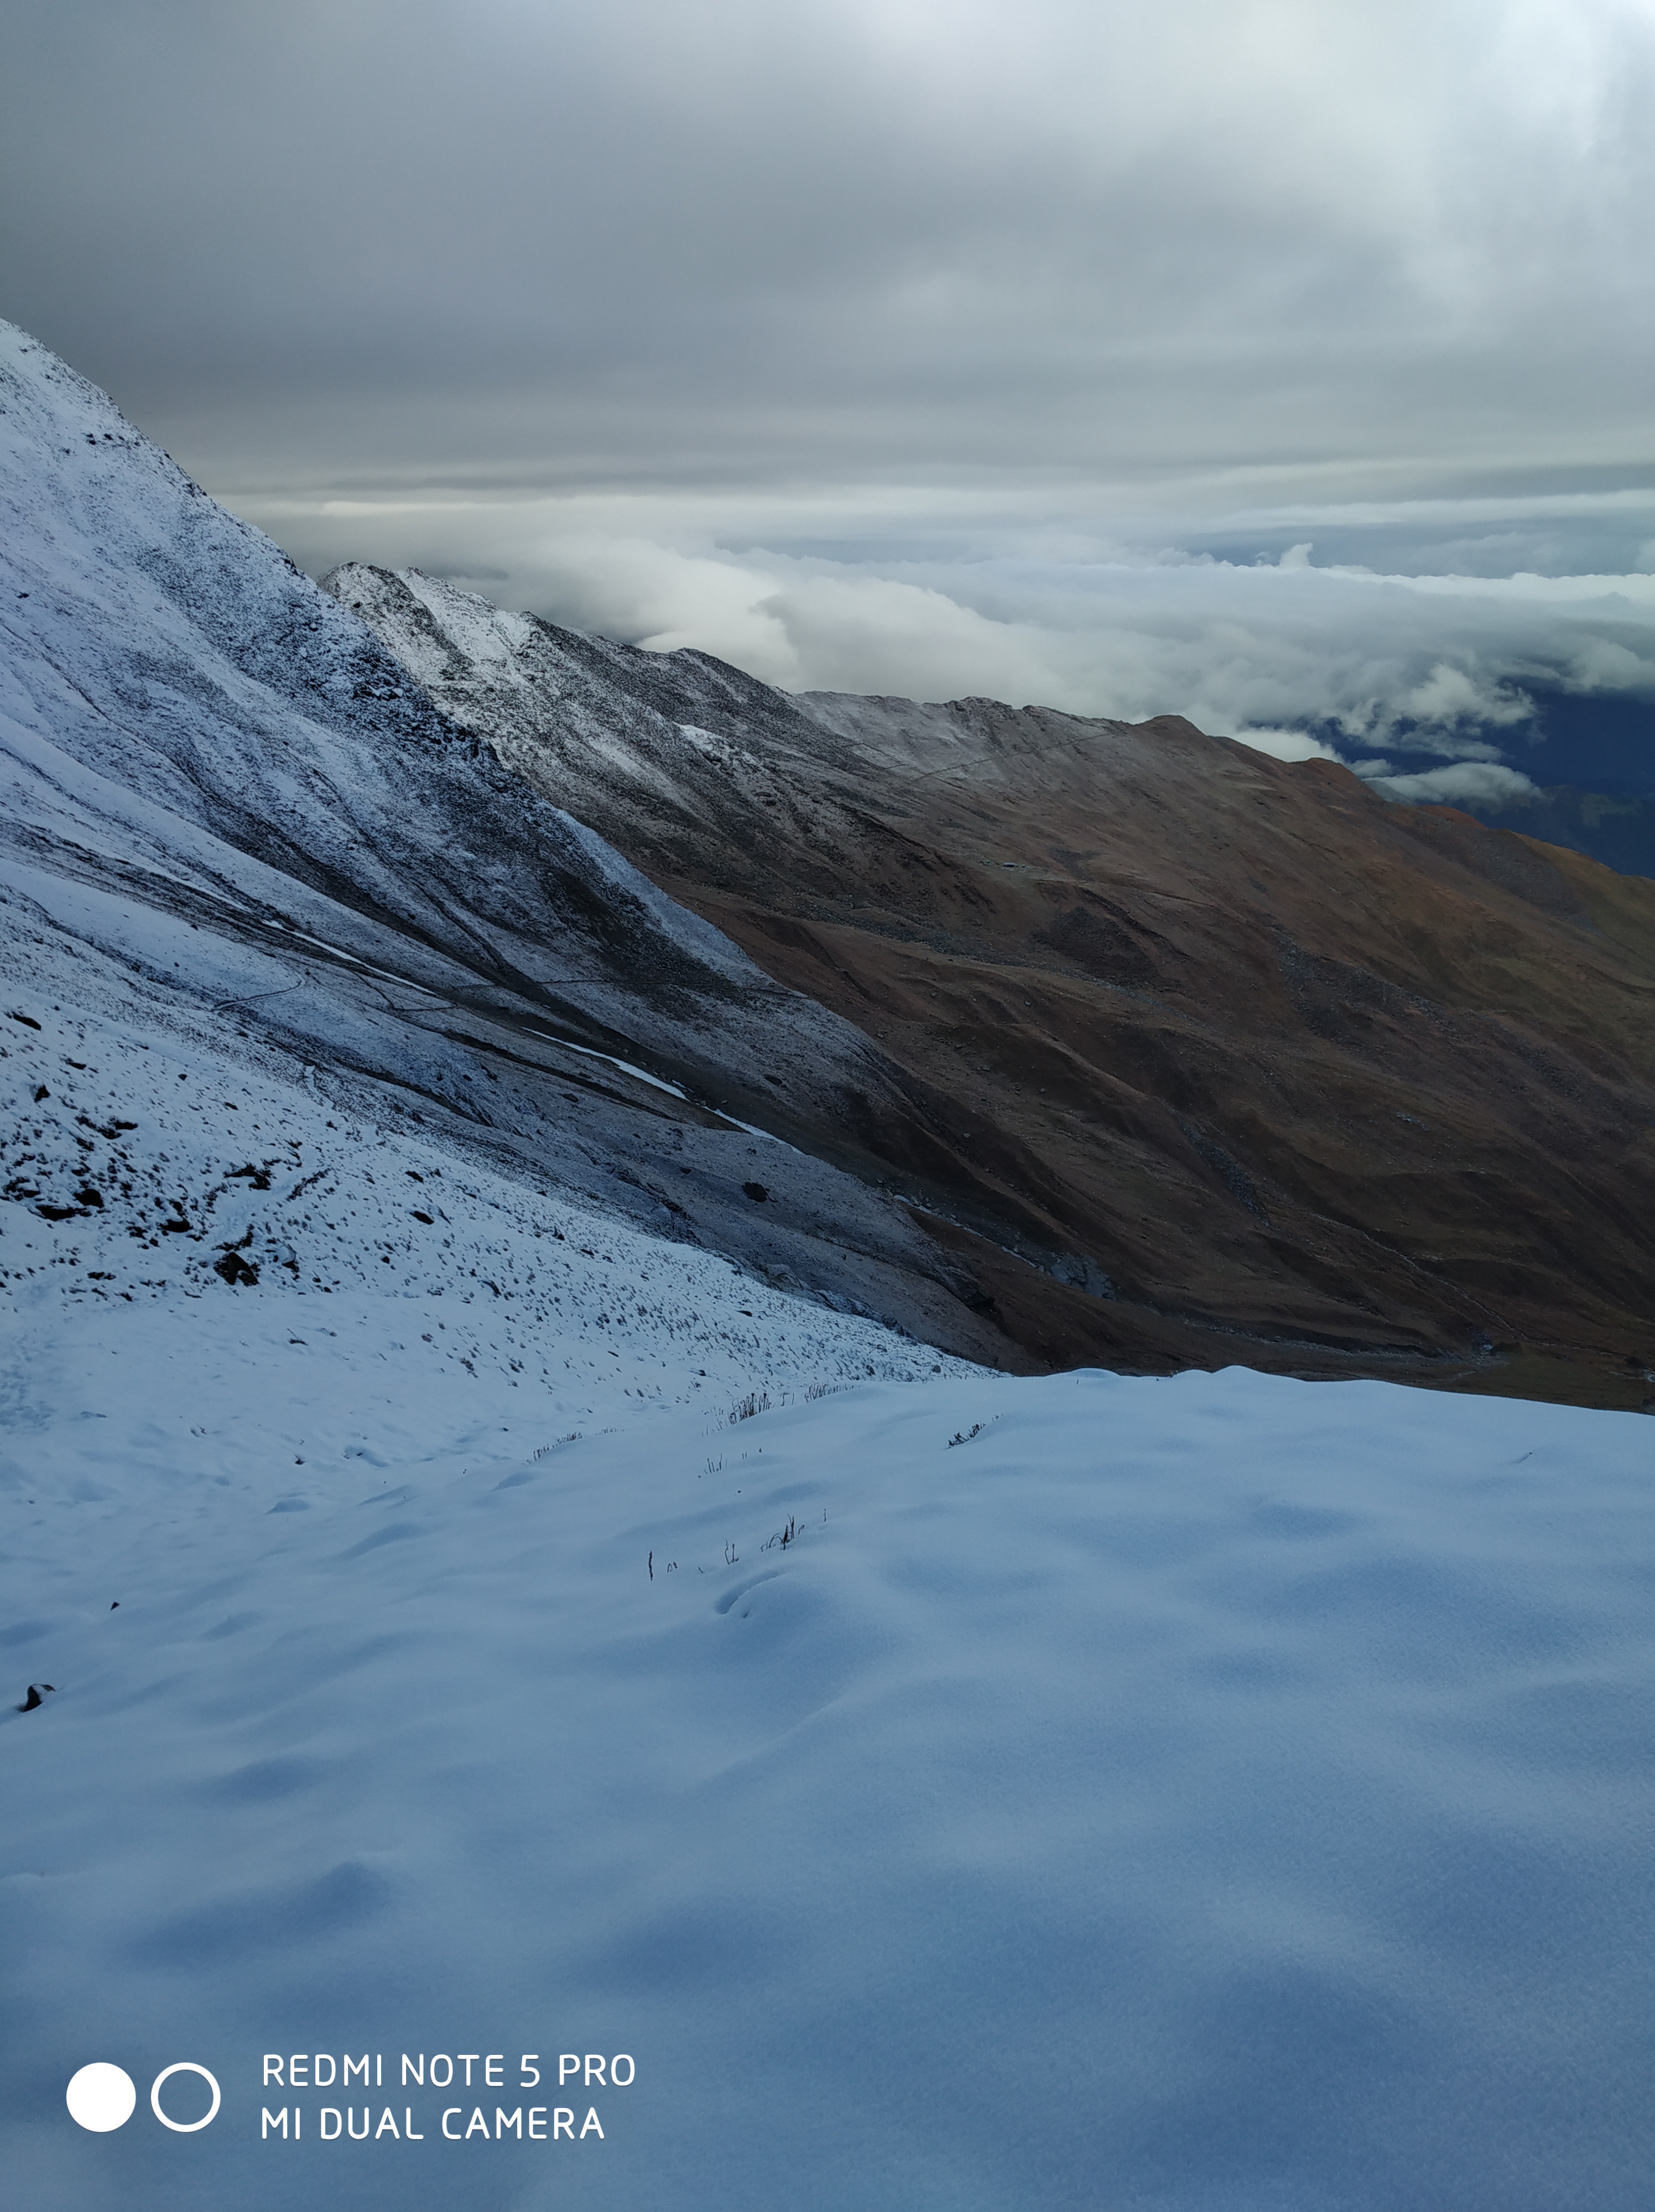
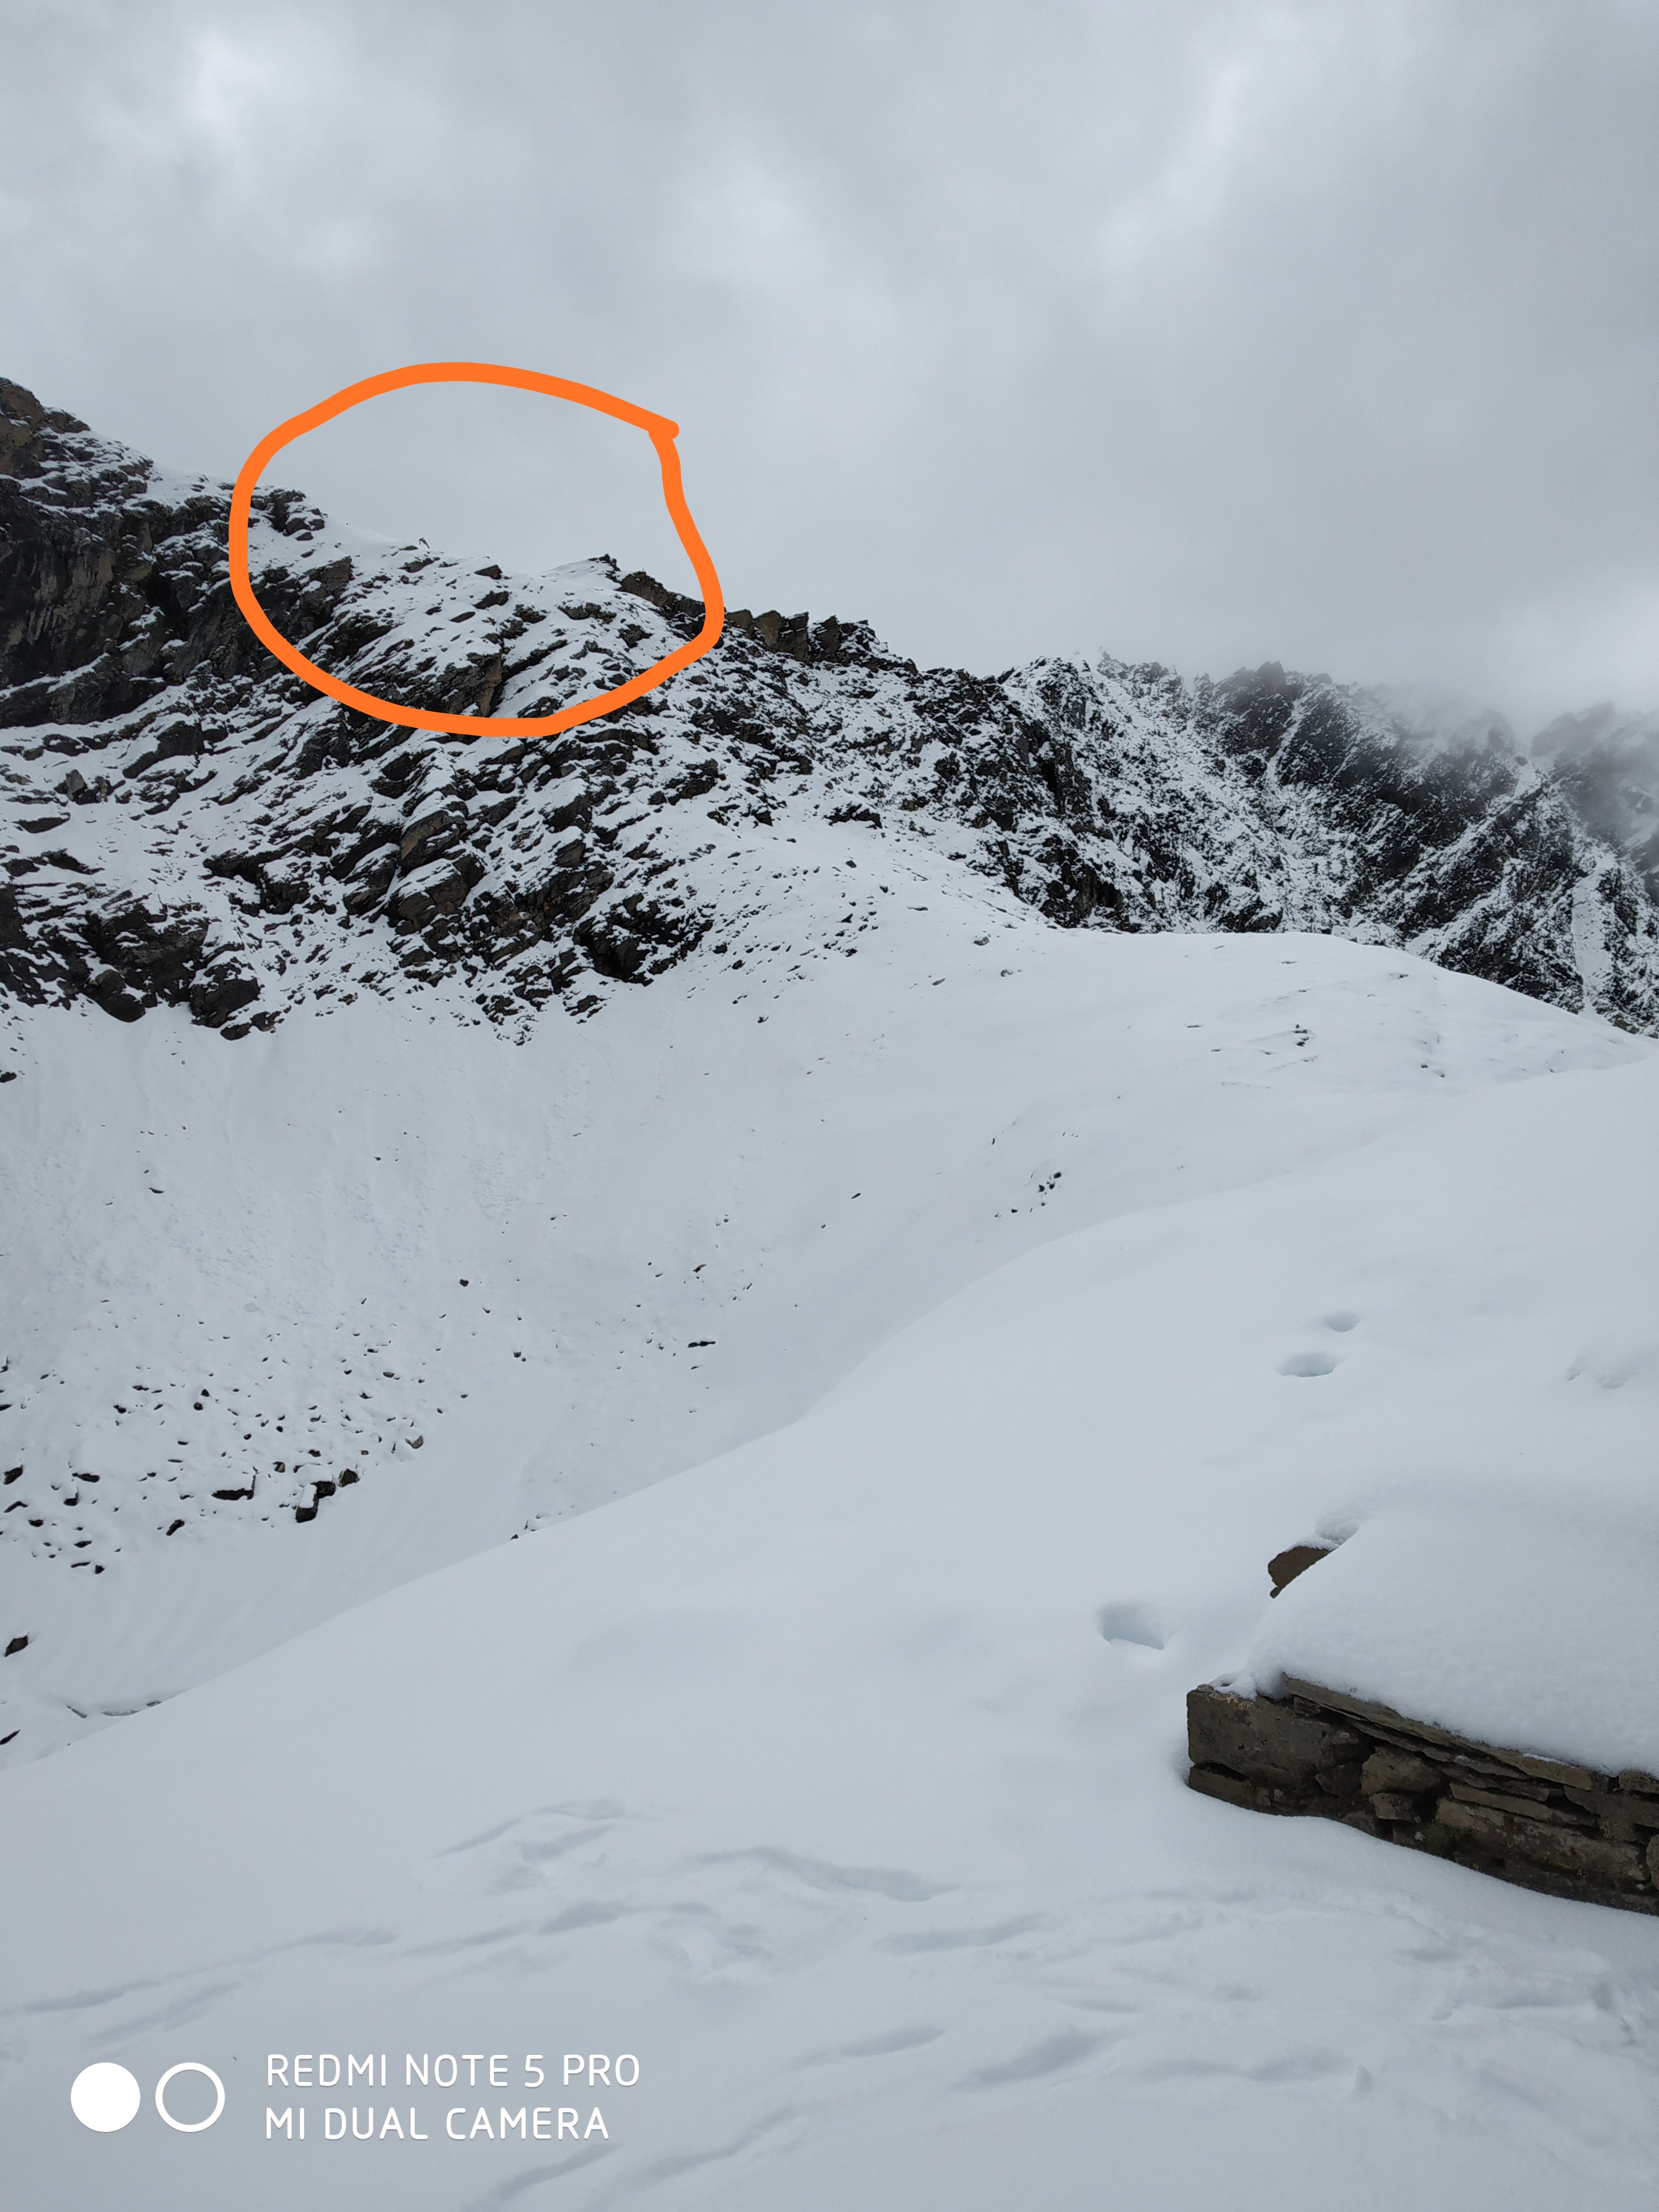
Sadly due to weather, I didn’t get clear views from Hampta, other mountains visible from the pass was covered by the fog.

At Hampta (PC: NAVEEN BHARADWAJ)
View from Hampta (PC: NAVEEN BHARADWAJ)
At Hampta (PC: NAVEEN BHARADWAJ)

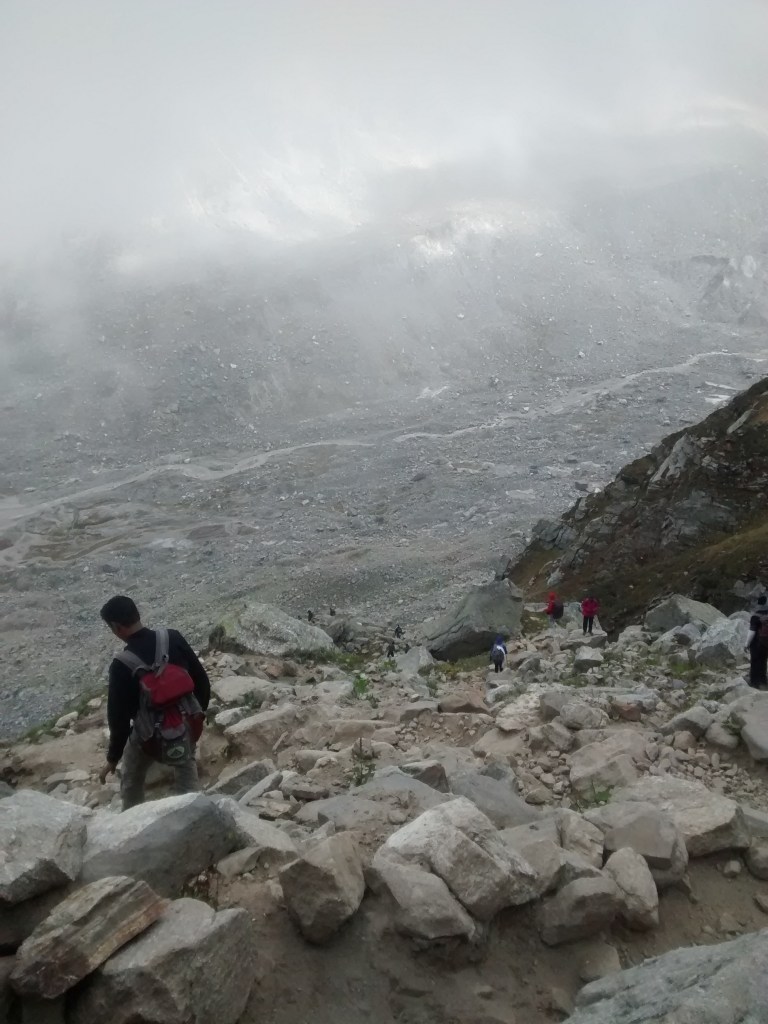
So after spending some moment at Hampta pass we started our descend. As I mentioned earlier it was a steep descend till Siagouru camp. Descend is more difficult as compared to climbing.

While decent

As you can see in the picture due to fog nothing is clearly visible. It is always advisable that while descending your bag’s straps should be loose so it pulls you back, your bodyweight should be backwards. Our descent was also difficult due to the loose rocks, we were walking in rocky terrain and also it gives more pressure to your knee. Finally, after around 3 hours and 30 minutes, we reached Siagouru campsite safely.

Descending

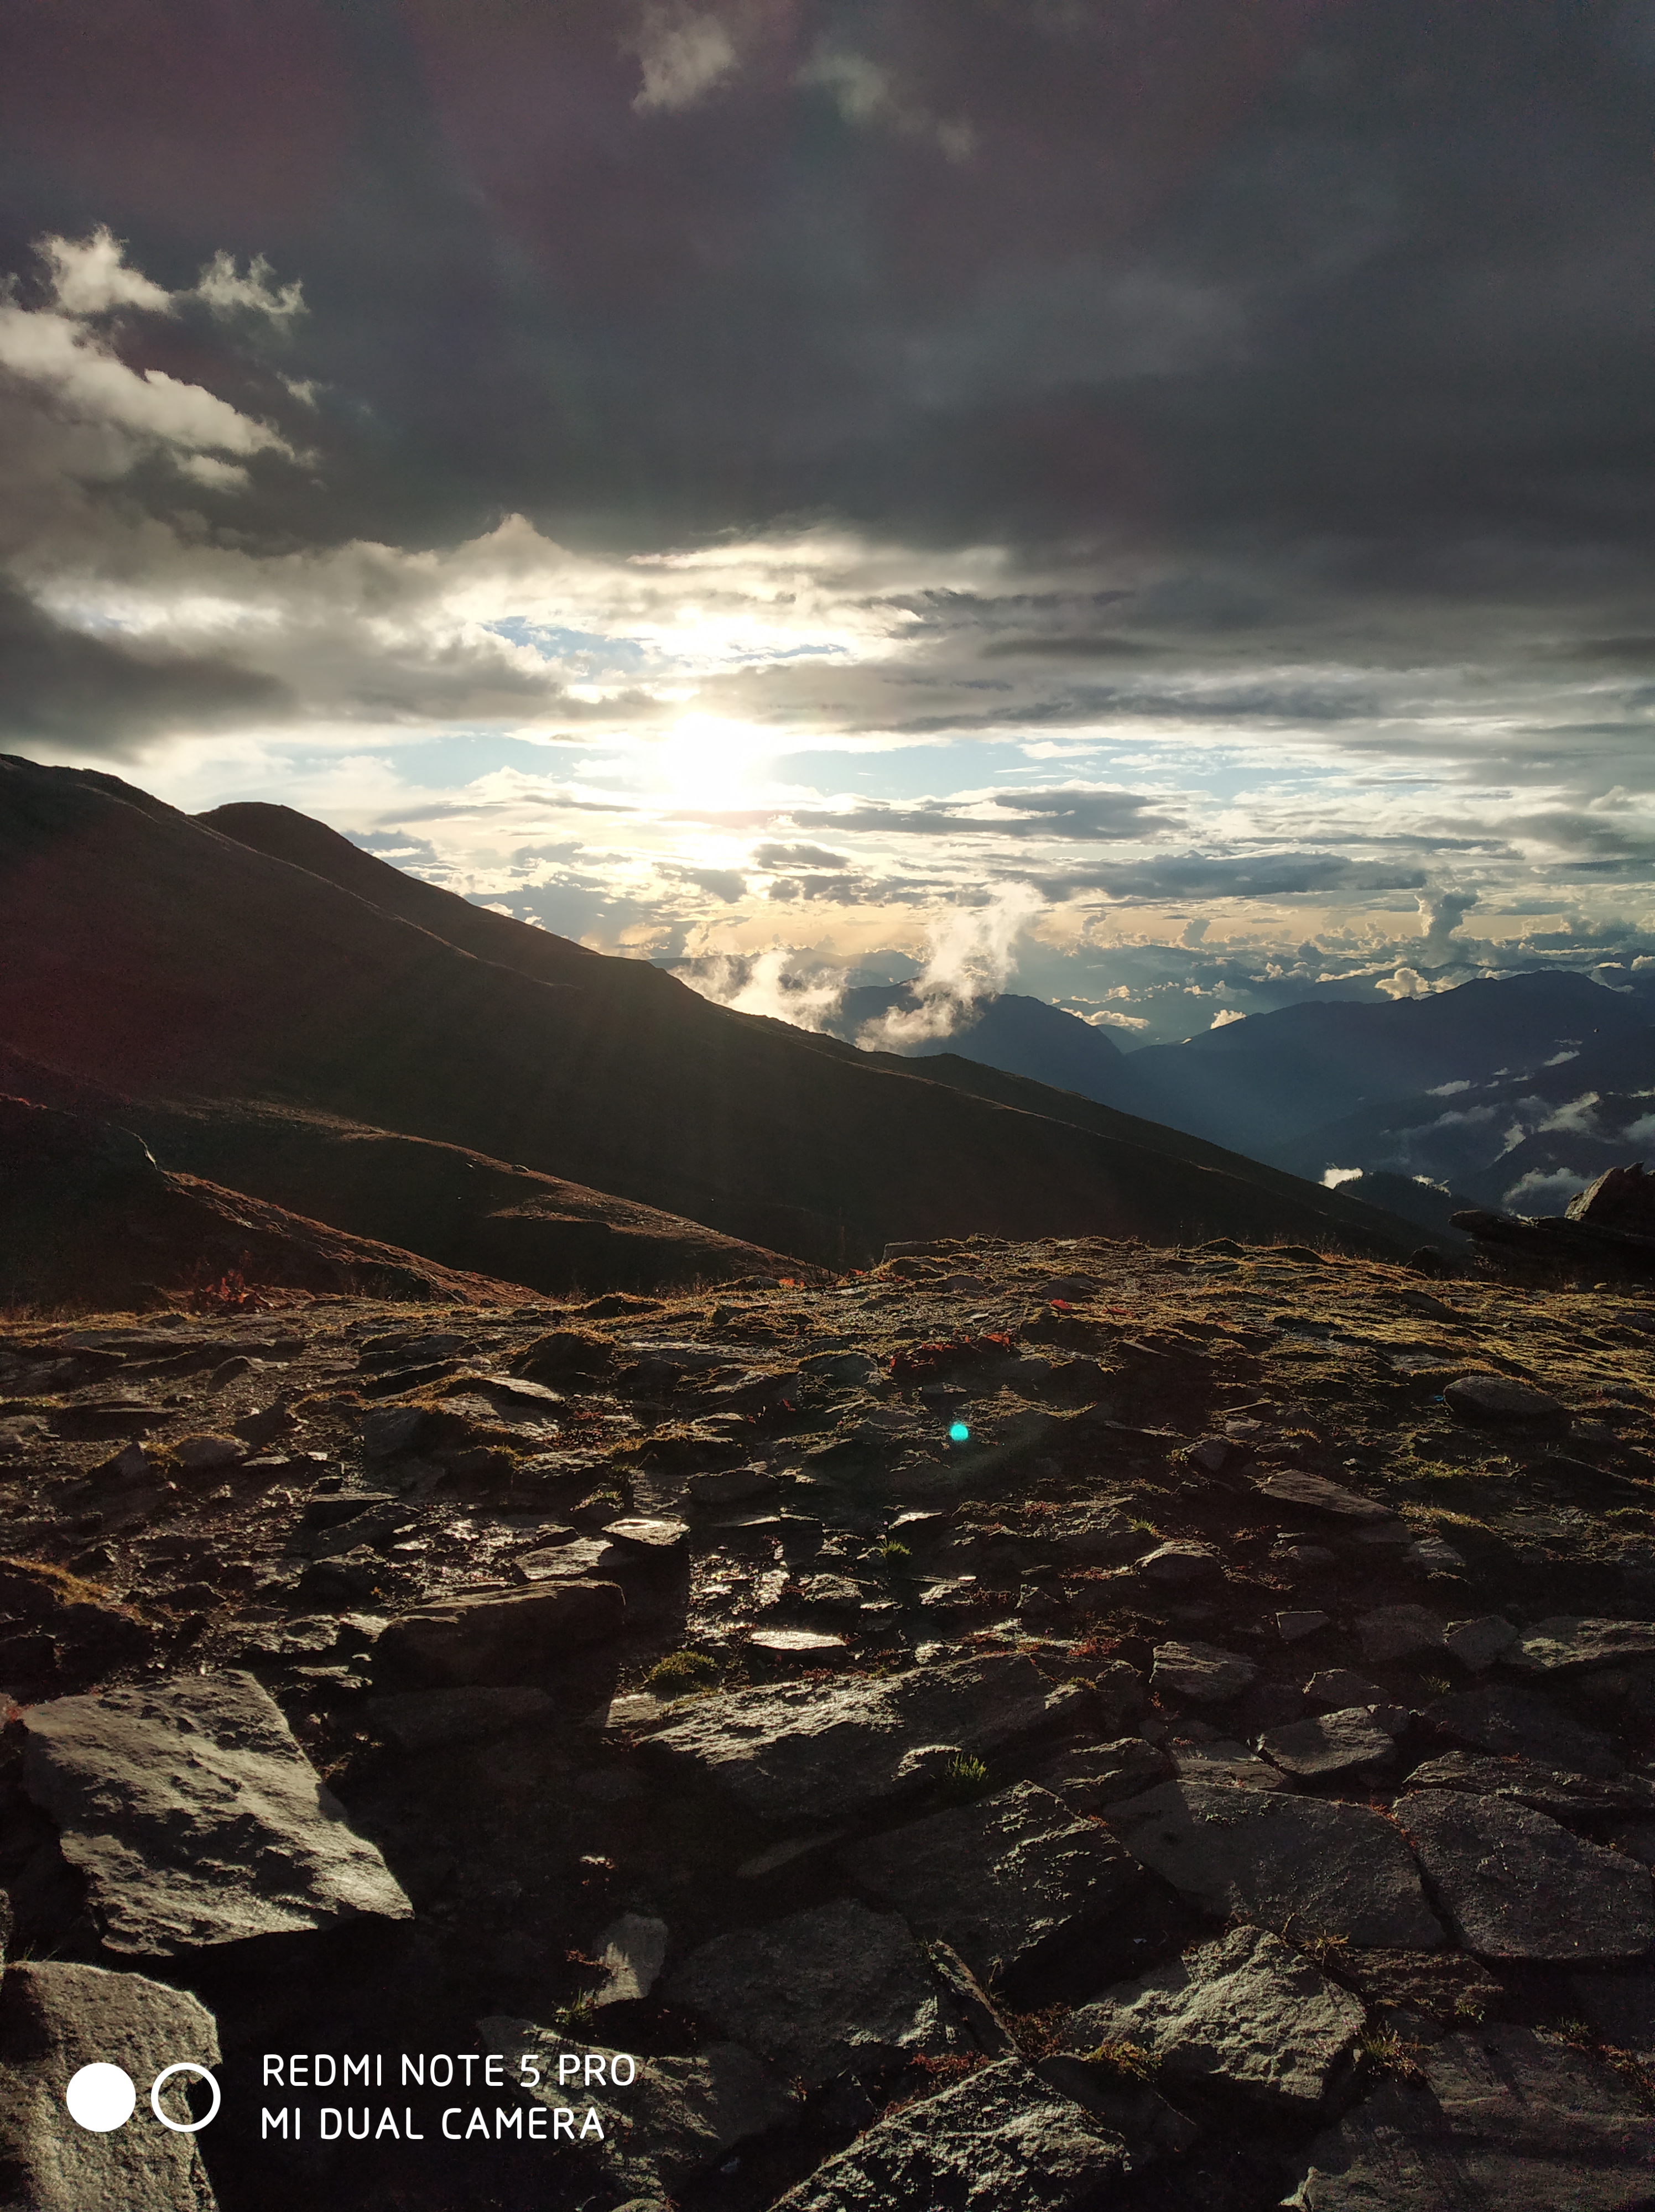
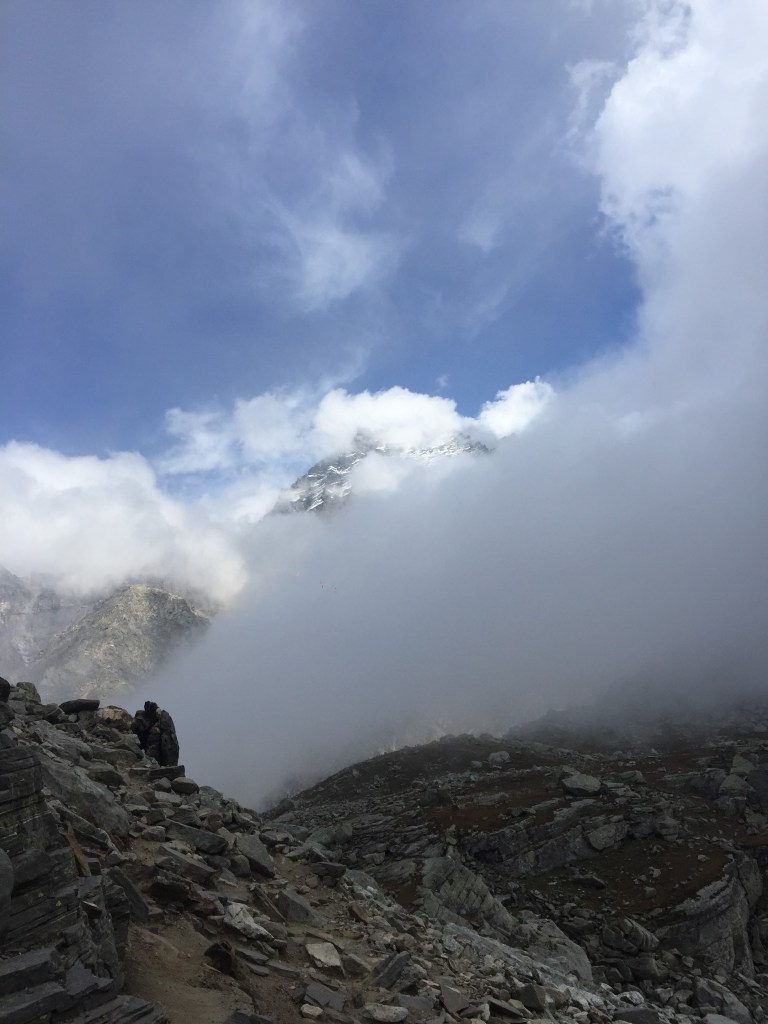
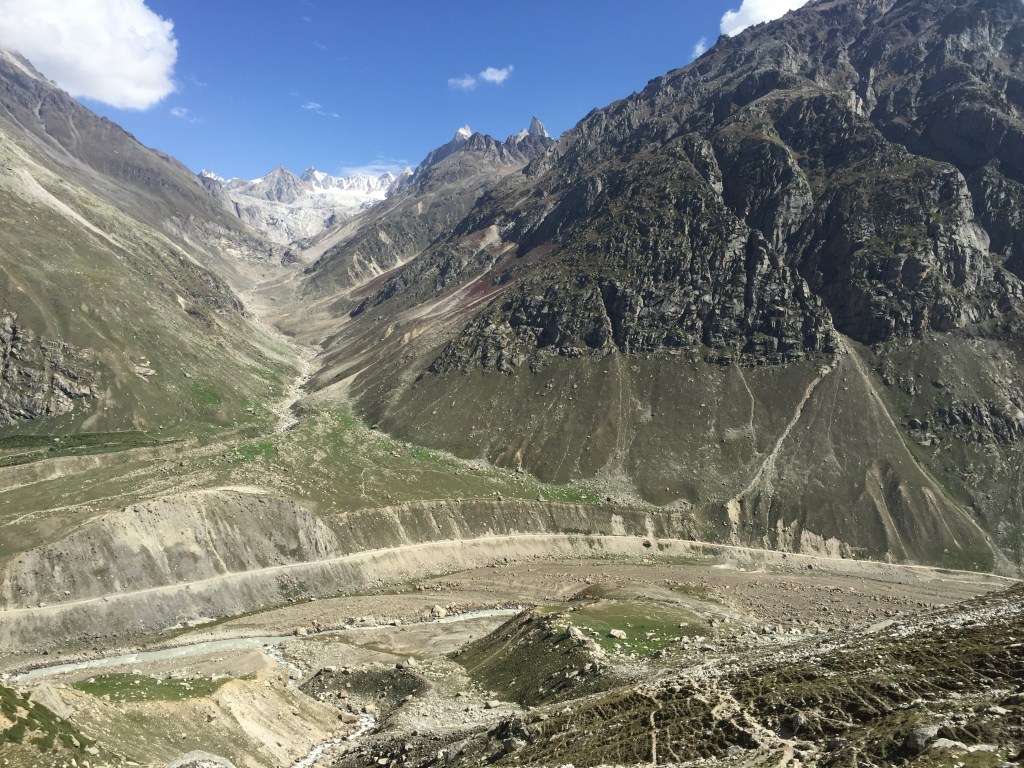
As you can see in the picture we entered into a desert of Lahul Spiti valley after crossing Hampta from green land of Kullu. A complete drastic change in the views. This the speciality of Hampta pass. Its route is called circular because you ascend from one route and descend from another and then back to base camp. In some trek, you ascend and descent route remains the same.

At Siagouru campsite

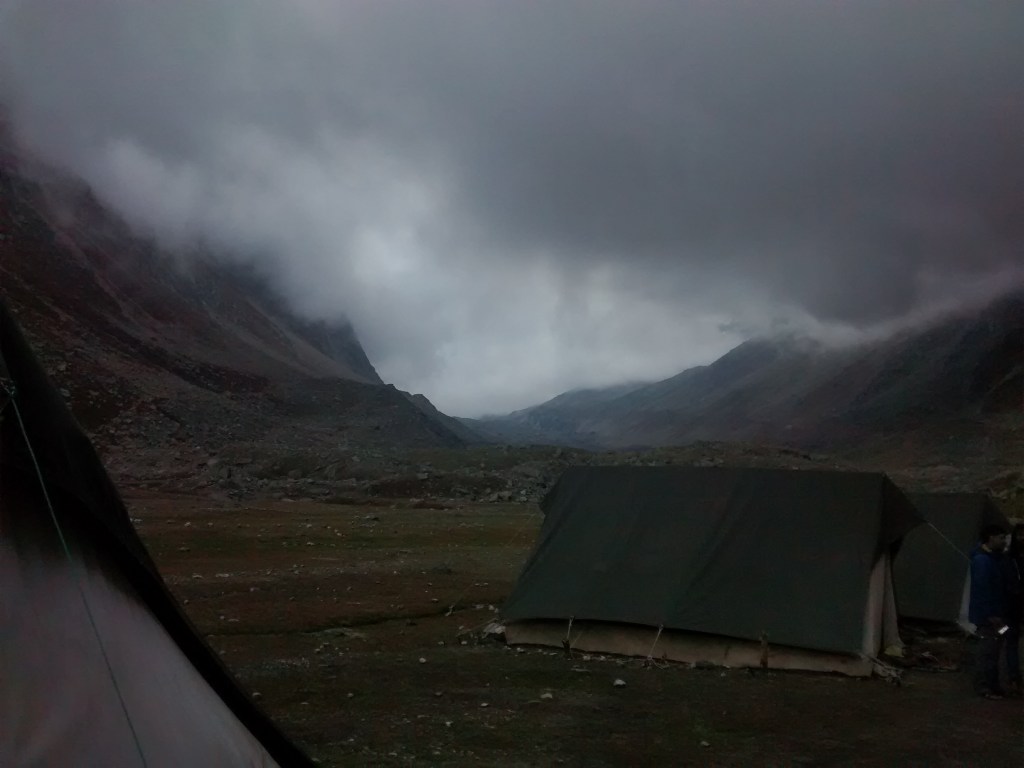
It was the coldest night at Siagouru. The temperature was close to 0° and with the wind, it felt like the temperature gone to negative. The wind was blowing continuously and even with wearing 4 layers, I felt the cold. It is always advisable to pack extra layers if you are trekking in the months from September to March as compared to the summer treks in May and June.

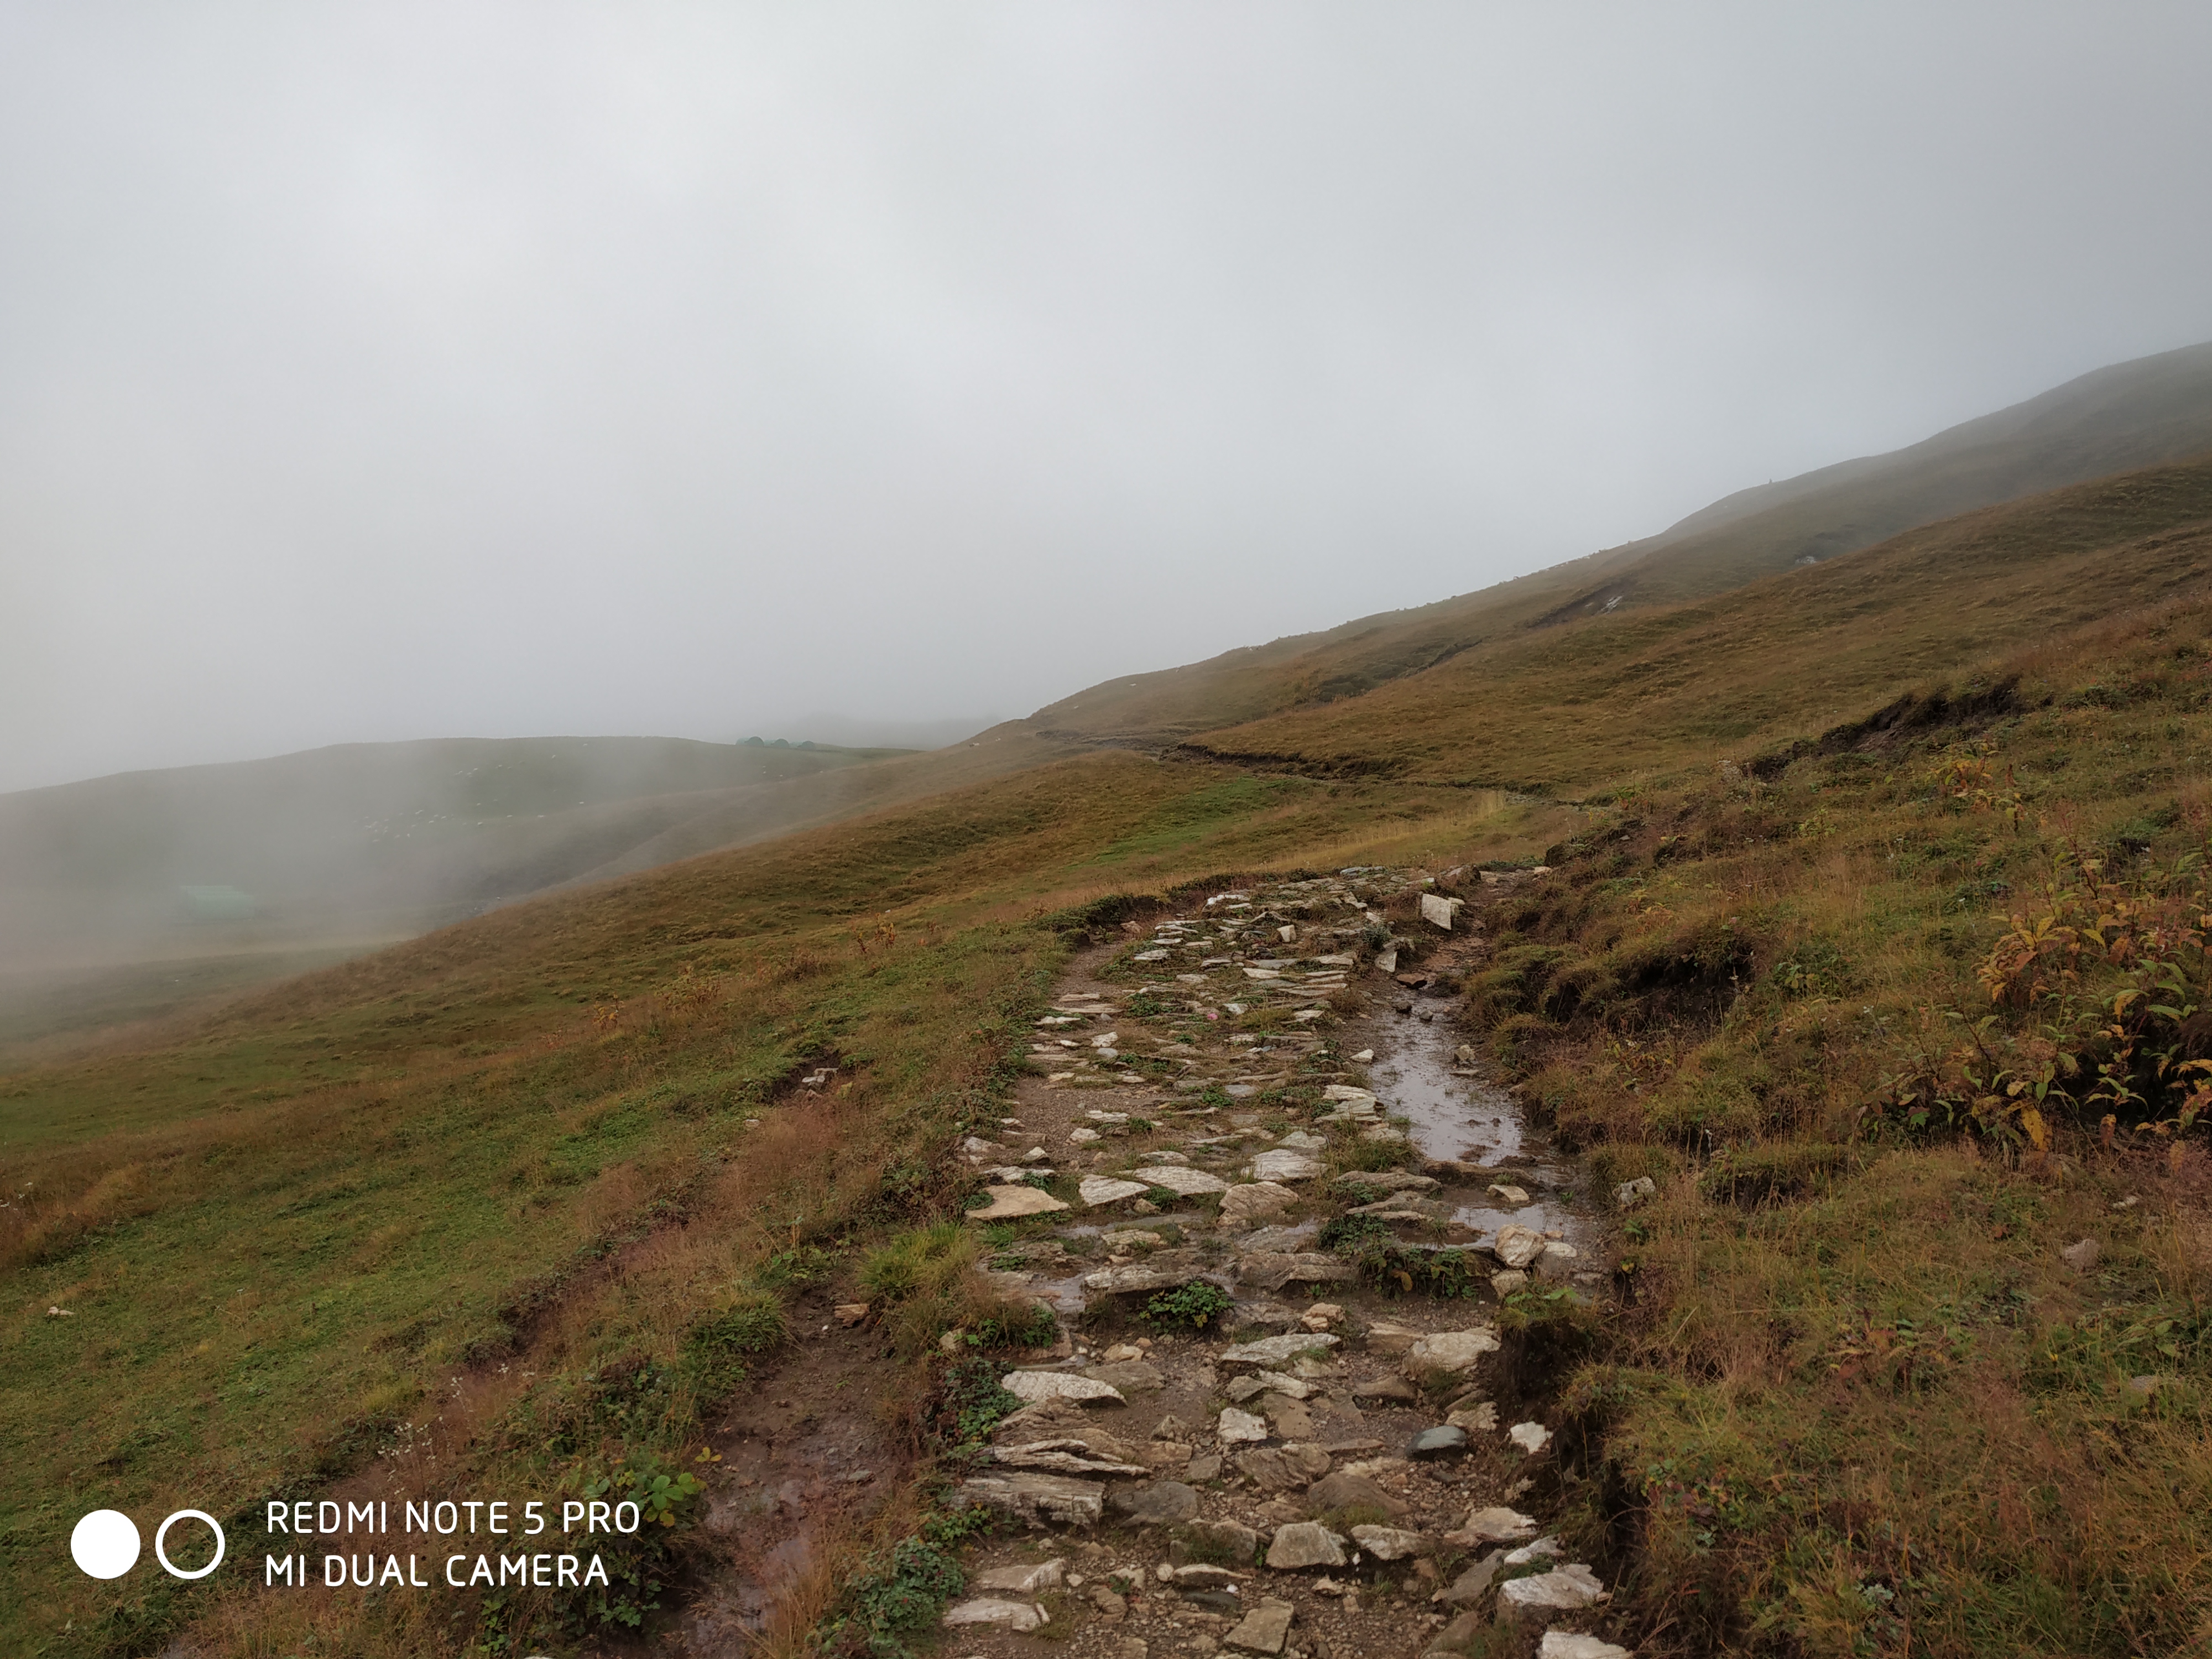
Day – 7 Trek to Chatru (9,152 ft) 9 km and then to base camp by bus via Rohtang pass (13,120 ft.)

Today was the last day of our trek. We woke up around at 6 in the morning. After having breakfast, we were ready to move with our packed lunch and backpack.

Just before leaving Siagouru (PC: NAVEEN BHARADWAJ)

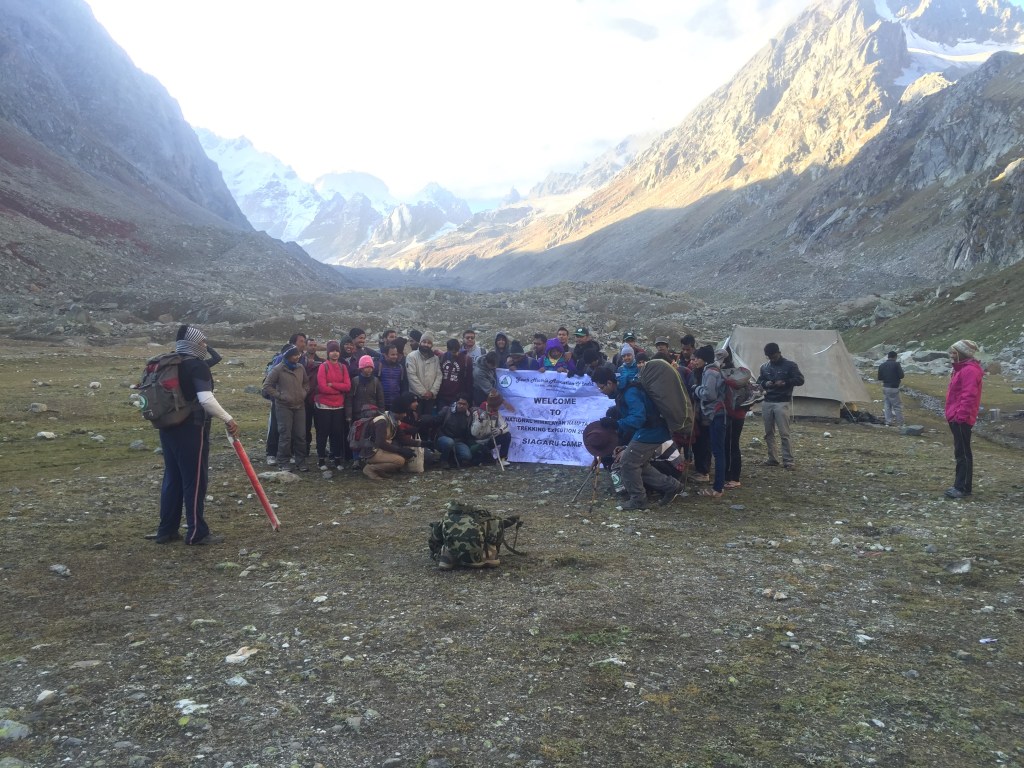
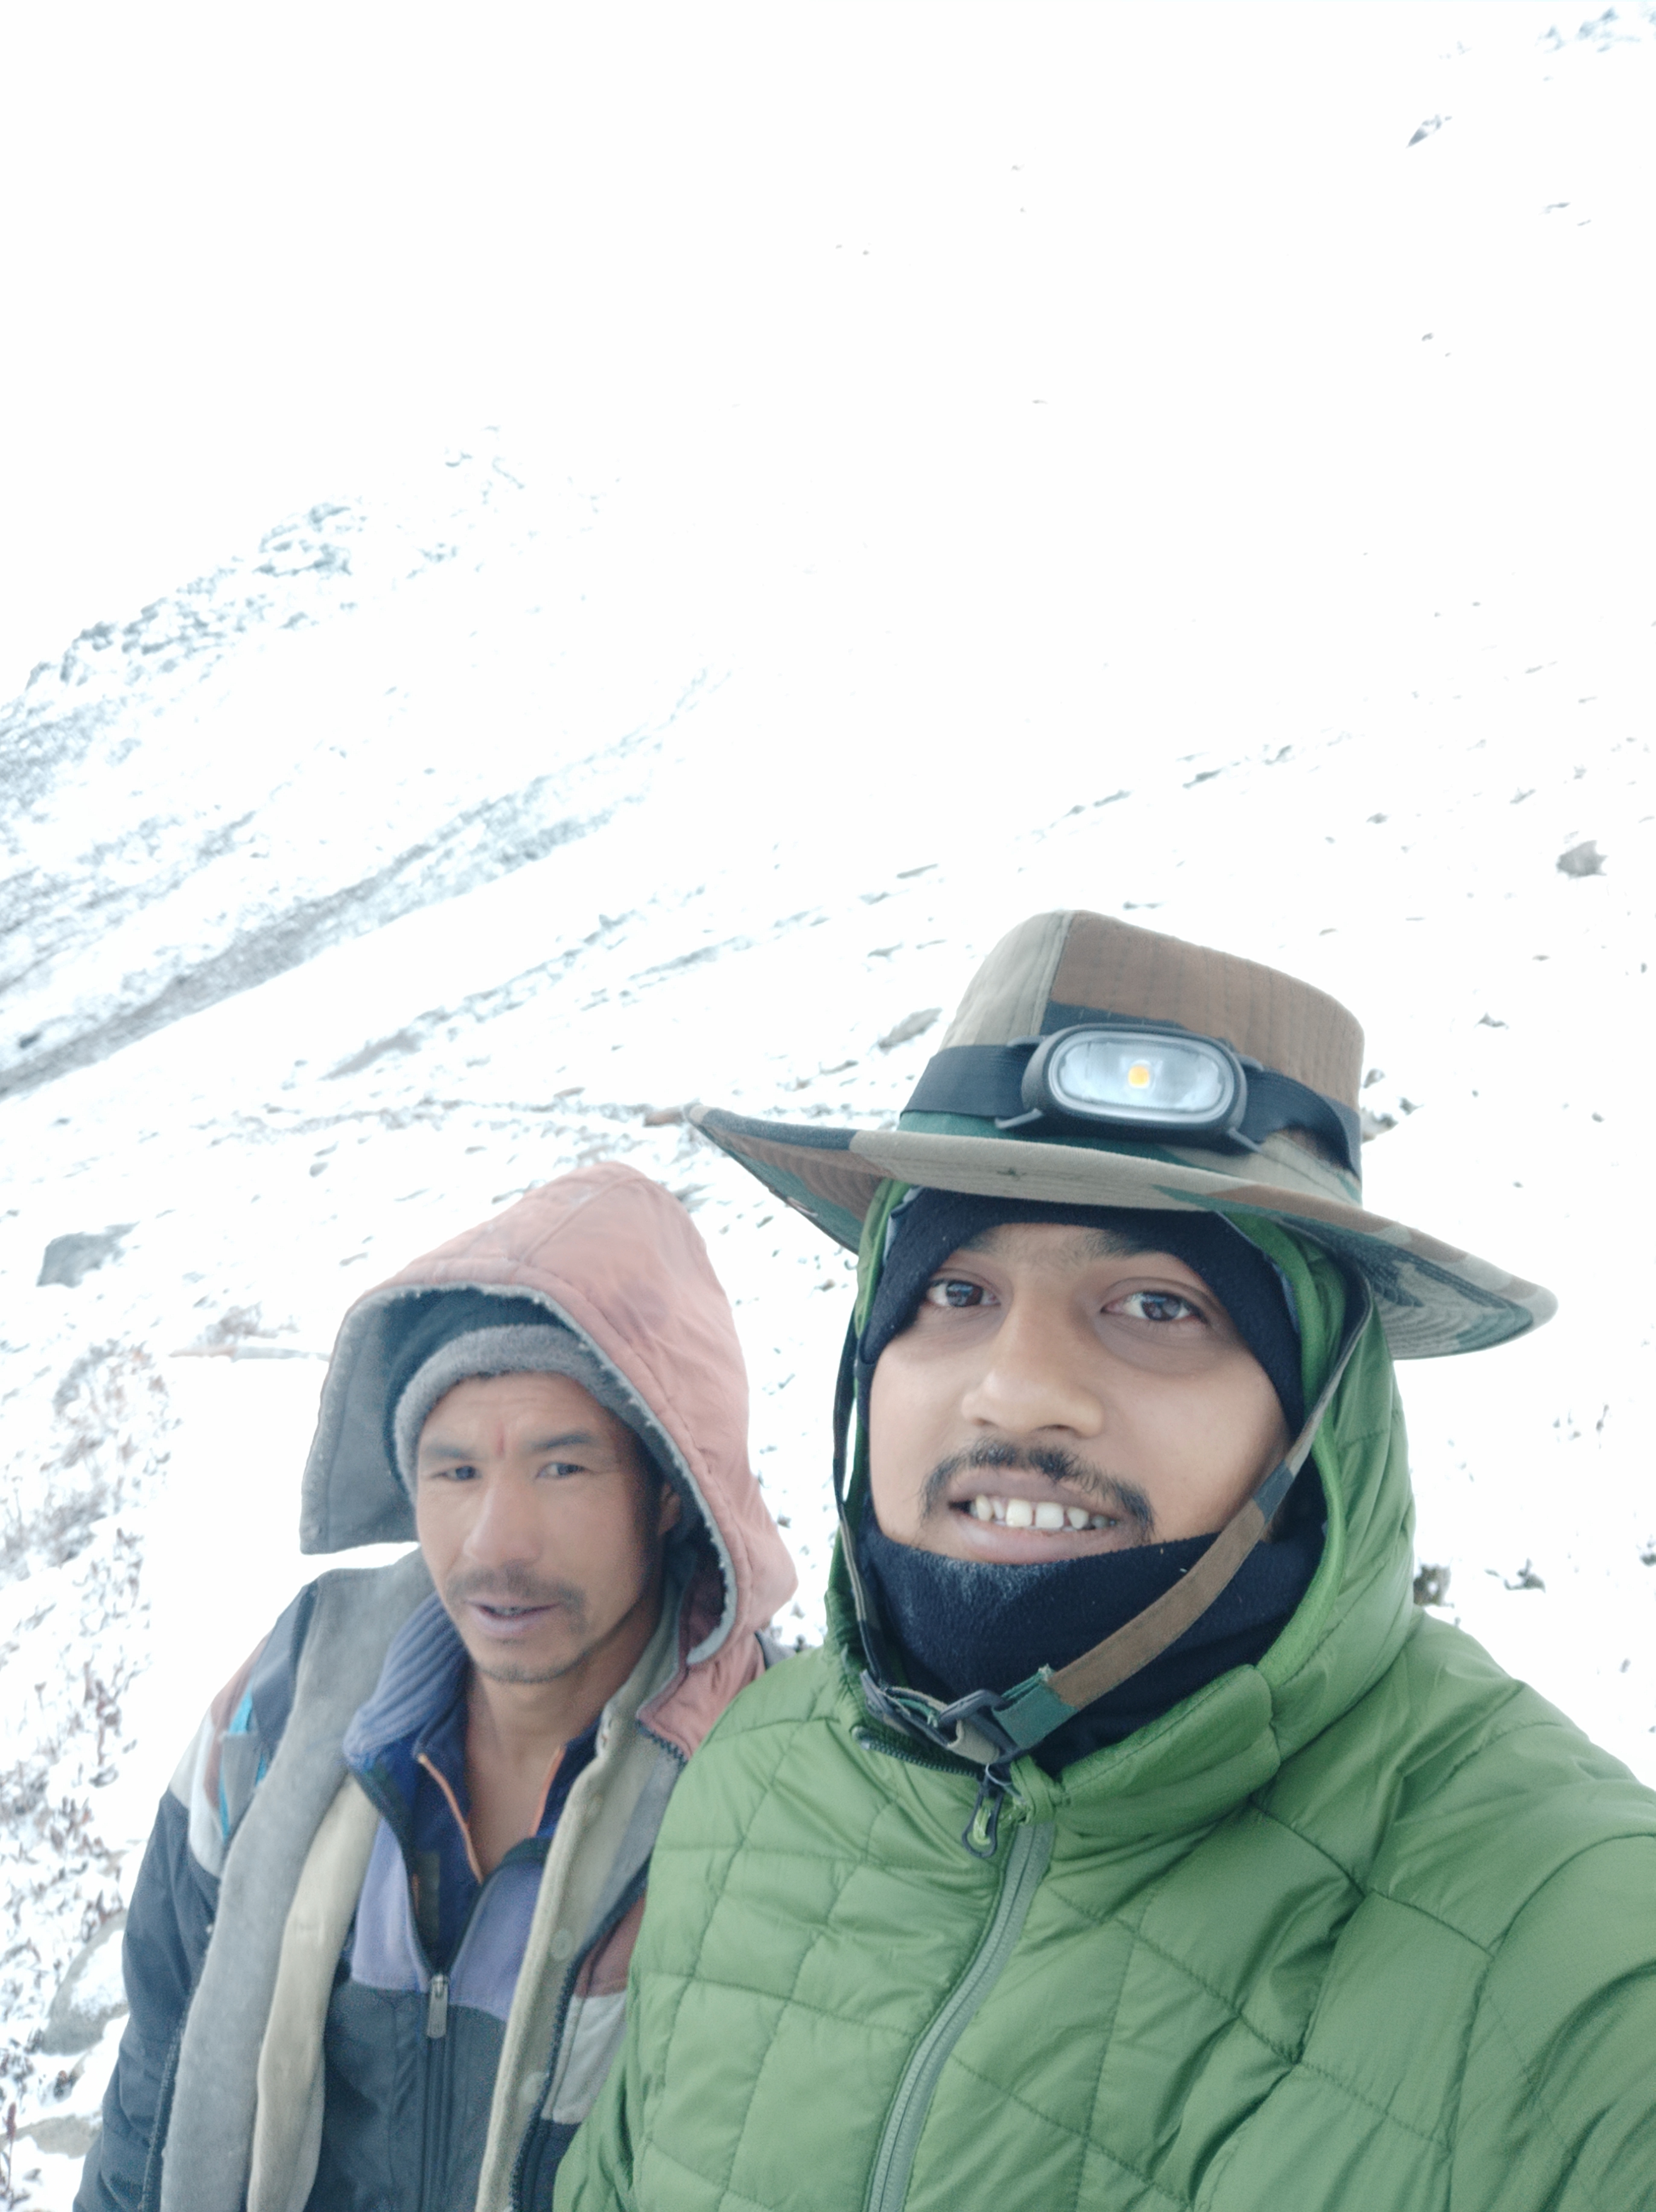
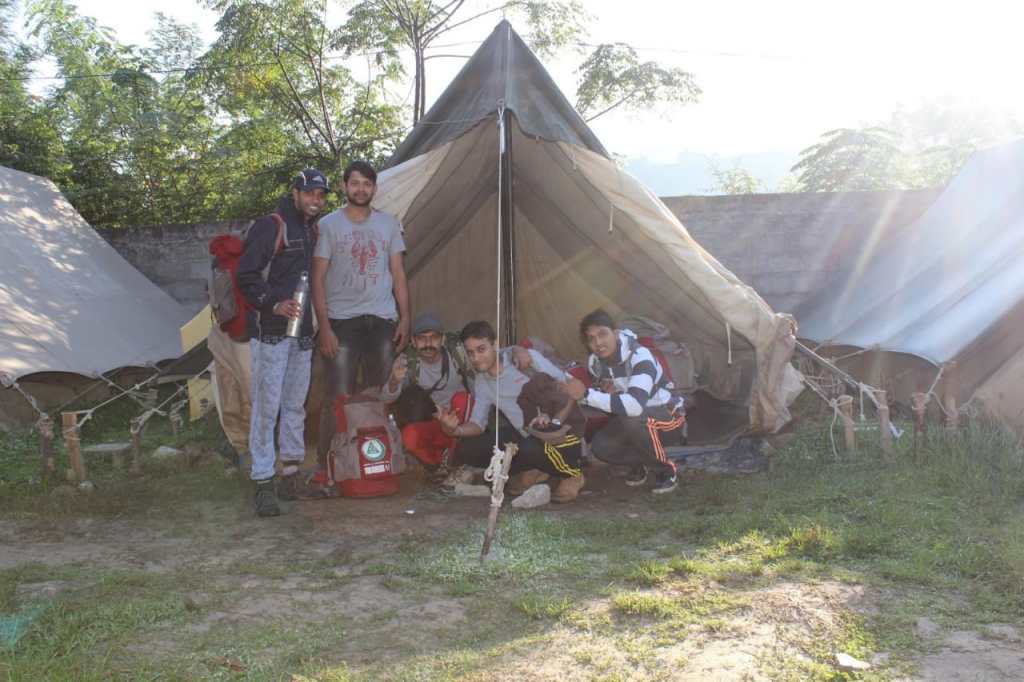
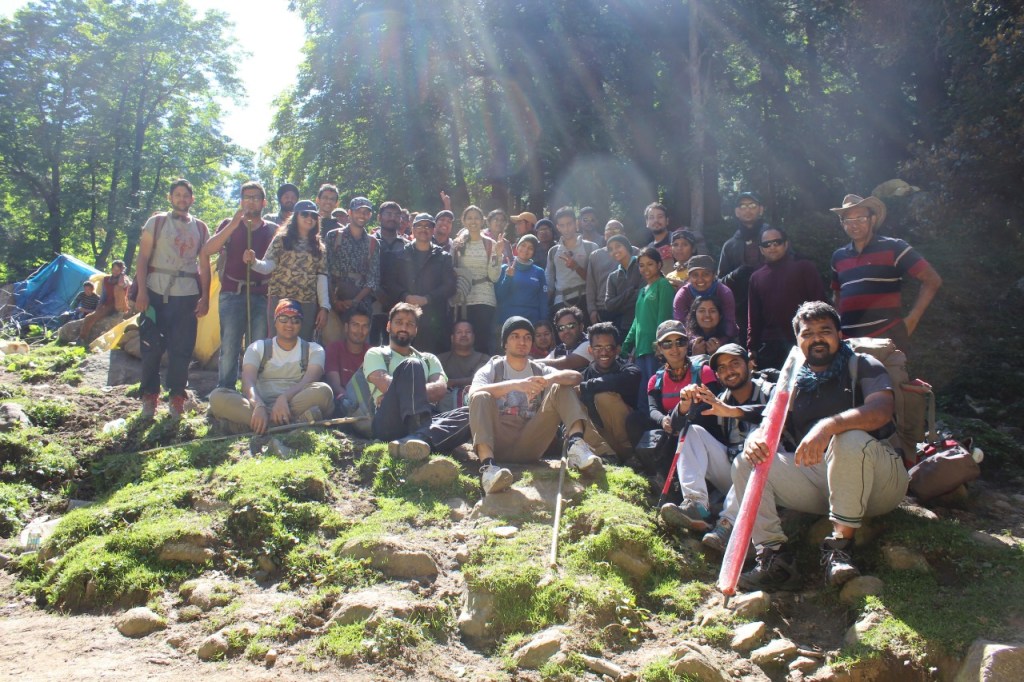
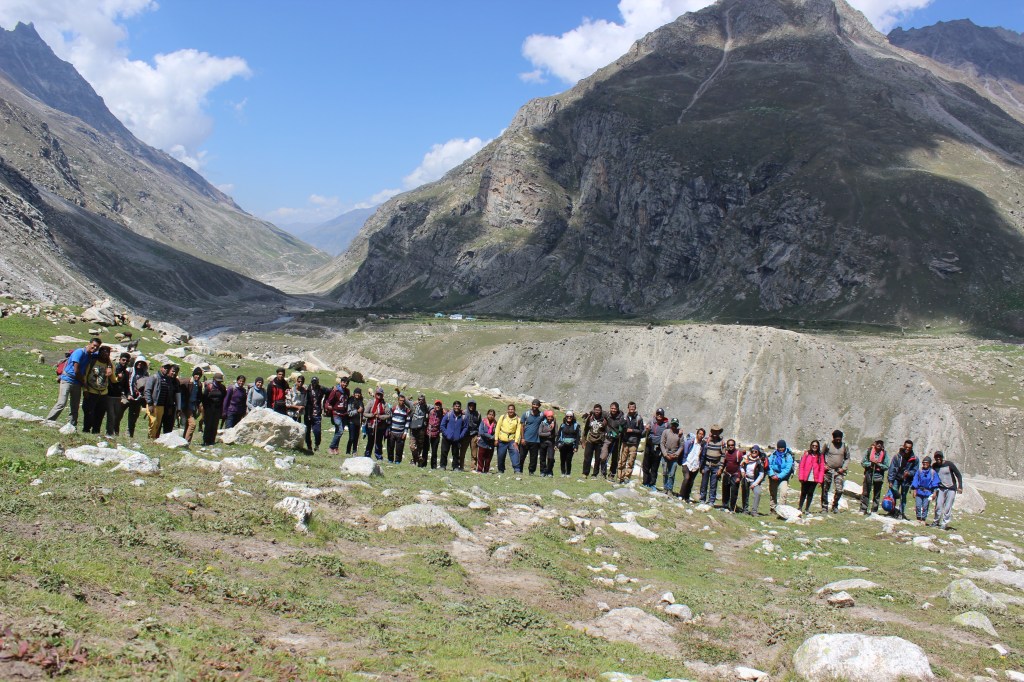
Every trek group took their group photo here after completing the Hampta pass trek with their happy faces. You can say it as a tradition. Pic shows the happy faces of the trekkers who achieved their goal and it motivates other trekkers to do treks and it motivates them that they also can complete the trek.

Crossing another stream

As you can see in the picture, we needed to cross this stream (2nd one) before trekking towards Chatru that too 8 in the morning. It was very chilled, some crossed barefoot, and some crossed with wearing slippers. As I didn’t had my slippers so I borrowed slippers from my fellow trekker then I crossed it. I will share the video at the end of this blog. We took around 15 to 20 minutes rest after crossing the stream to warm up our feet as it was frozen.

Towards Chatru (PC: NAVEEN BHARADWAJ)

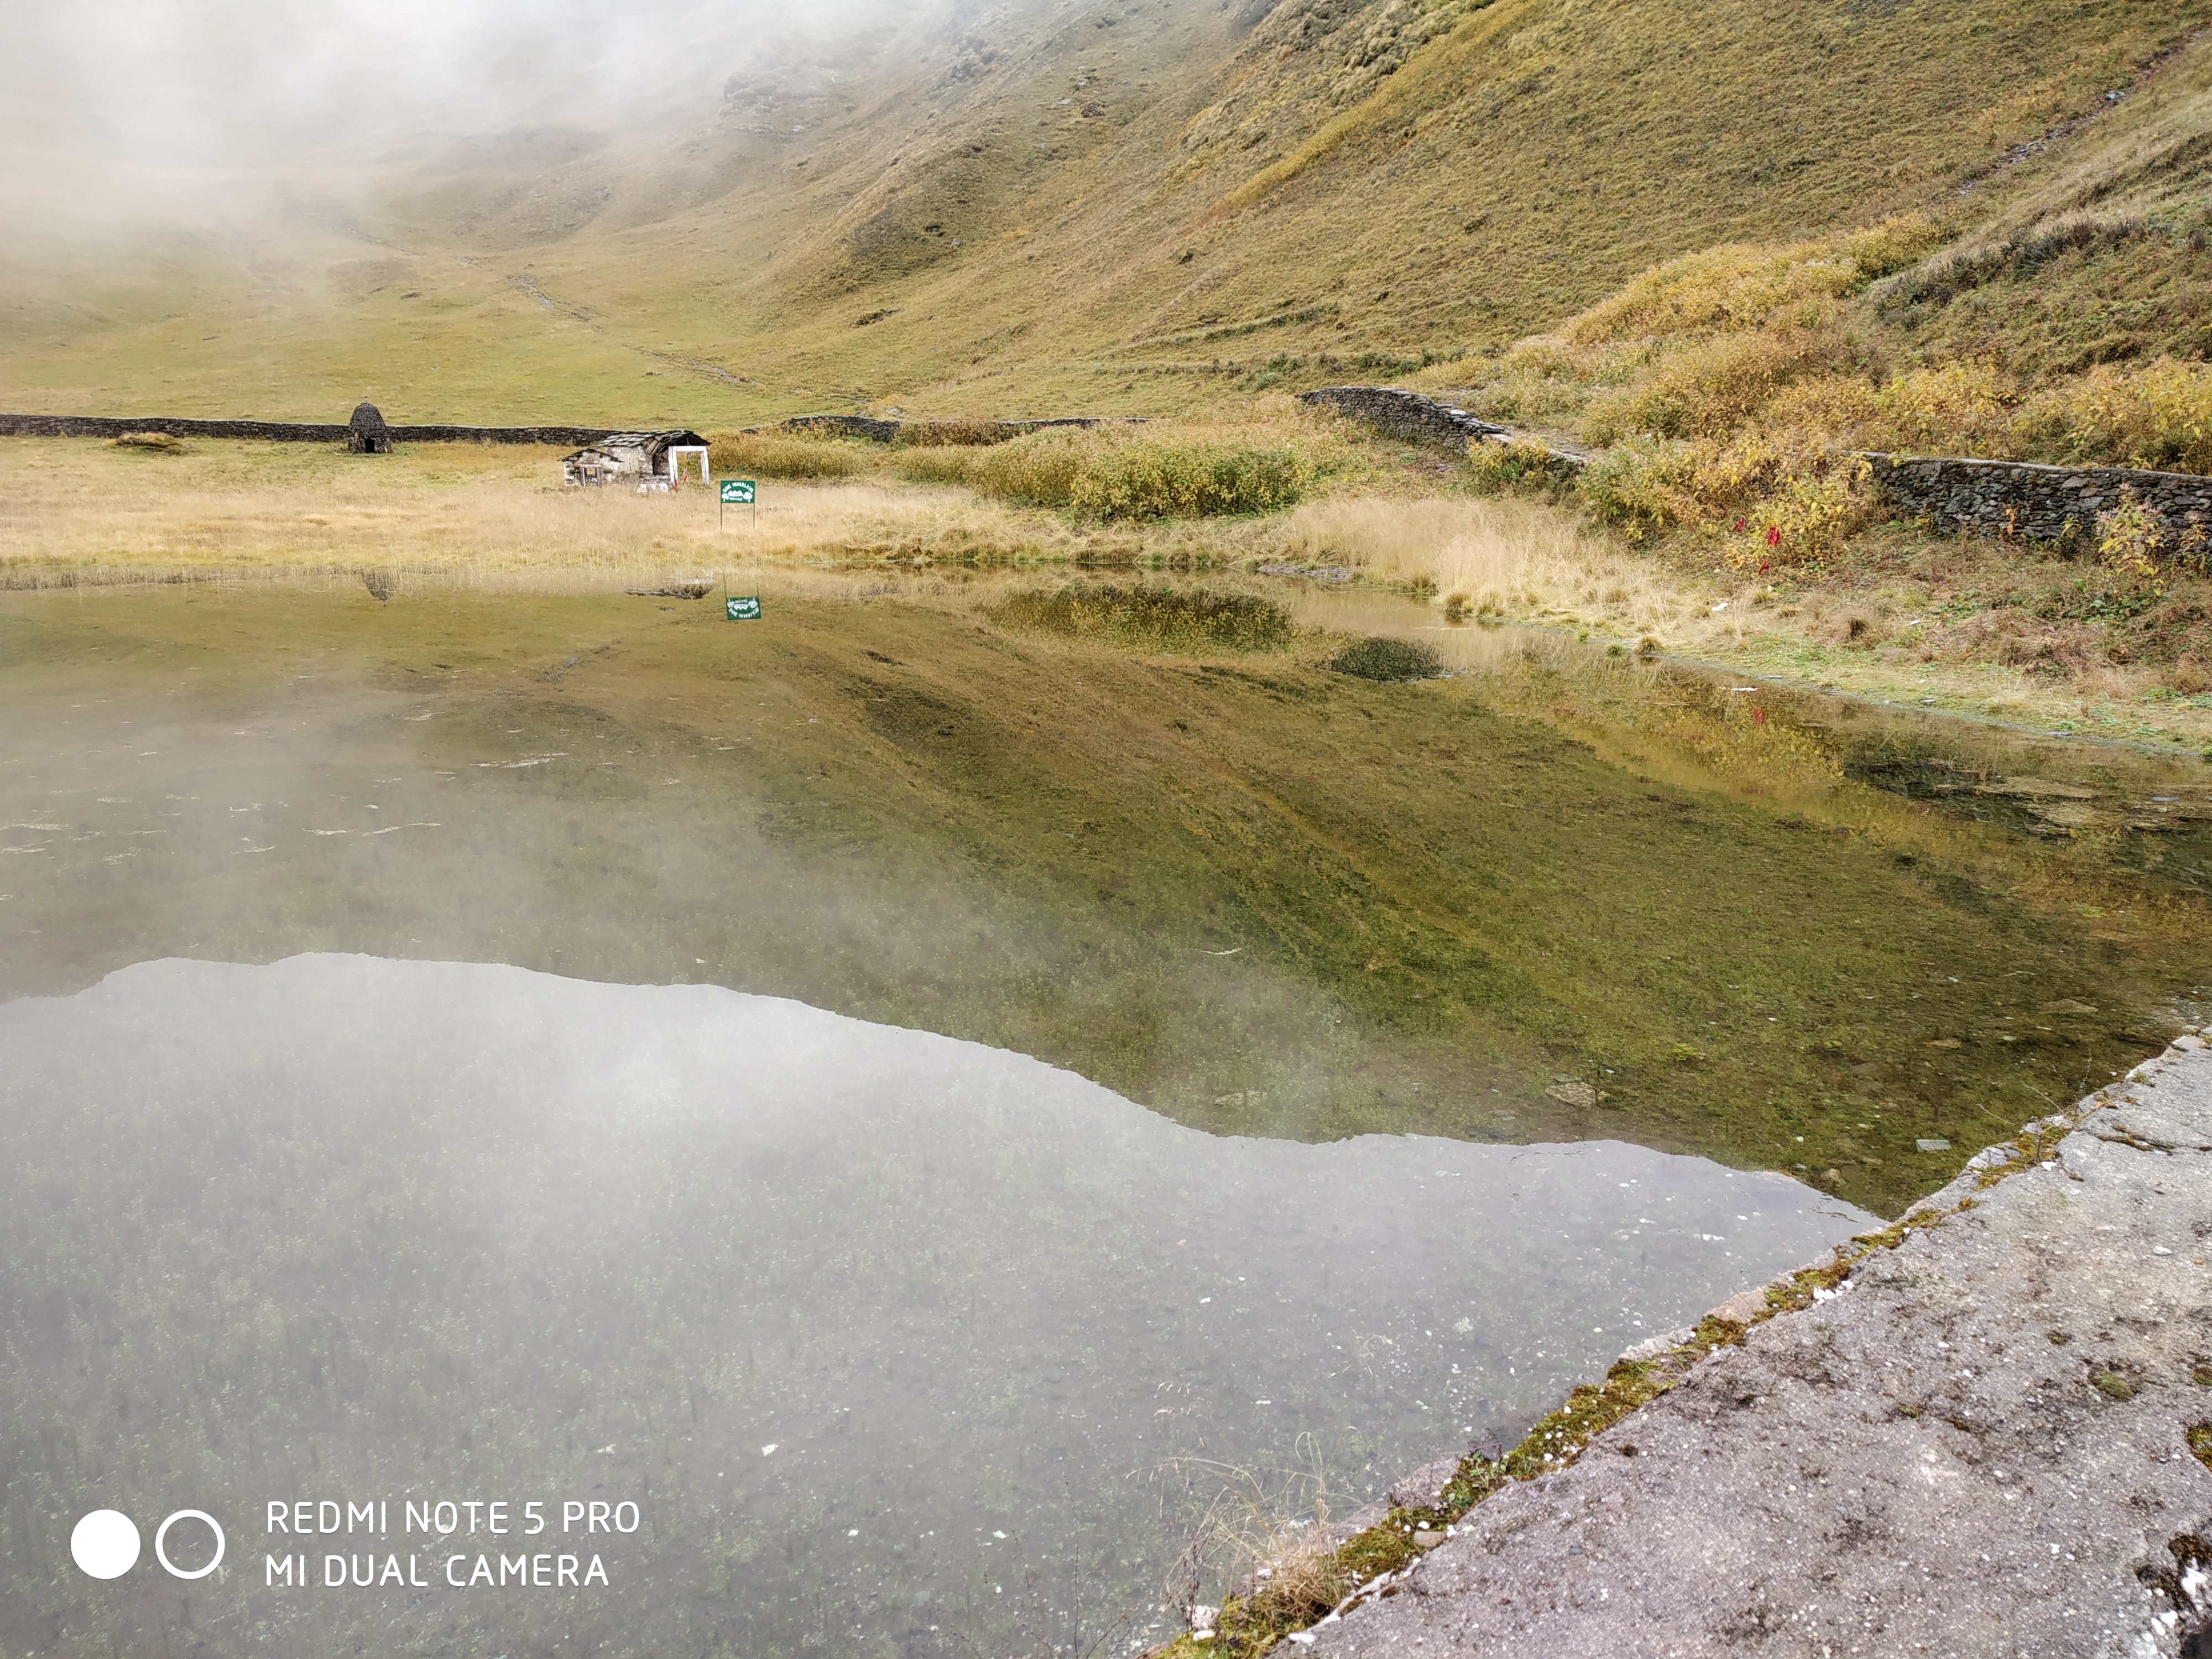
Today’s trek was easy with the flat and down trail. We reached chatru in the afternoon around at 1 p.m. where we had our lunch. We were near to the roads, sadly at that time YHAI not included Chandratal lake with Hampta pass trek, so I couldn’t able to see it. While researching about Hampta pass trek I got to know about Chandratal lake so I expected to go there but unfortunately, it was not included in the itinerary. But now YHAI has included Chandratal in their itinerary.

Took from the lunch point (PC: NAVEEN BHARADWAJ)

After having lunch we had our group photo and we went further where the bus was waiting for us to take back to the base camp.

Group pic before leaving (PC: NAVEEN BHARADWAJ)

I am standing somewhere in the middle with wearing a red cap, by the way, if you guys want to know 😜

The bus that took us back to the base camp (PC: NAVEEN BHARADWAJ)

We were around 50 to 60 trekkers in one batch (I don’t remember it exactly) and while coming back in that bus it felt like it was a college trip. Every trekker from different states with different cultures becomes your family. As you need to trek as a team it teaches you teamwork and importance of people in your life. On the way back, it rained and we reached base camp in the evening. We had our dinner at around 8 pm followed by the certificate distribution. Some left for their further journey and some stayed there for the night. I stayed there and the next day morning after breakfast some people went for Naggar castle and me with some of my friends went for Mall road (Manali). In the evening I boarded the bus for Delhi from the base camp. My trip ends here.

Some videos of Hampta pass trek

Stream crossing towards Balu ka ghera
Another stream crossing towards Chatru (Shot by: NAVEEN BHARADWAJ)
At base camp (Shot by: Gunwant Kudia)
Towards Hampta pass (where I lost the trail for a few seconds)
At Hampta pass
Towards Chikka
Towards Hampta
Towards Chikka campsite
At Balu ka ghera campstie

Some important and useful links

  1. Some more blogs on Hampta pass trek
  2. Video info on Hampta pass trek
  3. Best time to do this trek
  4. What to take on High altitude trek
  5. How to pack your backpack

ROOPKUND – A TREK TO THE GLACIAL LAKE WITH MYSTYRIES SKELETONS

Roopkund, in the state of Uttarakhand in India, is a famous glacial lake. This lake is famous due to more than five hundred skeletons of humans that are found at the edge of the lake.There are reports that these skeletons belong to the 12th century to the 15th century. It is located at an altitude around 4800m above sea level. It is a moderate to difficult trek, so first timers don’t go for this trek.

This was my 3rd trek in total and first trek in uttrakhand and this was my first visit in uttrakhand beyond rishikesh. So I planned this trek in September 2018, I was very happy that YHAI (trekking organisation) started the famous Roopkund trek and I booked for September end batch but unfortunately that time high court banned camping in bugyals (one of the camp sites), so roopkund trek got cancelled and I was so sad and I didn’t do any other trek, I wanted to do only roopkund, so I waited for this trek to reopen, time passed and still after 1 year, the ban didn’t removed, while searching in the website I got know about the local person called Mohan who operates the roopkund trek and had a website named “roopkund with mohan” , where I got his contact and called him, then I got to know that locals can operate on roopkund trek and without a second thought I booked for 28th September, 2019 batch. I was very happy that finally I will be going for the trek.

Day-1 – Drive from Dehradun to wan

I reached Dehradun isbt from Delhi at 6 am, mohan arranged a shared jeep for me which cost me Rs700 one side, jeep driver picked me at 6:30 am from isbt Dehradun. Many shared jeeps are available at Dehradun isbt. The travel was beautiful but tiring and as usual i got sick , i was vomiting for the whole journey, i didn’t ate anything, surving on ors (medicine), when you can’t eat anything and frequently vomiting, then this medicine is best.

At lunch point

On the way it rained all afternoon, it was weird to see this much rain in the post monsoon season. Finally after reaching lohajung my health got better and i met mohan here and we together went towards wan village (final destination).

At lohajung waiting for the cab

It was around 8:30 pm when i reached wan. It took 14hrs approx to reach wan. After reaching here i got know that i am the only trekker who will go for roopkund and not mohan but other guide will accompany me for the whole trek. After dinner I met the guide and had a chat about the itinerary and other details, then I slept in the guest house.

Day-2 – Trek to Ghairoli patal (1st camp site)

At wan, from where you would start your trek.This was my first solo trek, I was the only person to trek with the guide. At first I was sad that I will be alone, it won’t be fun at all, but later I realised that trekking solo is another experience and it increased my mental strength. After having breakfast we went towards the first camp.

On the way to first camp site

Due to the rain we started our trek at 10 am, after 1 hr, we reached our first rest point where we drank tea with parle-g biscuits and got some rest. It was steep climb till the rest point.

‘At rest point

After resting, we went towards Ghairoli,

As you can see in the above picture right in front of you, we needed to go to that mountain somewhere above the middle, 1st half an hour was downhill and after crossing the river, there was steep climb till Ghairoli.

While crossing river

It took us around 3 hrs to reach Ghairoli (our 1st camp site) from the river. We reached here at around 2:30 pm. Weather was not good, it was raining heavily, i met other trekker, he was with some other local guide for the trek, we stayed in a hut.

Hut at Gharoli (1st camp site)

We had our dinner in the kitchen and then slept at around 7:30 pm

Kitchen

Day 3 – One more day at Ghairoli

I woke up at 5:00 am, weather was still not good, it was still raining, in september this was weird, it was raining for 24 hrs for the past 2 days, we waited for the weather to clear but it didn’t.

‘At camp site’

Even my guide also said that it’s weird to see this much rain in the month of september. We waited till 9:30 am, still weather was not good for trekking, my guide refused to go further due to bad weather as it was not safe but fellow trekker wanted to go further despite the bad weather, he and his guide went further in that bad weather. I stayed there itself, praying weather to be cleared by next day.

Day-4 – Trek to Bhagwabhasa camp site

Finally by God’s grace, weather got cleared and I was excited to go further, after having breakfast we packed our lunch and took gas and other kitchen stuff with us to make food as there is no kitchen facility is available after Ghairoli camp site. We started our trek towards next camp site.

‘After weather got cleared’

After spending 2 days at Ghairoli, I was eager to trek further, we decided to skip 2 campsites ( bedni and patar) and move till 4th campsite (bhagwabhasa). At bendi stay was not allowed even for locals and from patar it was quite difficult to climb roopkund, from patar to bhagwabhasa was 3km and from bhagwabhasa to roopkund another 3km. So we started our trek at 7:30 am. It was steep climb till bedni.We reached bedni at 8:30 am.

Way towards bedni

Sun was playing hide and seek with us, after trekking for 30mins we reached bendi view point.

At bedni view point

After the view point, tree line ended meadow was opening and bedni was more clear. No words to express the views. After reaching bedni it was flat trail till bedni lake.

At bedni

Even though it was not raining still weather was not good for views, fog was everywhere and only upto few distances view was visible. After walking for 10mins, we reached bedni lake.

Walking towards bedni lake

At bedni lake

After taking rest for few minutes at bedni lake, we went towards patar ( next campsite ).

On the way towards patar nachauni, we took rest at ‘Ghora notani’. Till ghora notani it was little uphill and flat , mostly flat trail. It was an easy walk.

“At ghora notani’

Due to so much of fog, only upto few distances are visible. After this till patar it was downhill and flat trail, an easy walk till patar.

Way to patar nachauni ( camp site)We reached patar around 3 hrs from bedni around at 11 30 a.m. Thankfully we reached patar at right time because rain started again. We ate our packed lunch with hot tea. It was really windy outside and with the rain it was worst and cold.

‘At patar camp site’

After taking rest for around 30 mins at patar, I met the other trekker with his guide who went further one day before, that is on day 2. He completed the roopkund and was back to ghairoli. He was not able to go till junargali ( approx 400metres above roopkund) due to the bad weather. Junargali is like dessert after a dish. Whoever does the Roopkund trek goes till junargali too. He attempted roopkund from patar. After spending some time we left patar and went towards next campsite Bhagwabhasa. Thankfully rain was stopped but still sun didn’t shown up.

Towards Bhagwabhasa

From patar to bhagwabhasa it was around 4km. It was steep climb around 3km till kalu vinayak and from there down hill around 1 km till bhagwabhasa camp site. After walking in flat trail for 5 min from pathar, climb for kalu vinayak started.

From where climb starts

As you can see the trail in the picture through which I reached the point where the climbing starts.

It was a little difficult to climb as I already exhausted as well as I was gaining altitude in a quick period. I already trekked 7 km.Ghairoli was at 10,000 ft. Above sea level and kalu vinayak at 14,200 ft. Above sea level. So gaining almost 4,200 ft at one day. Although it is not generally advisable, because of altitude sickness. It is advisable that above 9,000 ft. you can gain upto 1,600 ft. At once, if you are staying at above camp, your sleeping elevation should be less than 1,600ft in one day. I.e. difference between your previous camp’s altitude and your next higher camp’s altitude should be less than 1,600ft. Otherwise you will be at risk for getting high altitude sickness. It’s a sickness which occurs when you gain altitude at early and without proper acclimatisation. Unless until you are a extremely fit trekker don’t follow my itinerary. As you gain altitude air becomes thin and it’s become difficult to breath especially when you gain more altitude at less time, which in my case happened. I was uncomfortable, I felt shorten of breath and I had very minimum water. At one point my guide said if it’s not good then we can go back to patar but I refused, I said I can push.

With the help of my guide we went further, I was lucky that I got a good guide he encouraged me and motivated me for the whole trek. He said push till kalu vinayak, if you feel better then we move forward otherwise we will go back to patar. As you heard me in the video I asked him many times that are we reached kalu vinayak? Until I finally reached there. I can’t express my feelings in words that how I felt after reaching kalu vinayak. I was extremely happy that I made it till kalu vinayak.

At kalu vinayak (14,200 ft.)

We took some rest there and made pooja and prayed for better weather and completion of trek safely.

My health got better and we decided to move further. As we are about to go, once again rain drops started.

Towards bhagwabhasa (14,100 ft.)

From kalu vinayak to bhagwabhasa was easy, 1km downhill. We were literally running as rain was getting heavy. It took us around 2 hr 30 min to reach bhagwabhasa.

At bhagwabhasa ( 14,100ft.)

As you can see in the picture, view only upto few distance is visible, I can’t see further that. After reaching here, my guide went further 1 km down to fill the water for us.

After 2 or 3 hrs weather started clearing and finally we were able to see the sun. It was around 5:30 pm. Weather was beautiful, perfect weather you can say.

View from bhagwabhasa camp site

I marked a circle in the above picture, that’s roopkund. You can see it from bhagwabhasa camp site if weather is cleared. We explored the campsite until the sunset.

It was beautiful to see such amazing mountains and especially roopkund which you need to climb next day itself. I was mesmerized by the views.

In the video kali bhai ( my guide) who took me to roopkund from wan and back. He was amazing and always motivating and informative. Because of him I completed the roopkund trek without any difficulties.

Took an evening walk here, with this beautiful weather and amazing views. After enjoying here taking pictures and videos we went into the hut. We had dinner around 7 pm and slept in the sleeping bag.

While making dinner by my guide

At hut

While lying inside the sleeping bag, before sleeping I took the above picture of roopkund right in front of me. Lying inside the sleeping bag seeing this mountain right in front of you, it’s a different feeling which I can’t express in words here. The more I see this it boosted me that at any how I need to climb this and I will. I repeated these words inside my heart. As I already mentioned above about the sleeping elevation should be less than 1600 ft, but here my sleeping elevation was 4100 ft. Last night I slept at an elevation of 10,000 ft. At ghairoli and today at an elevation of 14,100ft at bhagwabhasa. I started to feel some altitude. While trying to sleep I had a mild headache and I started to listening sound in my ear, similar to the horse running sound, it felt weird. I experienced this first time in Himalayas. So I listened to songs for a while and fall asleep.

Day 5 – Trek to roopkund and back to Ghairoli.

This day was my longest in all. So we started our trek around 5 30 am. After having breakfast we left for roopkund. We left our bag in the hut itself. We took only a small bag carrying water, dry fruits, apple and bisuits etc. It was dark when we started our trek. Weather was thankfully good. I coudln’t take the picture as it was dark. We walked with our head lights on. It was around 3km to rookund.I had mild headache and little vomit sensation also due to altitude, i wanted to take medicine but my guide refused. He said it will be alright and if you take medicine then it will become difficult to climb, so i did not take medicines. After some time i felt better.

Way to roopkund

We needed to cross this slippery snow. on our way. First 2.5 km was moderate, it was little steep and flat with snow. It is advisable to wear sunglasses in a snow trail and in mountains with snow, if you see without sunglasses for a longer period then it will affect your eyes.

After walking 2.5kms we took a rest and ate apples and biscuits to regain our energy. Dry fruits are best to regain your energy. Last 500 metre stretch was difficult as it was around 60° steep and with a fresh snow, it was slippery too.

500 metres below roopkund

As you can see foot marks of my fellow trekker in the picture who climbed it yesterday.

From this point onwards till roopkund, my one hand was holded by my guide and my one hand was holding the trekking pole. I don’t had any crampons or gaiters. My guide said with gaiters and crampons on, it will be more slippery as it is a fresh snow. Nor we had any rope tied for support. So we climbed as quick as possible. It was thrilling. In my whole trek only climbing this 500 metres was thrilling with a risk too. Finally after climbing for around 40 min , we finally reached roopkund. We reached roopkund at around 8 am, it took us 2 and a half hours to reach here.

Finally the moment arrived, we finally reached roopkund. It felt amazing after reaching the top. Finally I did it and my dream came true. Views were worth it.

Roopkund lake

Skeletons

We stayed there for around 30 min. My guide did a ‘pooja’ there. We left roopkund around 8 30 A.M.

At Roopkund

In the above pic as you can see, I circled a top that’s junargali, it’s about 400ft above from roopkund, due to the bad weather and heavy snow we were not able to go there. If you trek till roopkund then you must do junargali. It’s worth it, unfortunately I couldn’t able to do it.

‘Doing pooja’

‘At Roopkund’

‘view from Roopkund’

So after spending some time at roopkund and after enjoying the mesmerizing views, we finally started descent. Going down is always difficult than going up. I climbed roopkund successfully, but now comes important part to reach safely down.

One with my guide

‘Towards Bhagwabhasa’

We reached bhagwabhasa as soon as possible. After reaching there we ate khichdi and then we packed our bags and left for ghairoli.

‘On the way down’

After reaching patar we took some rest and drank tea and we ate our lunch here. Weather was thankfully good and clearing. Finally I got to see sun after so many days. We reached patar around 1 30 pm.

At Patar

After resting there for around 30 mins we went further.

‘Towards Gharoli’

We walked faster, as the trail was mostly flat and down.

‘2.5km before bedni’

While descending we took different route as weather was clearing, we decided to go down via bedni top and ali bugyal. Both Bedni and ali bugyals are beautiful you can’t miss these beautiful meadows.

At Bedni

As you can see in the above pic one trail is straight which go towards Ali bugyal via Bedi top and and one towards Bedni lake and down towards our climbed route. We took the Ali bugyal route.

At Bedni top

View of Ali bugyal from Bedni top

Route for Ali bugyal

We didn’t go till Ali bugyal, we took a turn just before Ali bugyal for gharoli. There is another route to reach down via Ali bugyal. After crossing Ali bugyal a route go towards didina village. Some trekkers do roopkund from didina.

From where we took the turn

In the above pic, you can see Ali bugyal right in front of you, but this is only one side, if you reach the Ali bugyal top, then you can see the other side also. We took some rest here enjoying the weather,beautiful views around us and eating parle-g biscuits.

Finally got to see clear blue sky

As you heard in the video, we were going towards ghairoli via thitak village. As we went further these beautiful meadows started to vanish as we were going down and down we entered into a jungle.

After walking for around 2 hrs we reached thitak village. It was around 6 pm. We decided to stay here as it was getting dark. Thankfully guide knew the village peoples and they were agreed to take us in. Village people were very humble and they made their food with their home made ingredients. I got to eat tasty and healthy food.

At Thitak

In the above pic, these two are cute couples, they live in thitak taking care of their cows. Their childrens live in wan. She made tasty food. They were very good. If you trek to roopkund then you can stay here at a reasonable price. After having dinner we slept at around 9 pm.

Day-6 – Towards Wan village ( last day of trek)

After a long and good sleep, we woke up at around 8 a.m. After having breakfast, we left thitak at around 9 am.

At Thitak village

‘At Thitak’

We reached wan guest house after visiting some temples in wan around 4 pm in the evening. I met Mohan and shared my beautiful experience. At night we ate together and gone too sleep. Next day morning at around 5 30 am, Mohan came, he dropped me in lohajung in his bike. I boarded a shared jeep to rishikesh and then to delhi. My journey ends here.

At guest house

From guest house

I am sharing some links here regarding the roopkund trek. Please do visit once for further details. Trek cost me around 10k Rs from Delhi to Delhi (excluding personal expenses). Dehradun to wan and back will cost you 1400 Rs in shared jeeps. You can also take private taxi. I am open to suggestions. Please give your valuable views in comments or you can mail me. I will mention my mail id below.

Links

1) MOHAN’S (TREK ORGANISER IN WAN) WEBSITE

2) Details about AMS ( ACUTE MOUNTAIN SICKNESS)

3) More blogs about Roopkund

4) Fitness guide for treks

5) Best season to visit

Mail id – karthikrk01@gmail.com

Kali bhai (guide in wan and nepal)

His contact – 70371 30867

Laxman for shared jeeps booking- 9997348834

Design a site like this with WordPress.com
Get started